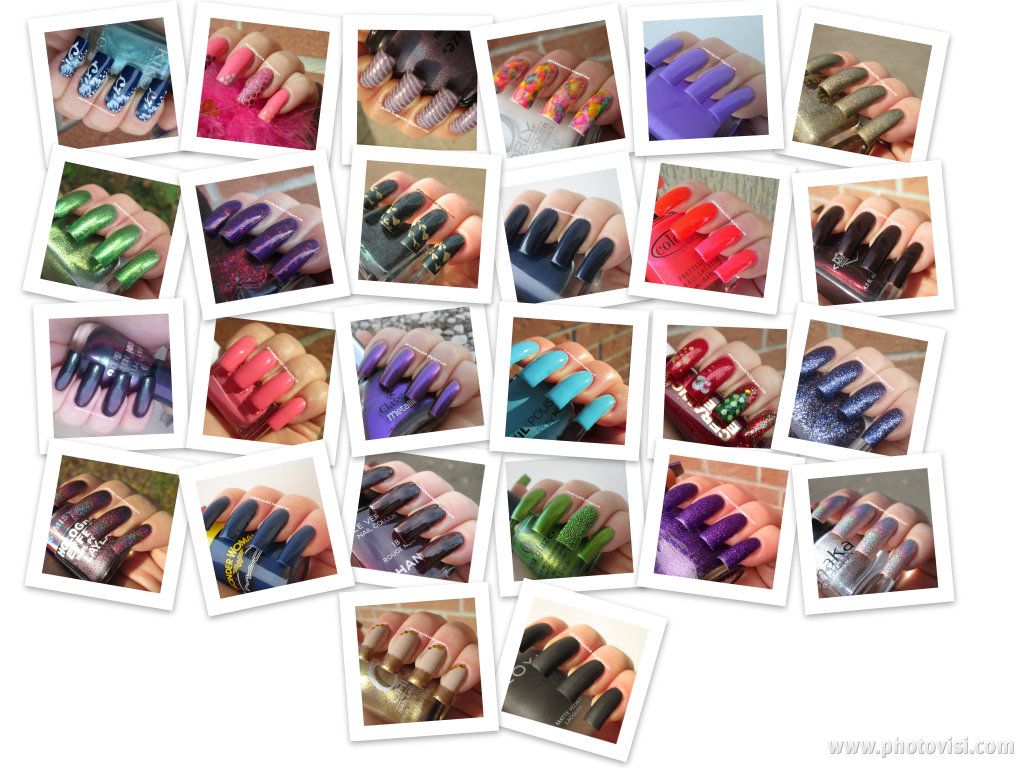
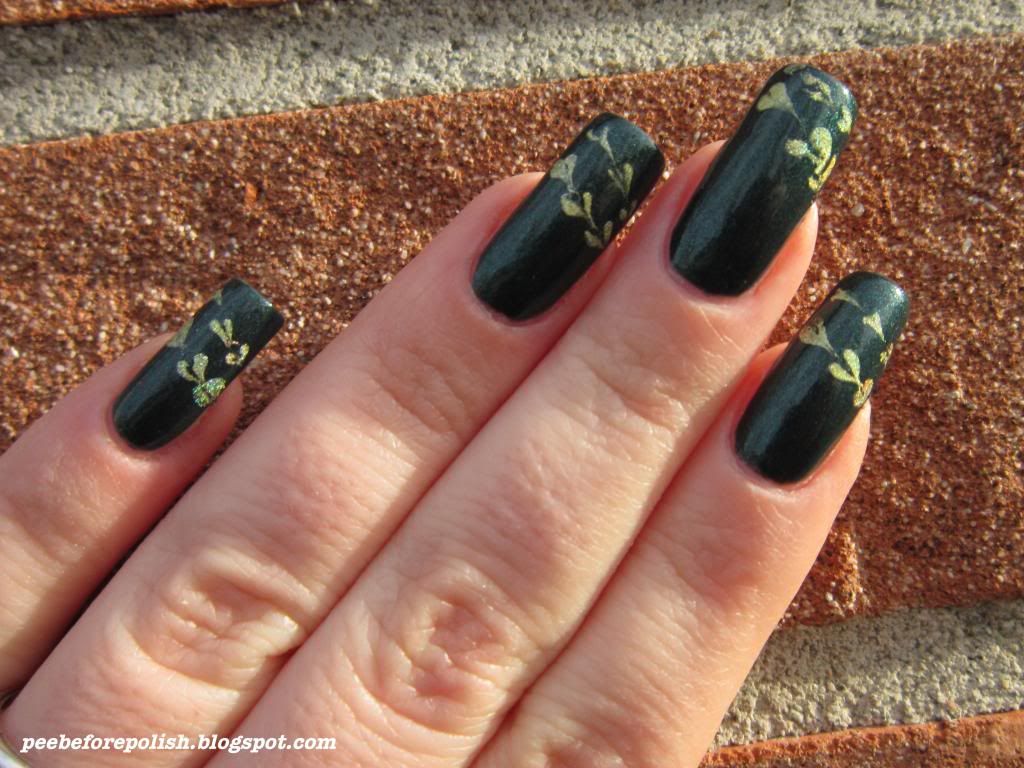
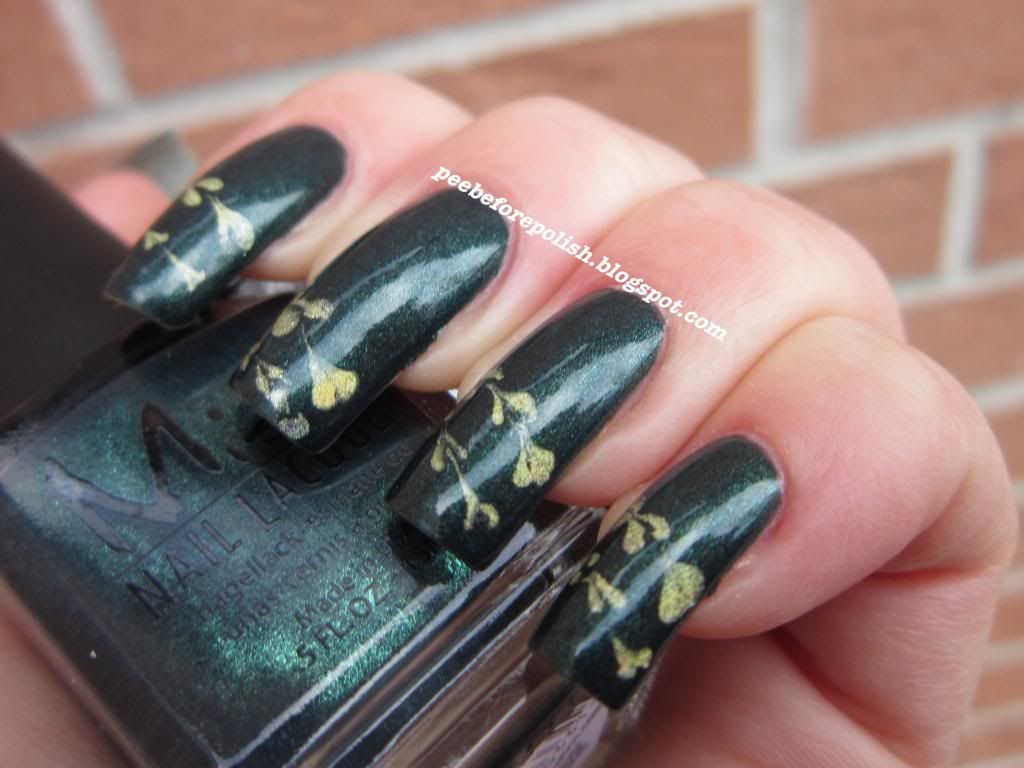
La ABC Challenge è terminata, ma non temete: abbiamo in serbo per voi, che avete avuto la buona volontà e la voglia di seguirci, tanti altri progetti!
Ho deciso di infarcire questo post di "farewell" con un po' di statistiche. Pronte?
Durante la Challenge vi ho mostrato 20 smalti singoli appartenenti a 20 brand diversi e 8 nail art.
Dei marchi mostrati, quattro sono italiani, sei europei e ben dieci di paesi extra UE.
Riguardo al mio colore predominante, svettano su tutti il viola e il verde con cinque entries cadauno; a ruota il blu od azzurro (4), il rosa (3), il rosso scuro/marrone (2) e il nero (1).
Per quanto riguarda il finish: vince il creme (5 smalti), seguito da olografico e shimmer (3 a testa), due duochrome e due neon, mentre a foil, flakies e matte è toccato un prodotto a testa.
Se volete vedere una carrellata dei miei protagonisti potete andare sull'etichetta ABC Challenge 2012.
Vi lascio con un collage del mio percorso e vi dò appuntamento a prestissimo!
ABC Challenge is over, but as I already wrote a couple of times, we have many other projects that will start soon.
Just to say "farewell" to my first polished marathon, I have a few stats and a nice collage for you.
During the Challenge I showed 20 individual polishes of 20 different brands. Moreover I made 8 nail arts.
Four polishes were by Italian brands, six of them were by European brands and ten of them were by extra UE brands.
Green and purple were my fav colors for this marathon (5 entries each), four posts featured a blue or light blue polish, three polishes were pink, two red/brown and only one polish was black.
About the finish: creme was the most popular, holographic and shimmer followed with three entries each, then duochrome and neon (two posts each) and then matte, flakies and foil (one polish each).
If you want to see all the protagonists you can click on the label ABC Challenge 2012.
Here above there's a collage of my fav pics. That's all I have for you today, have a nice evening and see you soon!
Visualizzazione post con etichetta ABC Challenge 2012. Mostra tutti i post
Visualizzazione post con etichetta ABC Challenge 2012. Mostra tutti i post
venerdì 28 dicembre 2012
giovedì 27 dicembre 2012
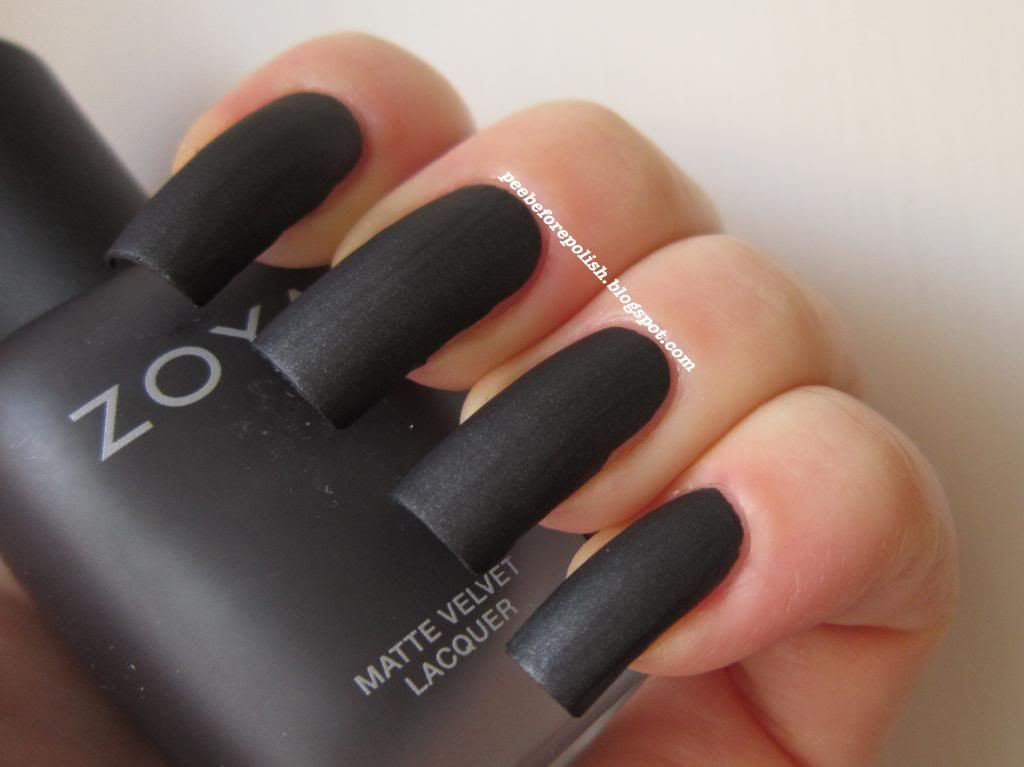
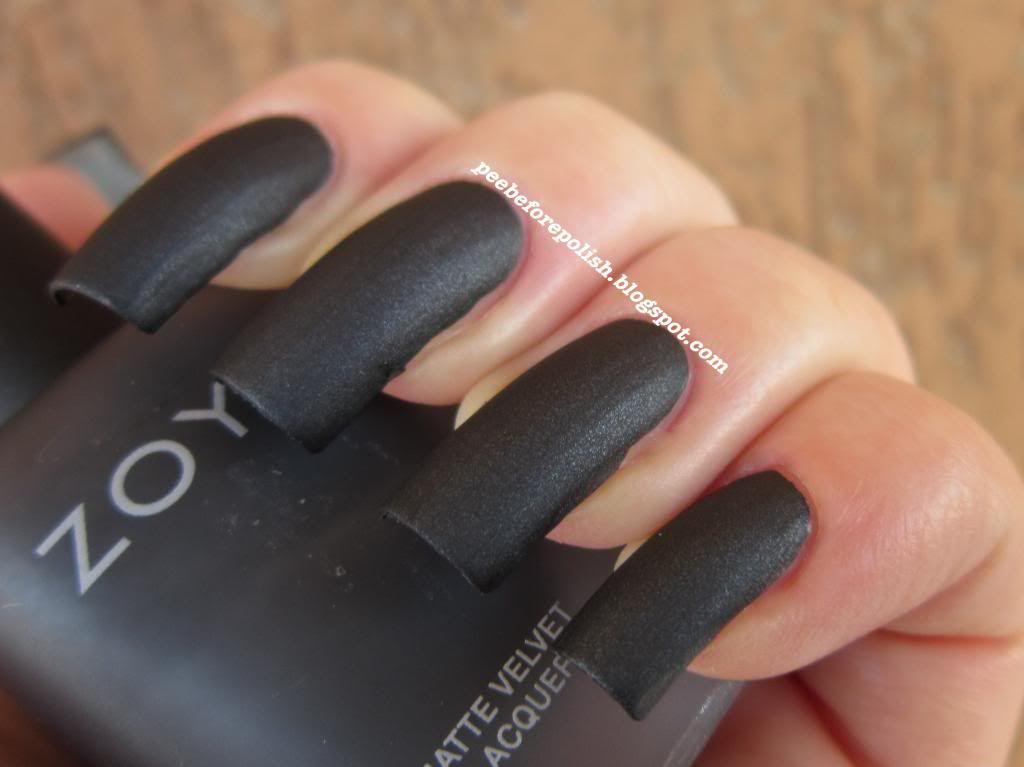
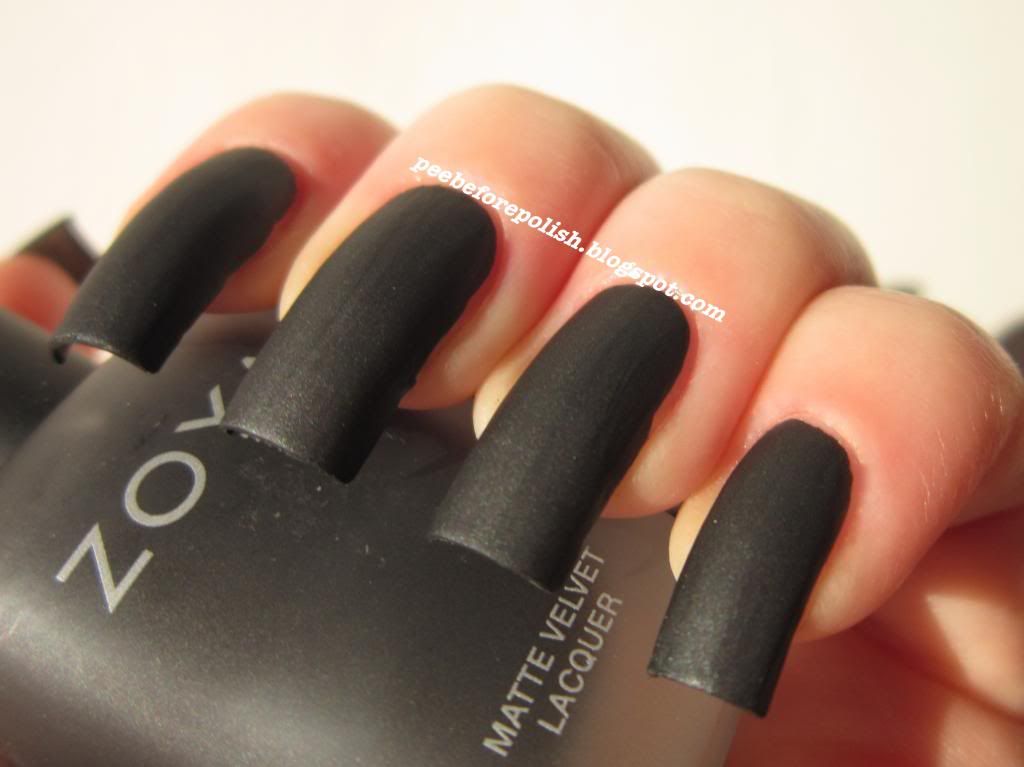
ABC Challenge - The final post: Z for Zoya Dovima
Ed eccoci qua: siamo arrivate al post finale della nostra Challenge.
Per la Z ero da tempo orientata su uno smalto Zoya, in particolare su un matte; sono stata indecisa fino all'ultimo tra il Posh e il Dovima, per poi scegliere quest'ultimo per uscire un po' dal seminato degli smalti rossi, che avrete visto in tutte le salse in questo periodo.
Comunque: Dovima proviene dalla collezione MatteVelvet del 2009, anno in cui i matte hanno conosciuto il loro massimo picco di gloria. Si tratta di un bel nero matte shimmer (o suede se preferite) coprente quasi con una sola passata, dalla formula densa e corposa.
L'applicazione non è agevolissima, dovete fare davvero attenzione anche perché questi smalti si asciugano davvero alla velocità della luce e ripassare una volta in più o tentennare potrebbe costarvi un pastrocchio.
La durata non è delle migliori, non sono mai riuscita a portare nessuno di questi smalti oltre il terzo giorno, e non c'è base gommosa, top coat o trucchetto del sandwich che tenga.
Se da un lato devo ammettere che oggigiorno esistono dei top coat effetto matte davvero efficaci, devo anche dire che questi Zoya MatteVelvet hanno un finish che nessun topper riesce ad imitare.
Insomma la premiata ditta Dovima - Posh (rosso) - Savita (viola) - Veruschka (verde) è sempre nel mio cuore e non mi pento affatto dell'acquisto.
Bene, il sipario si chiude sulla ABC Challenge. E' stata una bellissima avventura e sicuramente riproporremo qualcosa sulla stessa falsariga per cui... Asciugatevi le lacrime, torneremo presto!
Un bacio a tutte, lettrici, osservatrici, partecipanti occasionali od ospiti fisse, se questa Challenge ha avuto successo è stato merito di tutte. Ci facciamo un applauso?!? A presto!
Hi ladies,
and welcome back to ABC Challenge! This is the final post, sigh sob.
Since the beginning of the Challenge I picked Zoya for the last letter. But I wasn't sure about the shade... I wanted a matte and I didn't know which one to choose between Posh (an intense red) and Dovima.
In the end I wore Dovima because I didn't want to show another red polish during the festive period.
Anyway: Dovima (from MatteVelvet Collection for Winter 2009-2010) is an intense black with a matte shimmer (or suede, if you prefer) finish.
Its pigmentation is really high, it could be a one coater, and its formula is quite thick. Since this polish also dries lightning fast, you have to be very careful and fast during application.
Longevity is not the best ever, I tried to use a rubberized base coat or even using the sandwich method, but this polish chips after three days.
We all know that actually there are lots of matte top coats available and they can transform any polish in a matte. But I think that Zoya mattes (or suedes) have a kind of effect that it's impossible to obtain with a matte topper. For this reason I am very happy with the four mattes I own (Dovima, Posh, Veruschka and Savita).
Well, this is the end of ABC Challenge. It was a long but beautiful marathon and I'm sorry that it's over. We are already planning other challenges so stay tuned!
Thank you for reading and watching this and the past posts, hope you enjoyed every single of them and... See you soon!
| Applicazione / Application |
3/5
|
| Asciugatura / Drying time |
5/5
|
| Coprenza / Pigmentation |
5/5
|
| Durata / Longevity |
3/5
|
| GIUDIZIO FINALE / OVERALL |
4/5
|
Etichette:
ABC Challenge 2012,
Black,
Matte,
Zoya
lunedì 24 dicembre 2012
ABC Challenge: Y for Color Club Youthquake [and Merry Xmas!]
Cosa c'è di più deviante di pubblicare, la vigilia di Natale, uno smalto NEON?
Quindi ecco la mia proposta per un Natale smaltifero alternativo: Color Club Youthquake.
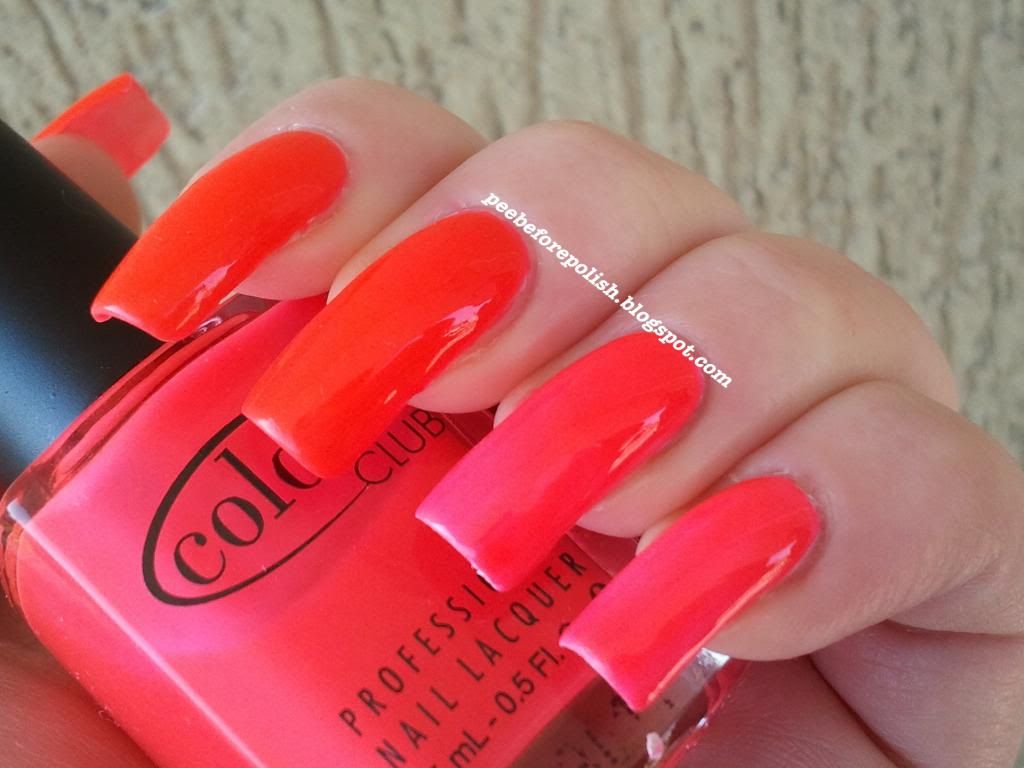
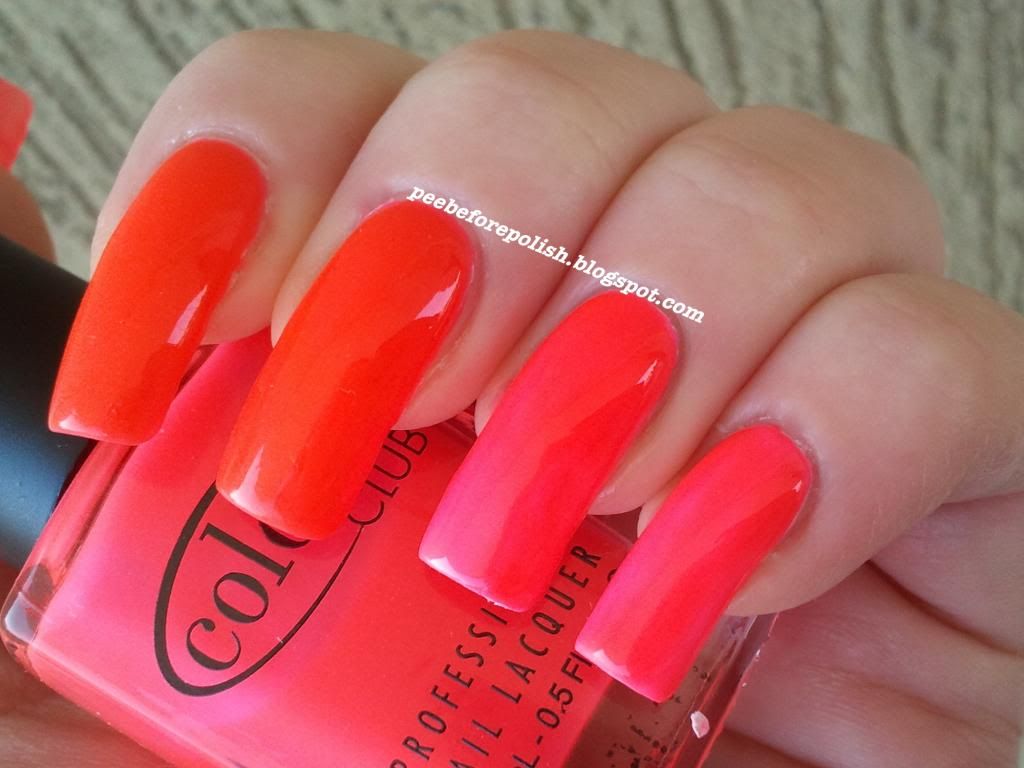
Uno smalto molto particolare, in realtà: in boccetta è rosa neon. Ma se lo andate ad applicare da solo, apparirà come un arancio-corallo. E faticherete non poco, perché messo da solo ci vogliono quattro mani per avere la coprenza (che non sarà neppure perfetta).
Se layerizzato sopra un bianco, invece, vi si mostrerà in tutto il suo splendore di rosa evidenziatore (tié, beccateve pure la rima).
Nelle mie foto, su indice e medio ci sono quattro mani di Youthquake solo soletto, su anulare e mignolo ci sono due passate sopra una mano di Orly Dayglow. Per fortuna la formula è fantastica, si applica con semplicità estrema, così il lavoro extra non sarà eccessivamente gravoso. L'asciugatura non è rapidissima, complici le numerose mani da stendere, e la durata è molto buona.
Scappo letteralmente, ho fatto tardissimo e devo prepararmi per il cenone della Vigilia, e ne approfitto per augurare a tutte voi un FAVOLOSO NATALE! Abbraccio voi e le vostre famiglie e... A presto!
This is an "alternative" post. You know, it's quite odd to wear a neon polish during the winter.
It's even odder to show a neon polish on Christmas Eve. Anyway, this was my pick for letter Y: Color Club Youthquake.
It's a very particular color: in the bottle it looks like a neon pink. But if you wear it alone, it will look like a neon orange-coral. If you apply it over a white base, it will appear like a neon pink. Quite strange, don't you think?
You can see this difference on my nails: on the index and on the middle there are four (yes, FOUR) coats of Youthquake. On the ring and on the pinkie there are two coats of Youthquake over one coat of Orly Dayglow.
Its formula is great, which is a good thing, considering that you have to do many coats of this polish. Drying time is a bit longer than usual and longevity is quite good.
Well, that's all I have for you today, I have to hurry up because I'm late for my Christmas Eve dinner. But before to go, I want to wish to all of you a great Christmas. Best wishes and many hugs from Italy!
| Applicazione / Application |
5/5
|
| Asciugatura / Drying time |
3.5/5
|
| Coprenza / Pigmentation |
2/5
|
| Durata / Longevity |
5/5
|
| GIUDIZIO FINALE / OVERALL |
3.75/5
|
Etichette:
ABC Challenge 2012,
Color Club,
Neon,
Pink
giovedì 20 dicembre 2012
ABC Challenge: X for Xmas Nail Art
Buonasera signore e signorine!
Oggi è il turno della X, ed era prevedibile che vi avremmo "ingolfate" di manicure natalizie. Meno male che siamo nel periodo giusto dell'anno, altrimenti non so proprio cosa mi sarei dovuta inventare...!
Comunque: X per Xmas Nail Art.
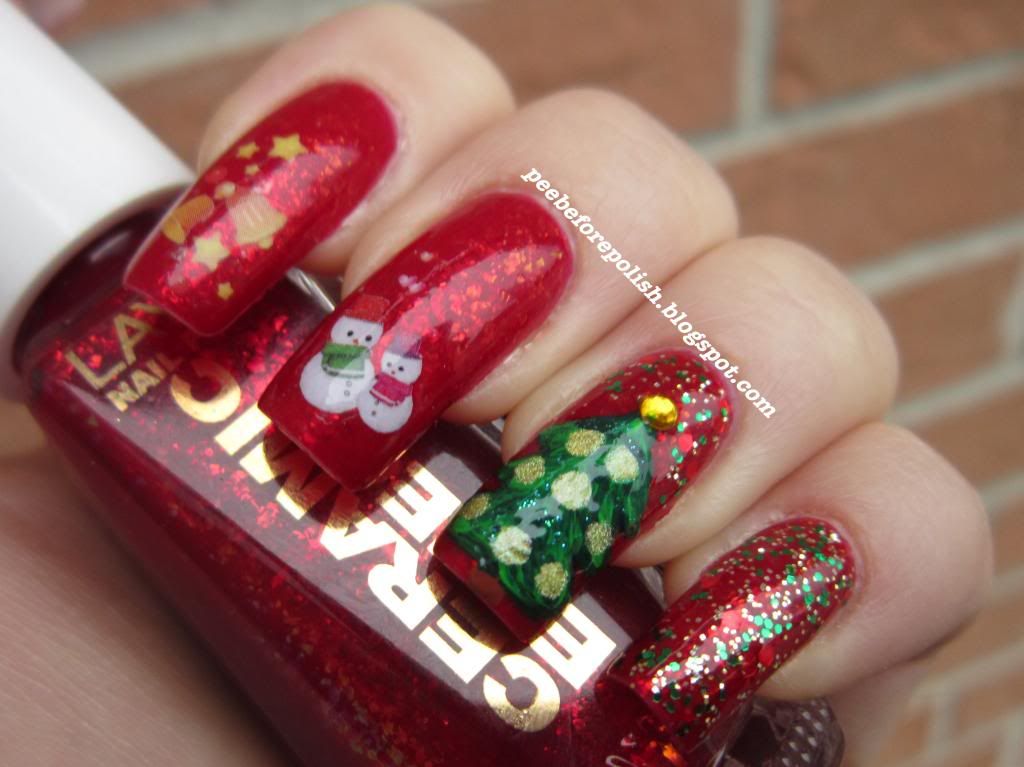
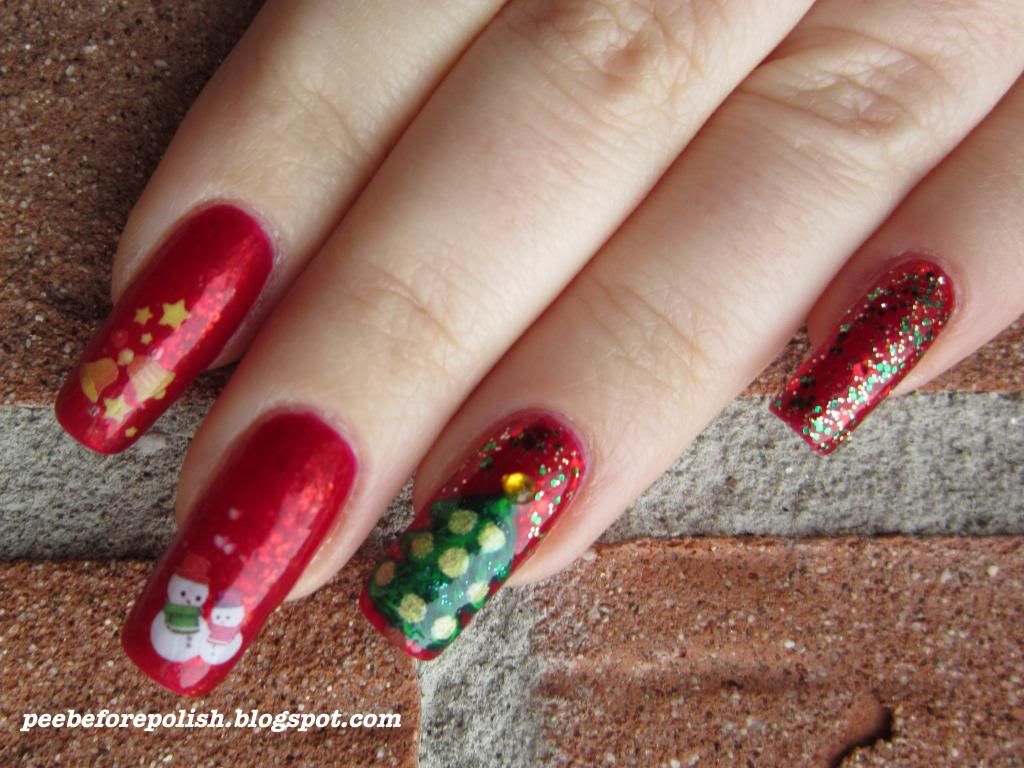
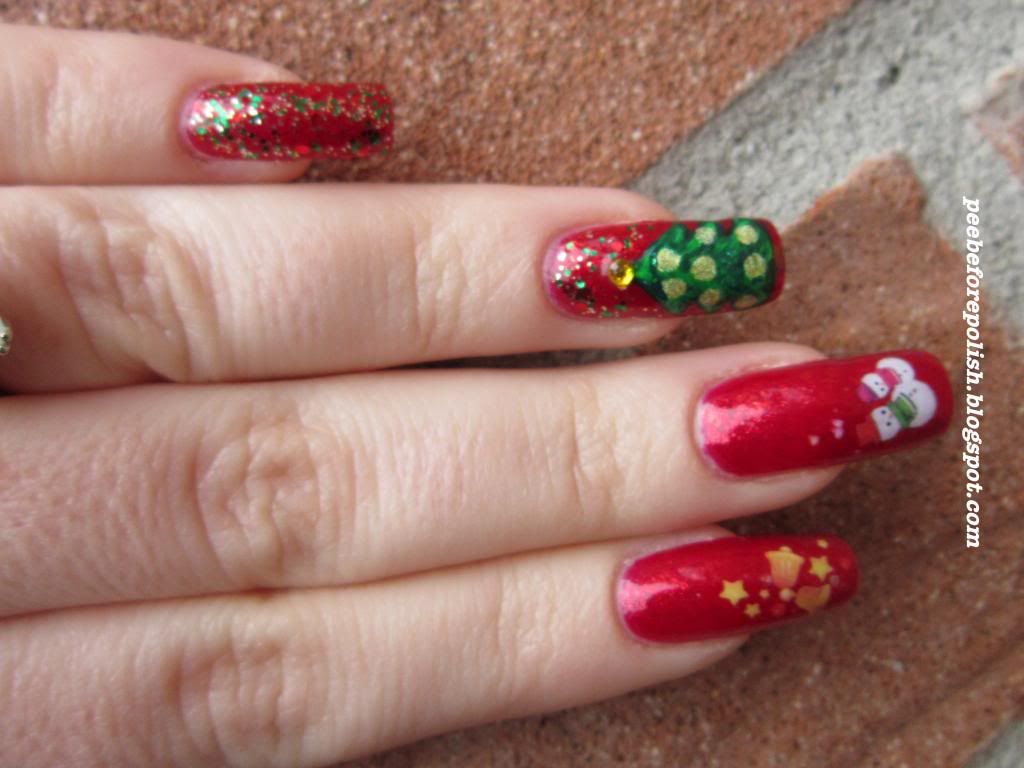
Tutto è cominciato con due mani di Layla Ceramic Effect #53 Killing Red. Sull'anulare ho disegnato a mano un giocoso alberello di Natale coi colori acrilici. L'ho addobbato con uno strass dorato in punta e qualche pallina (realizzata col Layla Gold Idol) e con un tocco glitteroso grazie allo striper Teal Glitter di LA Colors.
Ma perché lasciare spazi vuoti? E allora via col China Glaze Party Hearty, che ho applicato anche sull'intera unghia del mignolo (due passate). Il Party Heart è un tripudio di glitter rossi e verdi, di dimensioni diverse, in base trasparente.
Sull'indice e sul medio ho invece applicato due graziose water decals a tema di Viva La Nails.
Vi anticipo che questa sarà la mia ultima nail art della Challenge, cui devo davvero molto perché mi ha stimolata a sperimentare e realizzare quei meravigliosi lavori che avevo sempre ammirato, ma in cui non avevo mai avuto il coraggio di cimentarmi.
E anche per oggi è tutto, spero che vi piaccia, un abbraccio ed a presto!
Hi ladiessssss!
Today's post is about letter X, and as you could easily imagine a lot of us chose a Xmas Nail Art for this letter. Including me! Luckily we're in the right period of the year!
So, X is for Xmas Nail Art.
I started applying two coats of Layla Ceramic Effect #53 Killing Red.
On my ring finger I freehanded a Xmas Tree, using acrylic colours. Then I decorated it with a little rhinestone and I used a dotter (and Layla Gold Idol) to draw a few ornaments. In the end, I added a little touch of glitter with Teal Glitter, a striper by LA Colors.
On the empty space I applied China Glaze Party Hearty, which I also used for a funny layering on my pinkie (two coats). Party Hearty is a blaze of green and red glitters of different shapes in a clear base.
In the end, I applied two nice water decals by Viva La Nails on my index and on my middle.
This was my last nail art for the Challenge, and I have to say that I'm really happy about this marathon because I did a lot of nail art that I'd never realized without the Challenge!
That's all I have for you today, see you soon and have a nice evening!
Etichette:
ABC Challenge 2012,
China Glaze,
Decals and stickers,
Glitter,
Gold,
Green,
Layla,
Nail art,
Red,
Viva La Nails
lunedì 17 dicembre 2012
ABC Challenge: W for Watercolor Nails
-4. Ebbene sì, siam quasi giunte alla fine della nostra maratona. Tristi? Felici? Francamente ve ne infischiate?
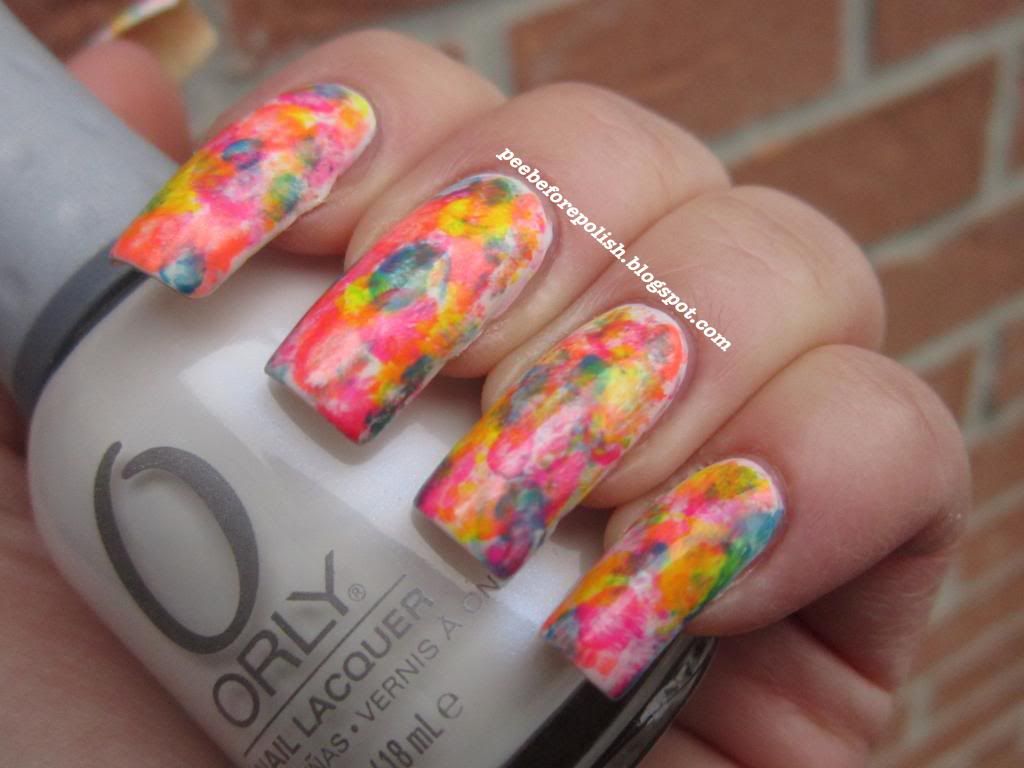
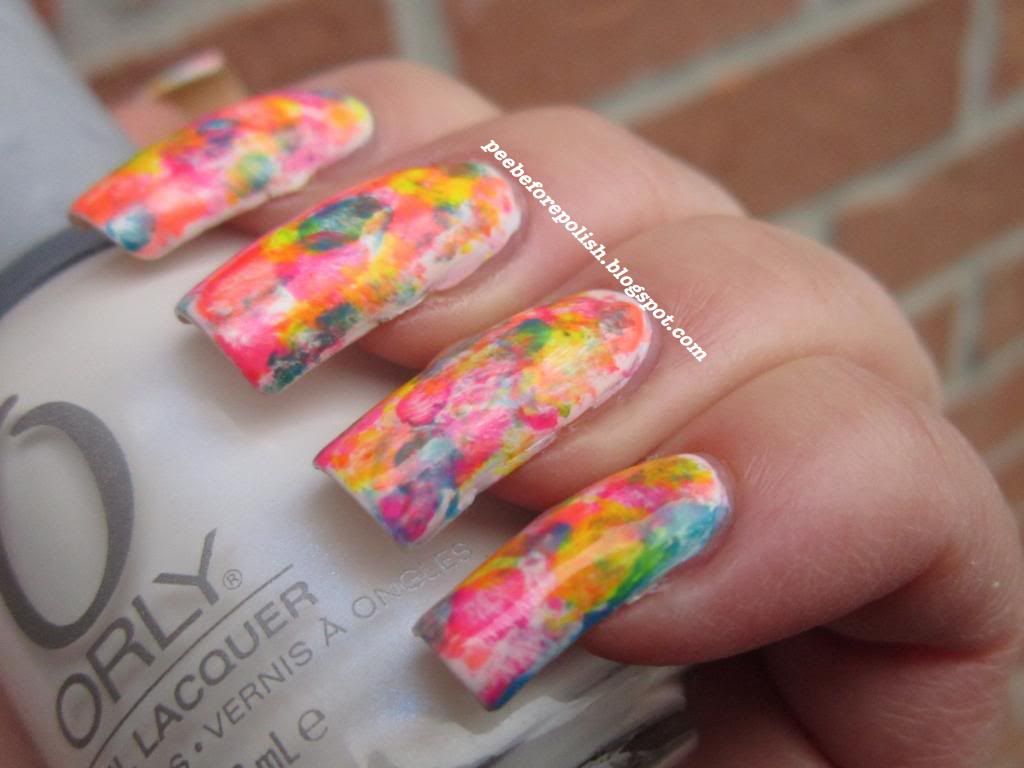
Qualunque sia la vostra risposta, oggi vi cuccate la nostra W, che io ho deciso di destinare ad una nail art. Ma perché fare una rodata water marble? Meglio sperimentare, no? Per cui, eccovi la mia prima Watercolor Nail Art.
Per realizzarla è necessario quello che, normalmente, è il nemico numero uno dello smalto: ovvero, l'acetone.
Ho iniziato stendendo due mani di Orly Dayglow; ho poi applicato un top coat, cosa che reputo importantissima: sulle unghie finte avevo fatto delle prove senza ed il risultato è che viene fuori un paciugo pazzesco. Il top coat, invece, costituisce un ulteriore film protettivo della base bianca che deve rimanere inalterata, perché tutto il marasma "impressionista" deve avvenire sopra ad essa.
Dopodiché ho ho iniziato ad applicare il primo colore scelto per il decoro: applicate due o tre piccole goccine di ogni smalto, e poi picchiettatelo su tutta l'unghia, creando il decoro a voi più confacente, con un pennello intinto nell'acetone. Questo processo va ripetuto con ogni smalto prescelto, avendo cura di pulire bene il pennello in particolare quando si cambia "drasticamente" tonalità.
Io ho seguito quest'ordine: Color Club Youthquake (fuchsia neon), Tangerine Scream (arancio neon), Orly Glowstick (giallo neon) e Catrice Blue Cara Ciao (azzurro intenso).
I consigli che vi posso dare, oltre a quello di proteggere la base bianca con un top coat, sono questi: scegliete l'acetone puro - il solvente contiene aromi e fragranze che possono interferire, inoltre l'acetone lavora più in fretta; utilizzate un pennello con setole morbide e punta stondata, orientandovi tra quelli di dimensione compresa tra il 4 e il 6 (a seconda della dimensione della vostra unghia); lasciate per ultimo il colore che più si differenzia dagli altri a livello cromatico, in questo caso il blu; usate smalti pigmentati, giocoforza sbiadiranno molto a contatto con l'acetone.
Spero che questo mio esperimento vi sia piaciuto, ditemi se vi può interessare un video tutorial (no, non fatelo, vi prego!) e non scordatevi di controllare le entries delle altre puelle!
-4. Our marathon is going to end soon. Are you sad for this? Are you happy? Or maybe you don't care at all...!
Well, today I show you my letter W, and I picked another nail art. You probably remember that I love water marbles, I think I'm quite good with that technique, but I wanted to change and experiment another kind of nail art: watercolor nails.
The "secret" ingredient of this nail art is acetone, which is usually the #1 enemy of nail polish.
I started painting my nails with two coats of Orly Dayglow and applying a top coat over it; I think this is a very important step: before realizing this nail art on my nails, I did a couple of tests on fake nails without applying a top coat and the result was very messy. The top coat will protect your base and you will be able to create your "impressionist" effect only on the surface of your nails.
Then I applied three tiny drops of the first polish I picked for the design and I dipped my brush in the acetone, and then start spreading the blobs of color. I did the same with all the other colors I chose.
Pay attention to clean your brush when you change color.
In this case, I applied the nail polishes in this order: Color Club Youthquake (neon fuchsia), Tangerine Scream (neon orange), Orly Glowstick (neon yellow) and Catrice Blue Cara Ciao (intense blue).
Just a few tips: use pure acetone, and not a nail polish remover - this can contain parfums or other ingredients that can interfer, moreover acetone works faster; choose a brush with round and soft bristles - mine was too hard and it was a nightmare!; just to give you an idea of the size of the brush, choose between #4 and #6, depending on the shape and lenght of your nails; the strongest color (here Catrice Blue Cara Ciao) should be the last to be applied; choose pigmented polishes, since the acetone will strongly fade their color.
Hope you'll like this nail art, if you want a video tutorial for this technique feel free to ask... And don't forget to check the other ladies' entries!
***Due degli smalti di questo post (Orly Glowstick e Dayglow) mi sono stati inviati a scopo valutativo. Tutti gli altri prodotti sono stati acquistati da me***
***Two of the nail polished of this post (Orly Glowstick and Dayglow) were sent me for review. All the other products were bought by me***
Etichette:
ABC Challenge 2012,
Blue,
Catrice,
Color Club,
Illamasqua,
Nail art,
Neon,
Orange,
Orly,
Pink,
White,
Yellow
giovedì 13 dicembre 2012
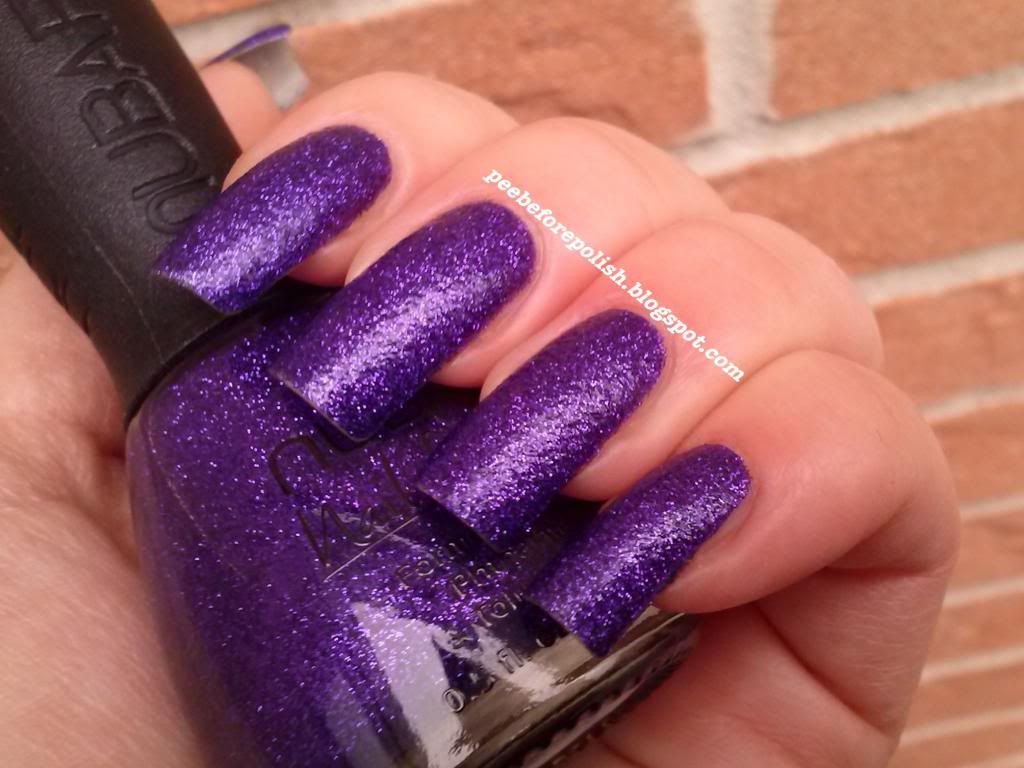
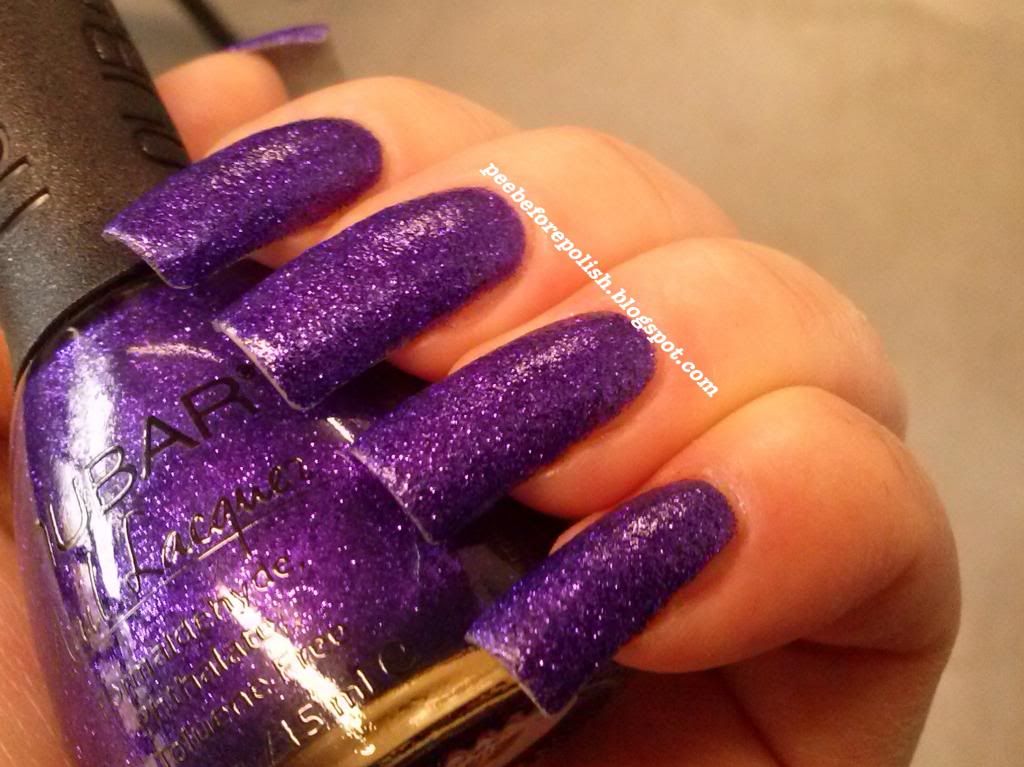
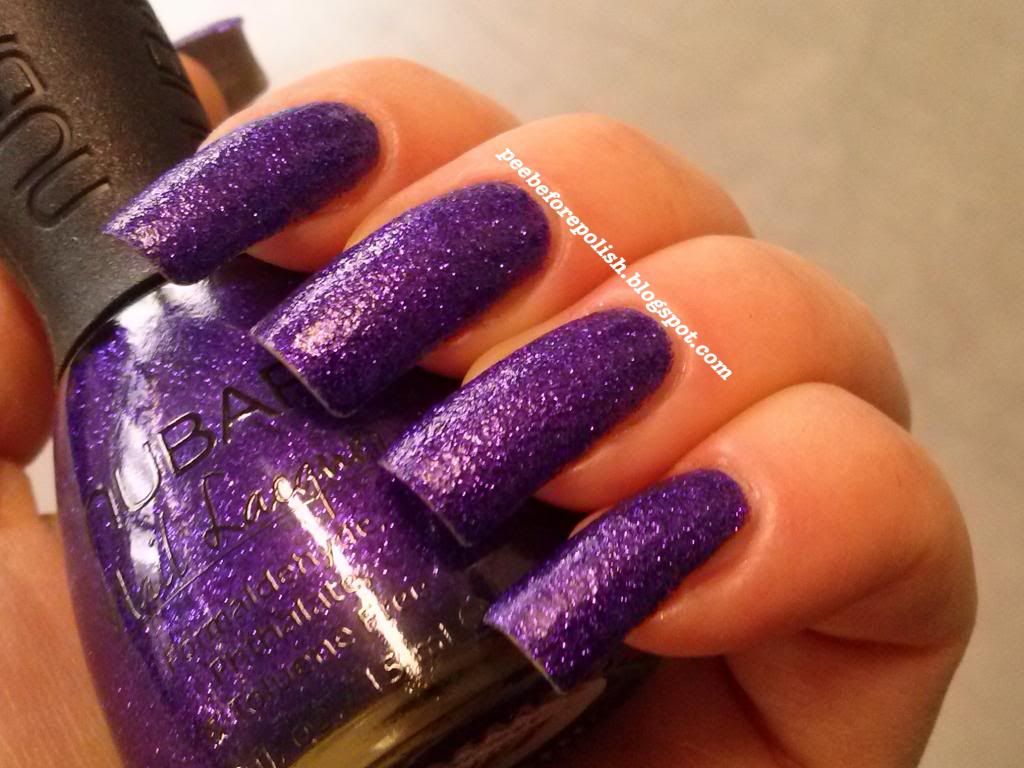
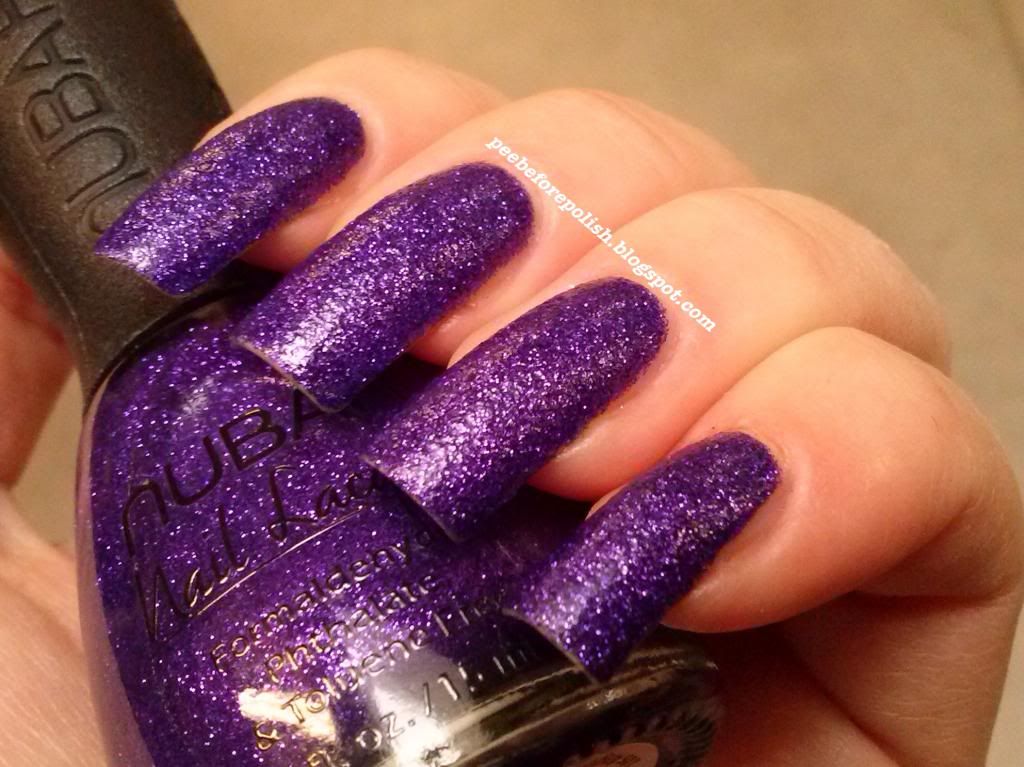
ABC Challenge: V for Nubar Violet Sparkle
Simona, nel suo post relativo alla V, ha scritto che le viene spontaneo dire "V for Vendetta". Io sono più del club del "V for Viennetta", ma solo perché sono ingorda.
Comunque, non ho nessuno smalto che si chiama Viennetta, semmai ho un Vendetta ma non sarà lui lo smalto per la mia V!
Ora che vi ho confuse abbastanza, direi che posso essere un tantino meno delirante: V sta per Nubar Violet Sparkle.
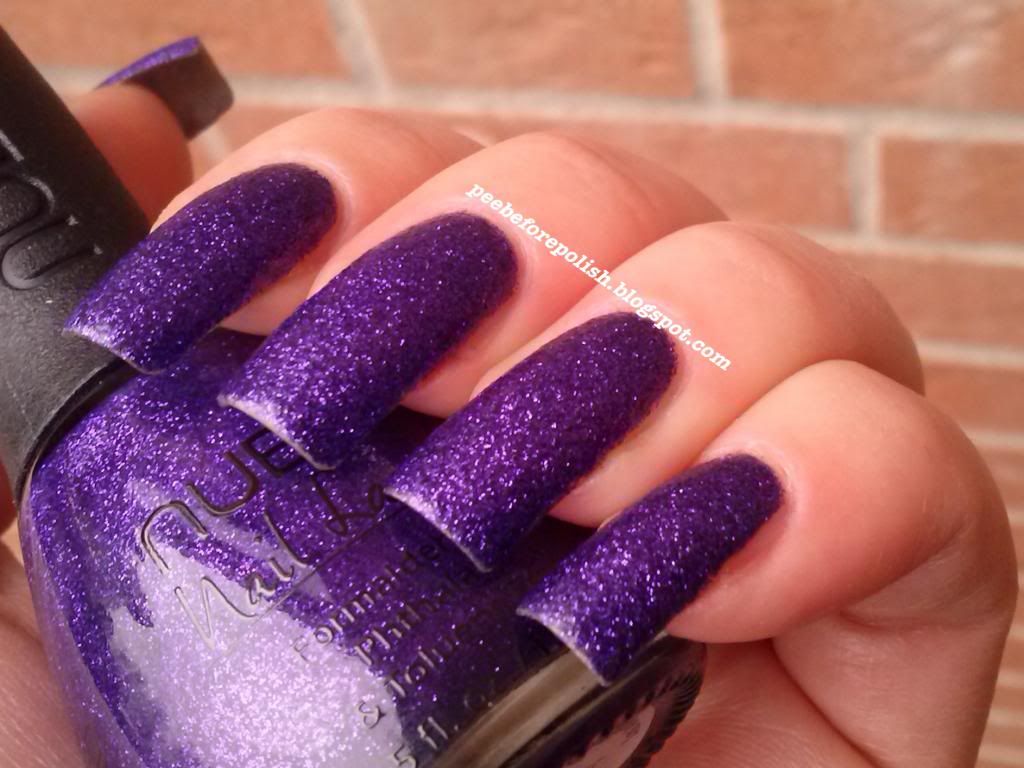
Direttamente dalla collezione Sparkles della primavera 2010, Violet Sparkle ha una base trasparente in cui sono contenuti migliaia di glitterini di un fantastico viola intenso e vibrante, ma anche di un viola più chiaro e tendente al fuchsia. Potrei dirvi che nelle mie foto vedete il risultato di due mani pesanti, ma non sarebbe preciso: ne ho date due badilate. Meglio tre passate più umane, forse.
Ciononostante, si è asciugato alla velocità della luce.
Un consiglio che posso darvi è di passare due volte il top coat o di usarne uno molto corposo: Violet Sparkle rimane davvero molto ruvido, e la prima passata di top coat quasi "se la beve". Per cui, se amate unghie lissssie lissssie e lucide, abbondate!
Ah, se la mia pelle vi sembra di un colore strano, è solo perché ho dovuto cambiare il bilanciamento del bianco per farvi vedere lo smalto nel suo colore reale!
Questa era la mia VVVVVVV, non scordate di guardare le altre entries e... A presto con la W, che sarà una nail art che volevo fare da tanto, troppo tempo!
Simona, in her post about letter V, wrote: "Did you think of the word “Vendetta” straight after reading the title? I keep thinking that, too!".
I have to say that when I hear "V is for", I think: "V is for Viennetta!". Maybe am I too greedy???
Anyway, I don't own any nail polish which is called Viennetta. I have a Vendetta, but it's not my choice for letter V.
I know, this sounds confusing. I stop here. The polish I picked for letter V is Violet Sparkle by Nubar from Sparkles Collection for Spring 2010.
Violet Sparkle has a clear base with millions of small purple and fuchsia glitters. In my photos you can see the result of two super heavy coats. Maybe three standard coats are better.
This polish dries super fast and needs a very dense top coat (or maybe two coats of TC) because it is rough.
Ops, I forgot: I had to play with white balance to capture its true color, so my skin seems a bit odd in these pictures!
Well, this was my pick for V, don't forget to check the other entries and... Have a nice evening and see you soon with letter W, can't wait to show the nail art I realized for this letter!!!!
| Applicazione / Application |
5/5
|
| Asciugatura / Drying time |
4.75/5
|
| Coprenza / Pigmentation |
3.5/5
|
| Durata / Longevity |
4/5
|
| GIUDIZIO FINALE / OVERALL |
4.25/5
|
Etichette:
ABC Challenge 2012,
Glitter,
Nubar,
Purple
lunedì 10 dicembre 2012
ABC Challenge: U for H&M U Must Have This
Buon inizio di settimana a tutte e ben ritrovate con la nostra ABC Challenge.
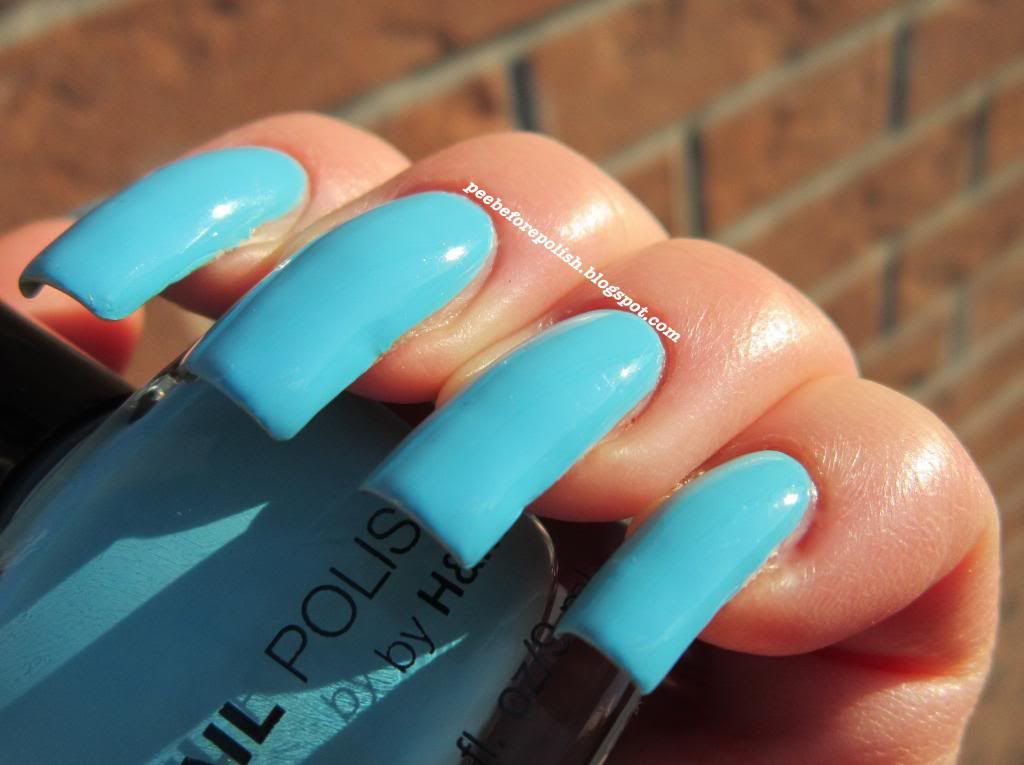
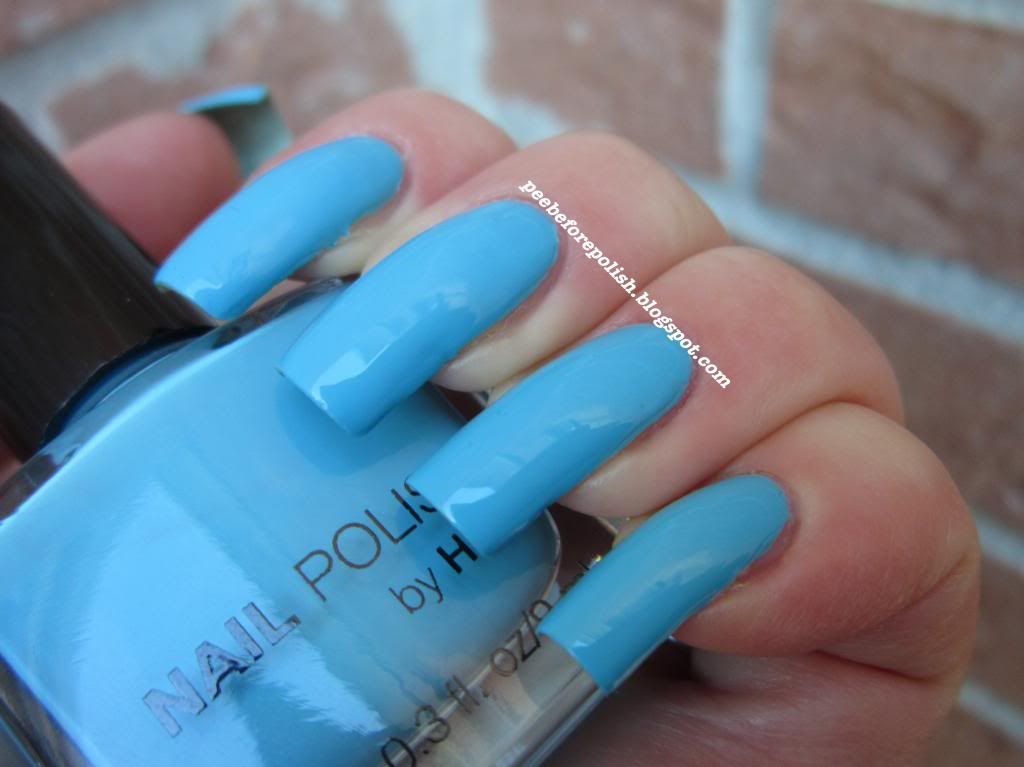
Analogamente a quanto successo col Rouge Noir di Chanel, mi voglio giocare uno dei primi smalti comprati quando ho smesso di mangiarmi le unghie: l'H&M U Must Have This.
Questo gioiellino, oltretutto, arriva dritto dritto dal mio haul newyorkese dell'estate del 2009, per cui porta con sé anche tantissimi, meravigliosi ricordi.
Comunque: U Must Have This, vecchio packaging, è un bell'azzurro cielo molto inteso dal finish cremoso. La coprenza è eccellente, praticamente un one coater; la formula è densa ma comunque piacevolissima da applicare.
L'asciugatura è rapida e la durata decisamente molto buona.
Posso dunque dire che... Nomen omen! E' uno smalto davvero da avere.
Un saluto a tutte quante e non scordatevi di curiosare tra le entries delle altre pulzelle!
Hi ladies!
Hope this new week has started well for all of you and welcome back to another post of ABC Challenge.
A few posts ago I showed you one of the first polishes I bought when I stopped biting my nails, Chanel Rouge Noir. But also the polish of the day, H&M U Must Have This, was one of my first purchases. I bought it in New York three years and a half ago, so it takes with it a lot of beautiful memories.
Anyway: U Must Have This by H&M (old packaging version) is a gorgeous bright sky blue with a creme finish. Pigmentation is high, it's nearly a one coater. Formula is a bit thick, but application is easy. Drying time is fast and longevity is really high.
What can I say? The name of this polish is a guarantee. I can only recommend it!
That's all I have for you today, don't forget to check the other ladies' entries and see you soon!
| Applicazione / Application |
4.5/5
|
| Asciugatura / Drying time |
4.5/5
|
| Coprenza / Pigmentation |
4.75/5
|
| Durata / Longevity |
5/5
|
| GIUDIZIO FINALE / OVERALL |
4.75/5
|
Etichette:
ABC Challenge 2012,
Blue,
Creme,
H&M
giovedì 6 dicembre 2012
ABC Challenge: T for Toxic Seduction and Toothpick
Buongiorno a tutte!
Siamo già arrivate alla T e la nostra maratona sta giungendo al termine, cosa di cui mi dolgo. Sarà che sono un po' autolesionista, ma fosse per me ricomincerei da capo non appena messo il punto sull'ultimo post! *e fu così che venne seppellita dagli insulti delle altre compagne di challenge*
Tornando a noi: T sta per Misa Toxic Seduction e Toothpick (stuzzicadenti).
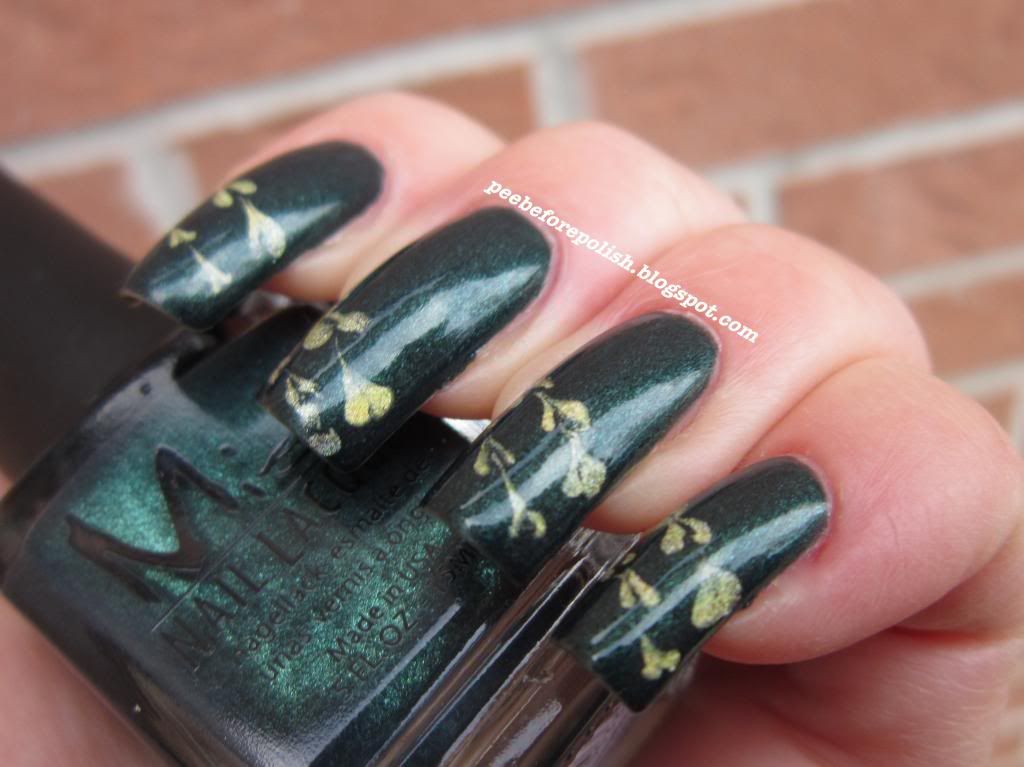
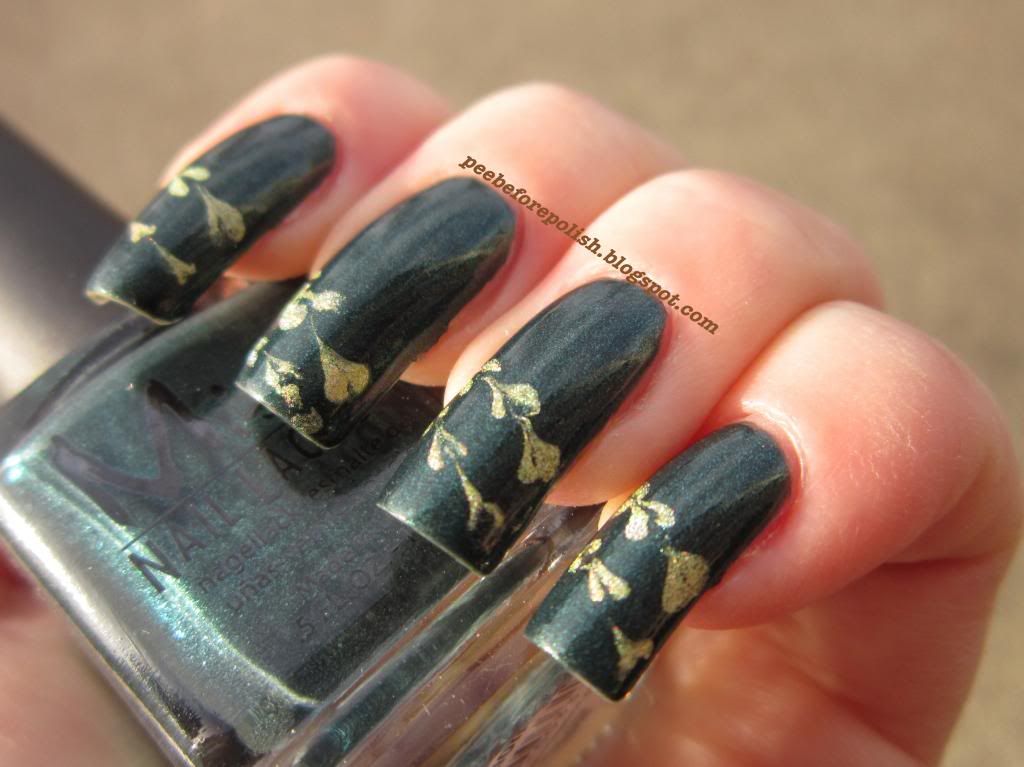
Ma andiamo per gradi. Toxic Seduction, appartenente alla Poisoned Passion del 2008 (gulp), è un verde scuro arricchito da shimmer di un verde leggermente più chiaro. Pigmentazione eccellente, due passate sottili nelle foto, ed asciugatura rapidissima. Nulla da eccepire neppure sulla durata, che è decisamente buona.
Per aggiungere un po' di pepe avevo deciso di fare una marble rapidissima col Layla Gold Idol. Quando lo smalto di base è ancora fresco, si creano dei pallini col colore da contrastro, tre o quattro a seconda della dimensione dell'unghia, e poi si passa in mezzo uno stuzzicadenti o un ago. In questo modo si dovrebbero creare dei decori di tipo cuoricioso.
Classica nail art a prova di impedita, no? NO. Perché qui è chiaro che qualcosa è andato storto. Lo vedete anche voi, no?
La ragione del semi fail è che non dovete usare degli smalti holo linear con formula poco corposa (come i Layla, gli Nfu Oh o gli Shaka), perché la goccina di smalto (bastarda) non si "aprirà" al passaggio dello stuzzicadenti, ma se ne andrà a spasso per l'unghia prendendovi in giro.
Ovviamente non mi sono rassegnata all'evidenza empirica, ma ho continuato a provarci finché non ho ottenuto un risultato pseudo decente. Non fatelo a casa!!!!!!
Per oggi è tutto, vi dò appuntamento a sabato con altri golosi swatches extra challenge!
Hi ladies!
The post of the day is about letter T of ABC Challenge. That means that our marathon is going to end soon. I'm a bit sorry about this, I'd immediately start another challenge! Maybe am I a masochist?!
Back to us: T for Toxic Seduction and Toothpick.
Let's start with this gorgeous polish: Toxic Seduction is quite old (it belongs to Poisoned Passion, which was launched for Fall 2008) but I think it is a great shade for fall or winter. It is a dark green with green shimmer. Two thin coats in my pics. Drying time is really fast and I'm happy with its high longevity too.
I wanted to add something sparkly to this polish so I decided to make a fast marble design. While the base color (here, Toxic Seduction) is still wet, you have to make three or four dots with another polish of your choice (here, Layla Gold Idol). Then you have to trace a line with a toothpick (or a needle) in the middle of these dots, and you will obtain a nice design similar to heart.
Unfortunately, I picked the wrong polish. If you use a holo polish with a very thin formula (like Laylas, Shakas or Nfu Ohs), you won't be able to "break" the dots and create the design. The dots will move and walk around the surface of your nails, but they won't break. But as I wrote above, I am masochist, I didn't change the polish and I didn't obtain the result I imagined. Mpppppf. Nice try?! Anyway: don't do this at home. Try with another finish!
That's all I have for you today, see you Saturday with swatches extra challenge and have a nice day!
| Applicazione / Application |
4.5/5
|
| Asciugatura / Drying time |
4.5/5
|
| Coprenza / Pigmentation |
4.5/5
|
| Durata / Longevity |
4.5/5
|
| GIUDIZIO FINALE / OVERALL |
4.5/5
|
Etichette:
ABC Challenge 2012,
Green,
Misa,
Shimmer
lunedì 3 dicembre 2012
ABC Challenge: S for Stripes
La cosa che preferisco della ABC Challenge è che mi sto cimentando per la prima volta in tantissime nail arts che mai avevo provato prima, pur morendone dalla voglia.
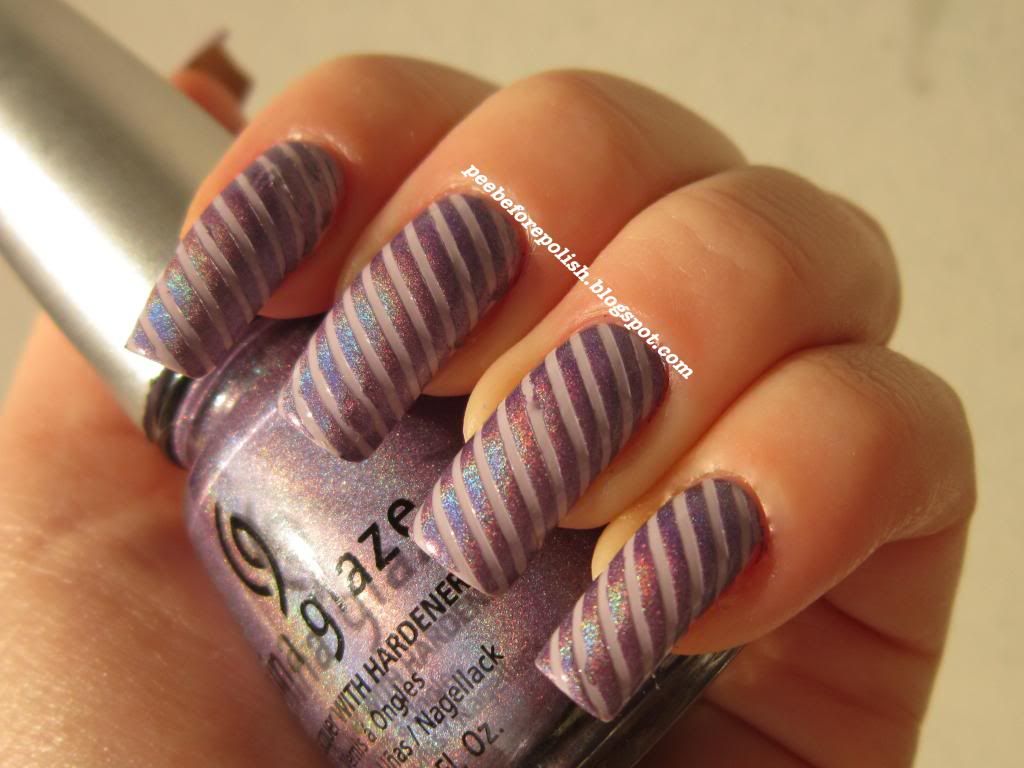
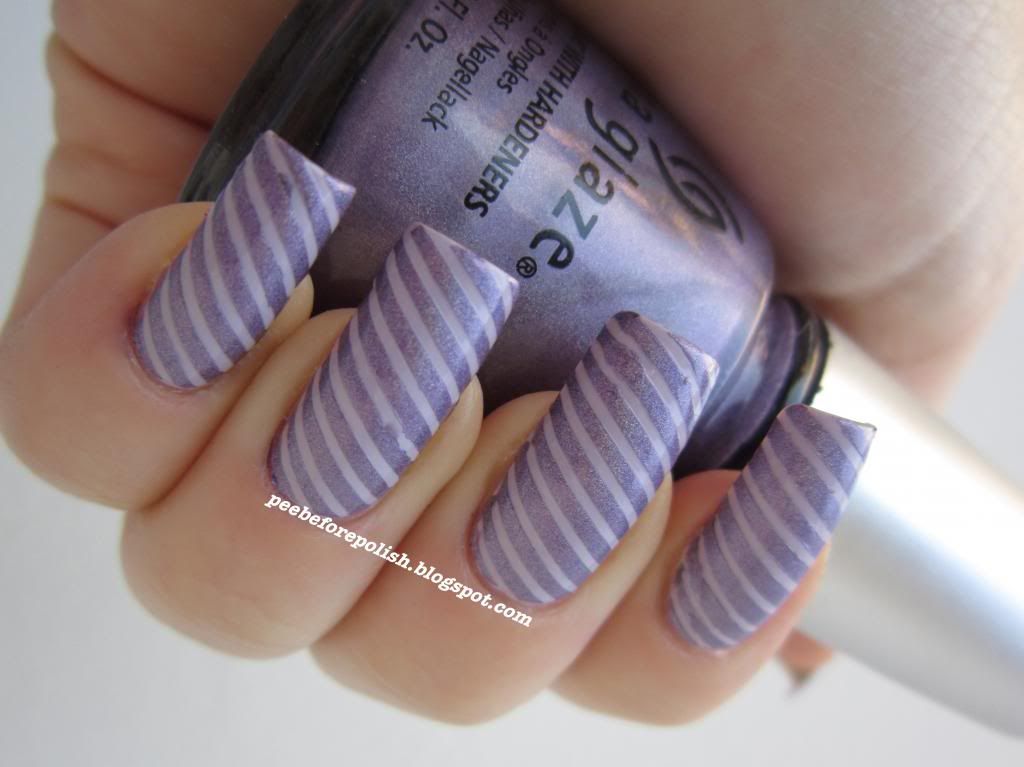
Per la S ho dunque voluto cimentarmi nella striped manicure. Non mi dilungherò nello spiegarvi il procedimento (comunque molto noto) perché ho un tutorial in serbo per voi!
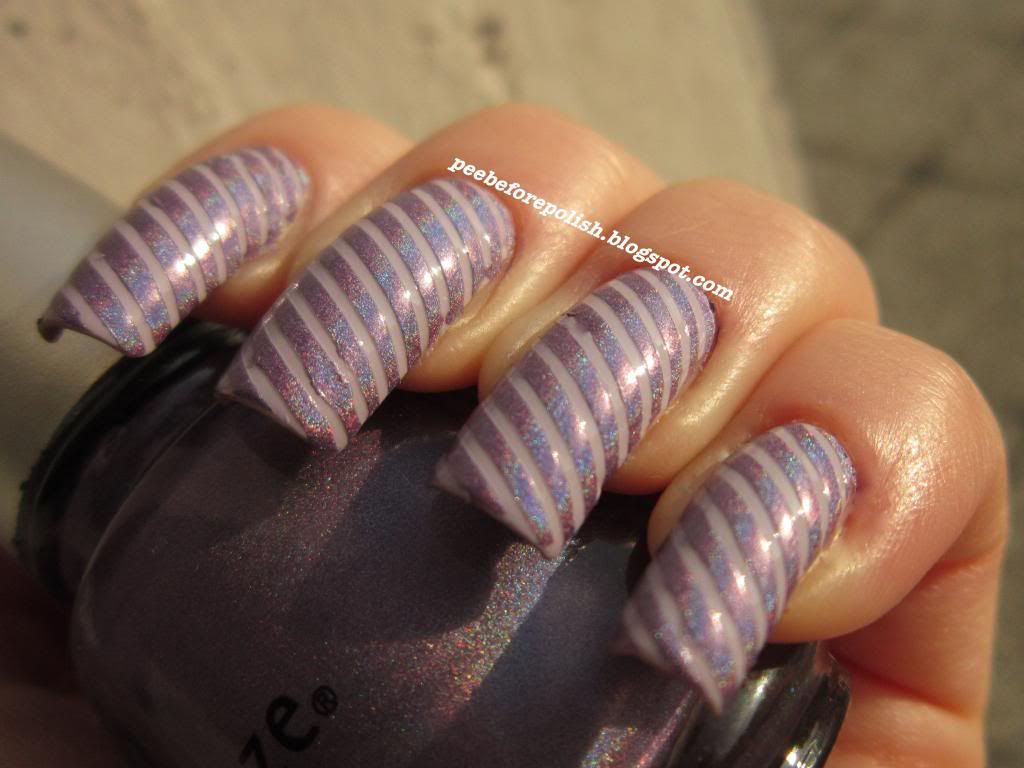
Lo smalto di base è il China Glaze Light As Air, un lilla chiaro creme. L'altro smalto protagonista è invece un olografico, il China Glaze IDK. E' stato un bel rischio, per due motivi: per la velocità di asciugatura degli olografici (e nel tutorial questo sarà meglio spiegato!) e per il tempo ballerino di questi giorni; insomma, non sapevo se avrei avuto il sole ad aiutarmi per le foto.
Non dimenticatevi di guardare cos'altro hanno combinato le altre donzelle e a presto!
Hi ladies and welcome back to another post of ABC Challenge!
I'm really enjoying this marathon, and the main reason is that I'm realizing a lot of nail arts I've never tried before.
So, for the S, I did a striped manicure. I won't explain how I realized it because I will publish soon a tutorial.
Just a few words, then: the base color is China Glaze Light As Air, a light lilac with a creme finish. The other nail polish which is the protagonist of this nail art is China Glaze IDK, a well-known purple linear holo from OMG Collection.
Luckily yesterday it was a sunny day, so I could take pics with direct sunlight!
That's all I have for you today and don't forget to check other ladies' entries!
Etichette:
ABC Challenge 2012,
China Glaze,
Creme,
Holographic,
Nail art,
Purple
giovedì 29 novembre 2012
ABC Challenge: R for Chanel Rouge Noir
Buonasera a tutte e bentornate ad una nuova puntata della ABC Challenge!
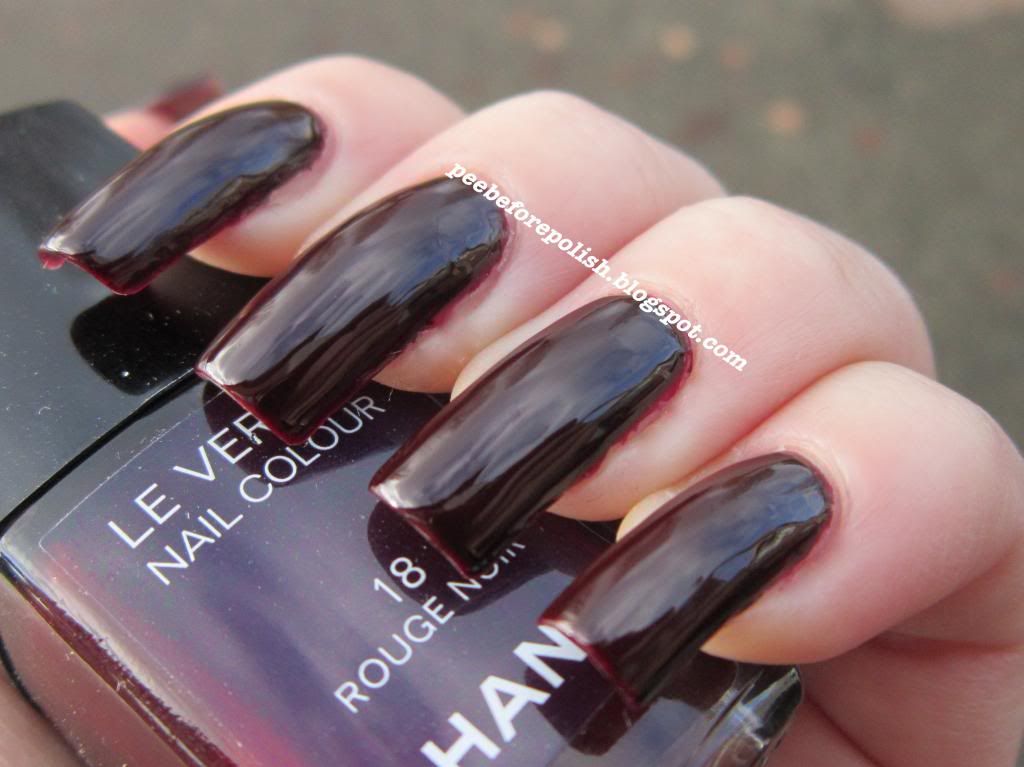
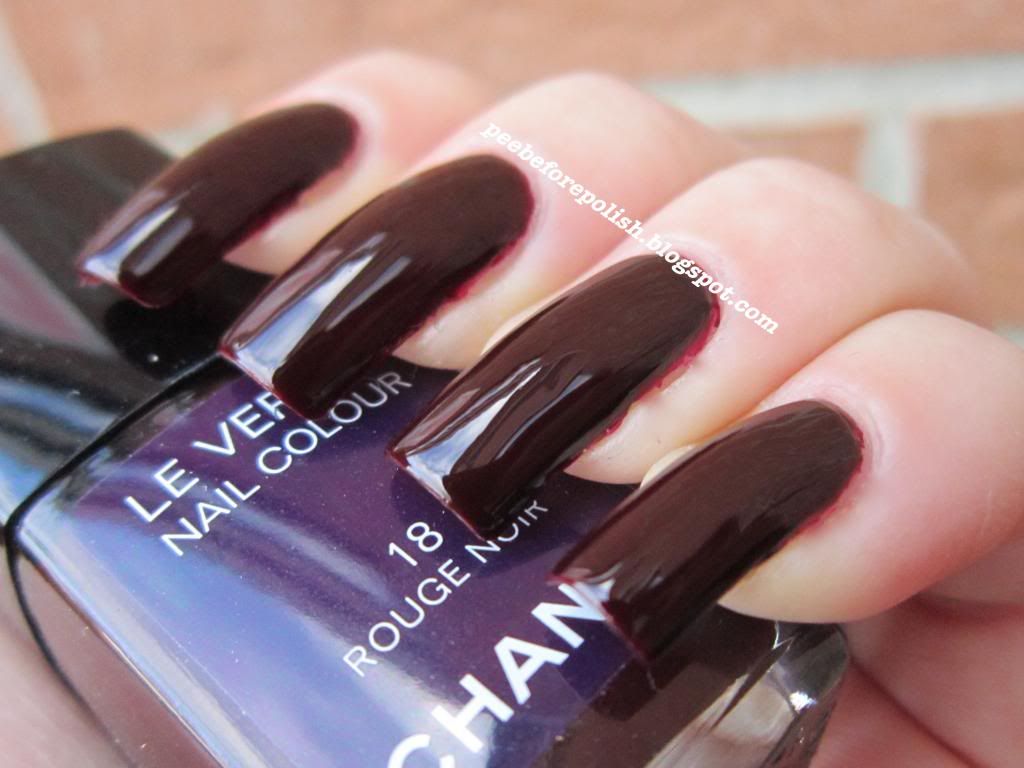
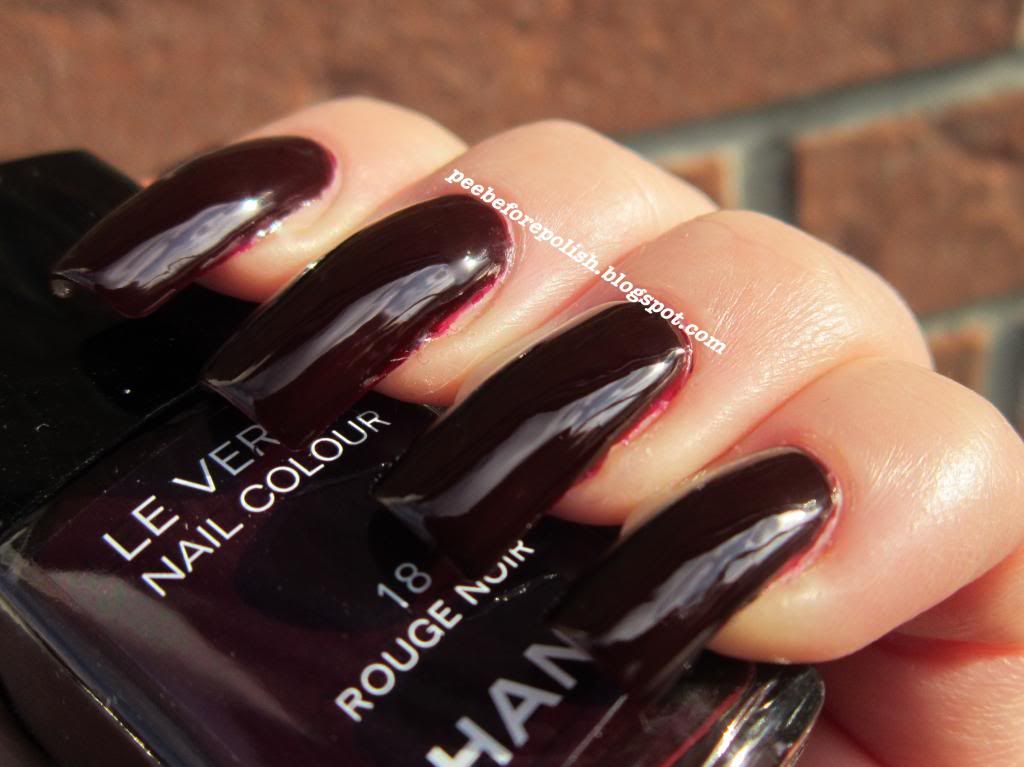
Per la R mi gioco un grande classico, lo Chanel Rouge Noir.
Quando ho smesso di mangiarmi a sangue le unghie, i primi smalti che ho comprato sono stati Chanel. All'epoca (parlo del 2008) nomi come China Glaze, OPI e Orly erano a me sconosciuti, Kiko non era ancora approdata nella mia città e i grandi marchi mi sembravano l'unica (o quasi) alternativa.
Ho sorriso tirando fuori dal cassetto il Rouge Noir, perché è evidente che è stato largamente usato, mentre ora fatico a provare tutto quello che è nella mia untrieds box.
Comunque, il Rouge Noir è un classico nero-rosso con inflessioni marroni. Il finish è cremoso ed asciuga molto lucido anche senza bisogno di top coat.
La perfetta coprenza si ottiene in due mani, e l'applicazione è resa leggermente difficoltosa da una formula un tantino liquida. L'asciugatura è molto rapida.
I difetti che principalmente ha questo smalto, per lo meno ai miei occhi, sono due: in primis, stinge. Ovvero: dopo aver atteso dieci minuti vado a passare il top coat, ma il pennello dello stesso si va a tingere immediatamente di rosso non appena tocca il Rouge Noir. Ciò mi costringe a pulire il pennello ogni volta che devo ripucciarlo nella boccetta, se non voglio che il top coat diventi da trasparente a rosato.
In secondo luogo: la durata. A parte il Dragon, nessuno dei sei smalti Chanel in mio possesso ha mai superato incolume il giorno tre. Il Rouge Noir non fa eccezione in tal senso.
Tornando indietro, non lo ricomprerei di certo. Anche perché oggi come oggi siamo infestati da suoi dupe ben più economici. Come colore è sicuramente un must have, un passepartout, elegante e di classe, ma i suoi difetti fanno sì che io sia costretta a dire che non vale i 22€ che costa oggi, né i 18€ che io pagai nel 2008.
Di certo, ad anni dal suo lancio, è ancora uno degli smalti più venduti e ricercati, merito anche dell'aura mitica che circonda lui e il marchio che lo produce.
Per oggi è tutto, vi lascio alle foto e vi auguro una buona serata!
(ps: scusate per l'applicazione ad mentula canis, ma la combinazione formula liquida+febbre e tremolio mi ha fatto andare lo smalto un po' ovunque; in circostanze normali sarei andata di clean up, ma onestamente non me la son sentita, stavo troppo male e volevo solo andare a letto)
Hi ladies
and welcome back to ABC Challenge!
For letter R I picked an old classic nuance, Chanel Rouge Noir.
When I stopped biting my nails, the first polishes I bought were by Chanel. At that time (it was 2008) I ignored the existence of brands like China Glaze, OPI or Orly, and Kiko hadn't a store in my city yet, so I had only a few brands to consider for the purchase of a nail polish: high end brands like Chanel, Dior, YSL, or most popular brands like Pupa or Collistar.
Looking at the bottle of Rouge Noir, I smiled because it is evident that I've really used it a lot... Now I rarely use a polish as much as I used Rouge Noir, maybe because now I have more than 5 nail polishes including base and top coat!
Anyway: Rouge Noir is a classic blackened red with a hint of brown. It has a creme finish and it dries super glossy even without a top coat.
Two coats for the perfect coverage, but formula is a bit runny for my taste so application isn't the best ever. Drying time is really fast.
In my opinion, this polish has mainly two defects: first-of-all, it stains. Not on the nails, but on the brush of the top coat. I always wait ten minutes before applying a top coat on a polish (even more if I did some stamping), but when I touch the surface of my nails with the brush, this becomes immediately red. I am obliged to clean constantly the brush on a paper tissue if I don't want that my top coat turns into light pink.
Secondly: the longevity is poor. I have six Chanel polishes in my stash and only Dragon has an excellent longevity. The other five, including Rouge Noir, last less than three days before tip wears.
In conclusion: we all know that Rouge Noir is a beautiful color, a passepartout, it is so classy and elegant. There's a reason if it is still a best seller even if it was launched many years ago. It has a sort of "golden air".
But I don't think I'd buy it again: I paid 18€ for it (it actually retails for 22€) and I don't think it's worth the price. Actually there are so many dupes of Rouge Noir; well, maybe they're not "the Original Nuance", maybe they're not by Chanel, but they are identical and much cheaper.
That's all I have for you today, talk to you soon and have a nice evening!
(ps: I'm sorry for the bad application of this polish. As I wrote before, its formula is runny plus I was shaken by shivers. I rarely apply badly a nail polish, but when it happens I always do a clean up. I hadn't the strenght to do that in this case, I had flu and I only wanted to go to bed!)
| Applicazione / Application |
3.5/5
|
| Asciugatura / Drying time |
5/5
|
| Coprenza / Pigmentation |
4.5/5
|
| Durata / Longevity |
2.5/5
|
| GIUDIZIO FINALE / OVERALL |
3.75/5
|
lunedì 26 novembre 2012
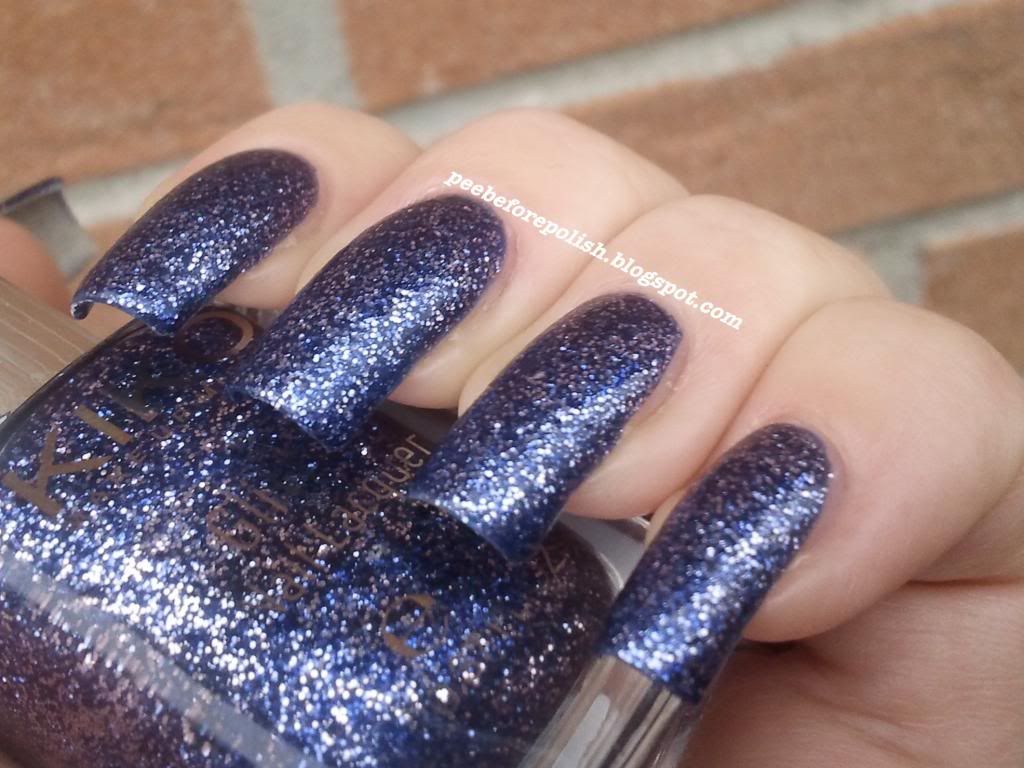
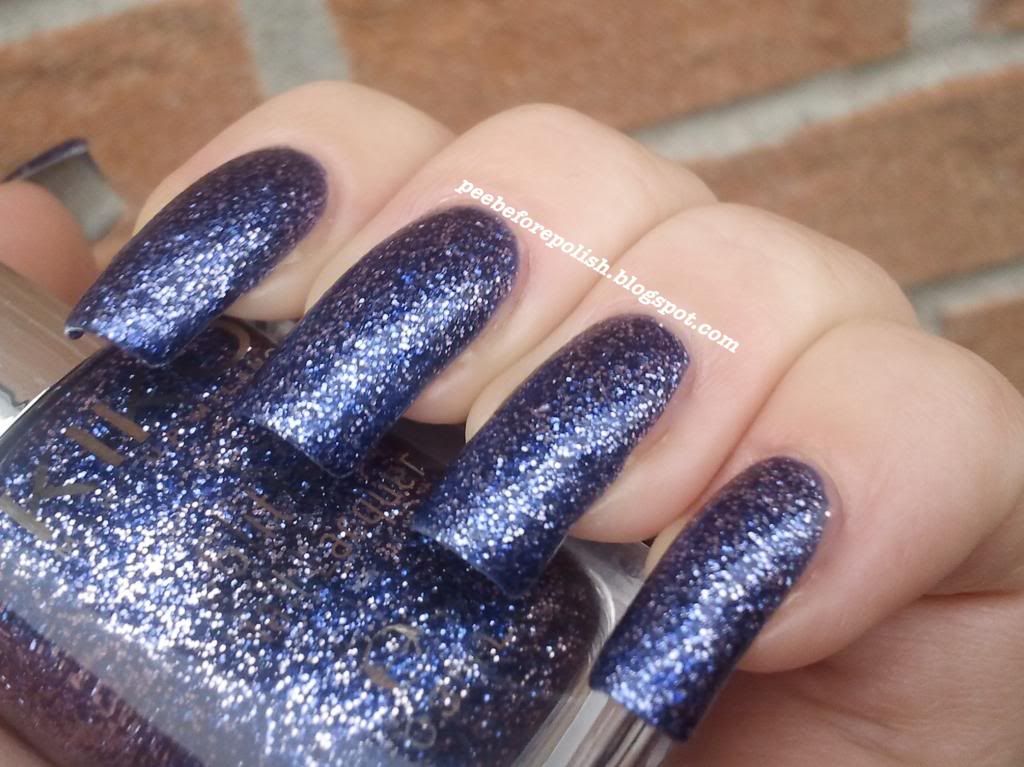
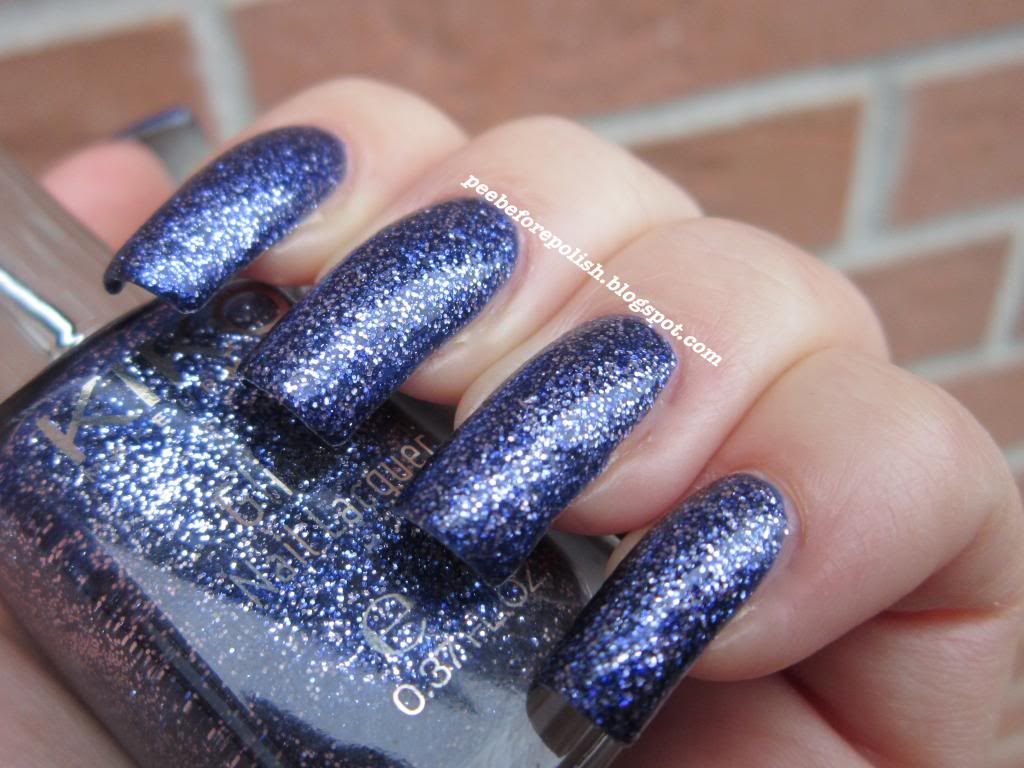
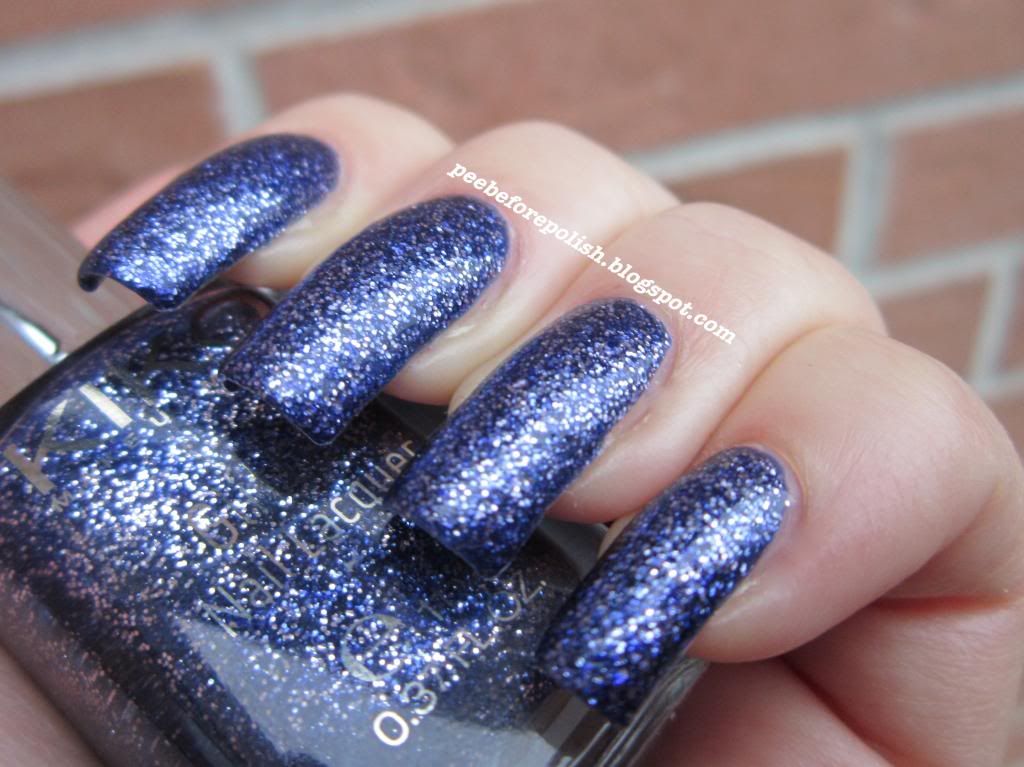
ABC Challenge: Q for Kiko #407 Starry Indigo
Benvenute nella più ostica delle puntate della ABC Challenge!
Ostica per via della lettera: insomma, non è che con la Q ci sia molto da scegliere.
Per cui, dietro suggerimento delle compagne di merende Simona ed Elena, ho optato per il Kiko #Quattrocentosette Starry Indigo, uno dei nuovi glitter della collezione natalizia Dashing Holidays.
Starry Indigo ha una base blu-viola con tonnellate di glitter argento-violacei e blu. La formula è davvero densissima, il che rende un pelo più difficoltosa l'applicazione ma, al contempo, fa sì che un'enorme quantità di prodotto venga trasferito su unghia. In questo modo, con due passate la coprenza perfetta è ampiamente servita.
L'asciugatura è molto rapida e la durata è media.
Di certo non è uno smalto da colloquio di lavoro, ma lo trovo bellissimo e molto luminoso, insomma perfetto per le feste. O anche non solo: io non ne ho mai abbastanza dei glitter, voto per indossarli sempre e comunque!
Vi lascio alle foto, sono un po' triste all'idea di non riuscire a farne da eoni alla luce solare diretta, ma brutto tempo e nebbia sembrano non volerci abbandonare ancora per una settimana... Uff.
Non dimenticate di guardare le entries delle altre ragasssssuole e a presto!
Hi ladies and welcome back to another post from ABC Challenge!
It was hard to choose a polish for letter Q. I have only a polish from an italian cheap brand called Quando è but I didn't want to wear it because I've already showed it in my first water marble.
Then Simona and Elena suggested me to use a Kiko polish with a reference number which starts with #4. In fact, the italian word for "four" is "quattro". So, here it is Kiko #407 (Quattrocentosette) Starry Indigo from Dashing Holidays Collection.
Starry Indigo has a blue-violet base with lots of silver-violet and blue glitters. Formula is really thick and gloppy, but it wasn't hard to apply it. Thanks to this dense formula, a lot of product is transferred to the nails with only one coat and you'll need only two coats for the perfect coverage.
Drying time is fast and longevity quite good.
Maybe this is not a work appropriate shade, but I think Starry Indigo is a beautiful polish, a great choice for the Xmas period.
That's all I have for you today, I'm a bit sorry because I can't take my pics in direct sunlight and, according to weather forecasts, I won't be able to take them for many days. Sgrunt.
Don't forget to check other girls' entries and have a nice evening!
| Applicazione / Application |
4/5
|
| Asciugatura / Drying time |
4.5/5
|
| Coprenza / Pigmentation |
4.5/5
|
| Durata / Longevity |
4.5/5
|
| GIUDIZIO FINALE / OVERALL |
4.25/5
|
Etichette:
ABC Challenge 2012,
Blue,
Glitter,
Kiko,
Purple
Iscriviti a:
Post (Atom)

