Ads 468x60px

venerdì 16 agosto 2013

Holothon #09: Jade Mystic Gold

Ciao a tutte!
Le mie ferie sono agli sgoccioli e devo dire che ho dedicato davvero poco tempo al blog, o meglio all'editing dei video, contrariamente a quanto promesso. Ops.
Spero di farmi perdonare con uno smalto davvero super, il brasiliano Jade Mystic Gold. Trovo che sia davvero un colore da spiaggia, con quel dorato brillante ed intenso che si abbina tanto bene alla sabbia bollente e quell'effetto holo linear che esce così bene grazie al sole incandescente.
Due mani per la perfetta coprenza, asciugatura rapida e durata davvero molto buona anche senza top coat. Anche l'applicazione è semplice e rapida grazie ad un pennello ergonomico e una formula ineccepibile.
Vi lascio alle numerosissime foto e vi dò appuntamento a presto!

Hi ladies!
My holidays are almost over and I've been spending lazy days at the sea or just eating a lot! This means that I haven't edited my video tutorials yet... Ops.
Hope that you'll forgive me after seeing the wondeful polish of the day, the Brazilian Jade Mystic Gold. I think this is the perfect polish for the beach: it is a beautiful, intense and bright gold that matches perfecty with hot sand. Moreover, its crazy holo linear effect comes out so well thanks to the glowing sun. 
Two coats for perfect coverage, it dries quickly and it has a very good longevity even without a top coat. Even the application is quick and easy thanks to its ergonomic brush and flawless formula. 
I took a ton of pics of this beauty, so maybe it's better if I stop writing here! That's all I have for you today, thank you for reading and watching and have a nice evening!


Applicazione / Application
5/5
Asciugatura / Drying time
3.5/5
Coprenza / Pigmentation
4.5/5
Durata / Longevity
4.5/5
GIUDIZIO FINALE / OVERALL
4.5/5


mercoledì 14 agosto 2013

Mish Mash Challenge #03: METALLIC

Hi ladies and welcome back to the third appointment with Mish Mash Challenge!
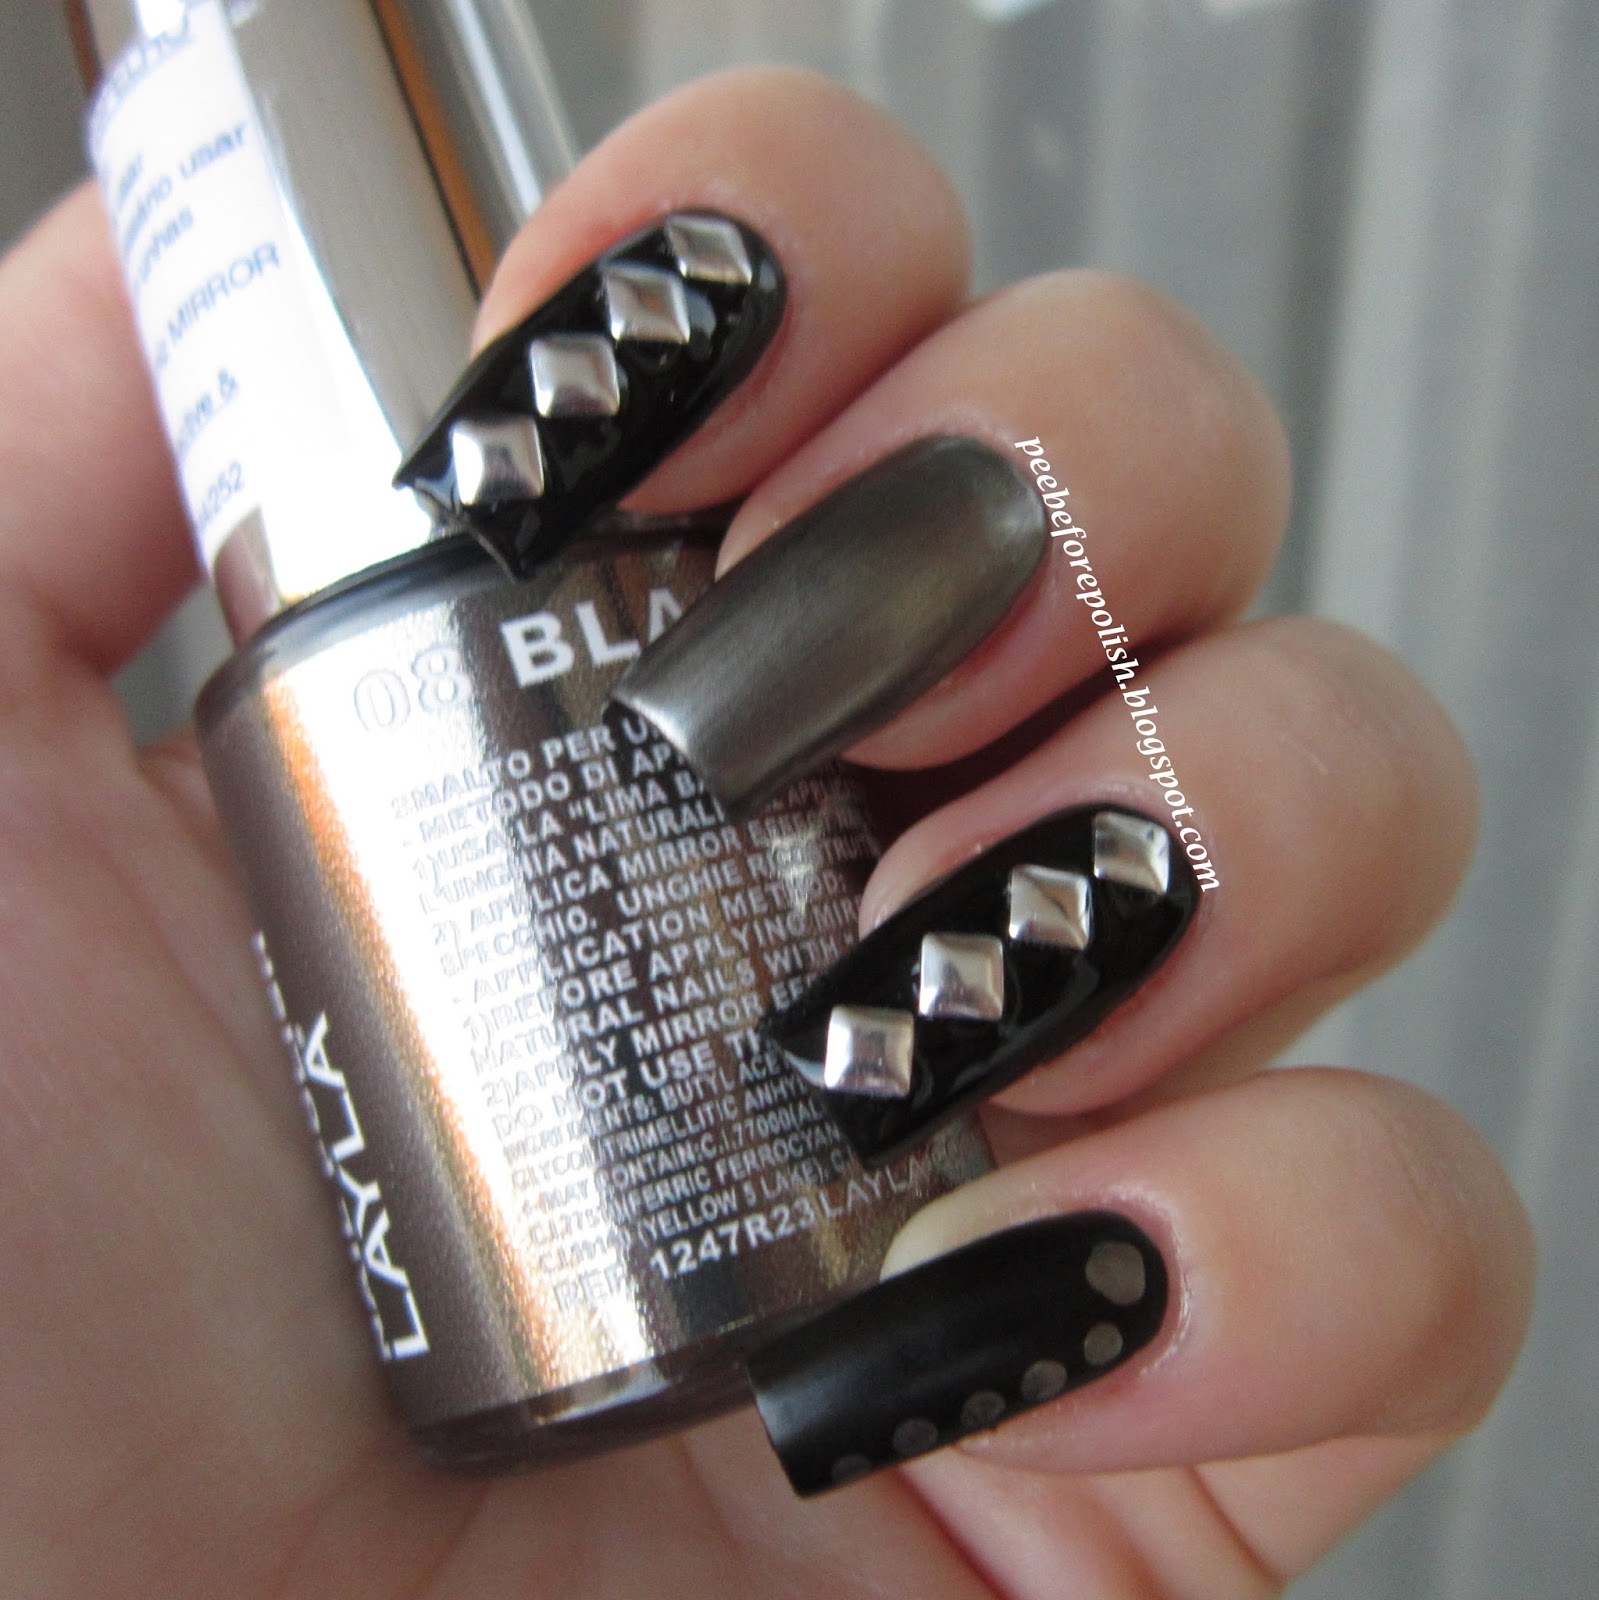
Today's theme is metallic, and I decided to play a bit with different finishes and with the studs of my Born Pretty Store set.
I started with painting my nails with just one coat of Illamasqua Scorn, a beautiful intense black with a matte/rubber finish. Then I added some squared, silver studs on my index and ring fingers. I used Seche Vite to seal the little stones and to give a glossy touch to my nails too.
On my middle finger I applied just one coat of Layla Black as Ebony, which has a chrome/mirror finish. I used this same polish to create a couple of simple dots on my pinkie. I didn't apply a top coat here because I wanted to keep the original matte aspect of Illamasqua Scorn.
So we have three different finishes in a super simple and easy-to-do manicure!
That's all I have for you today, don't forget to take a look at the entries of the other ladies and have a nice evening!

Ciao a tutte e ben ritrovate con la terza puntata della Mish Mash Challenge!
Per il tema di oggi, Metallic, ho deciso di giocare con diversi finish e con le borchiette del mio kit di Born Pretty Store. 
Per prima cosa ho steso una mano di Illamasqua Scorn, un fantastico nero dal finish matte/gommoso. Poi, solo su indice e anulare, ho aggiunto qualche borchia argentata, sigillando tutto col Seche Vite non solo per rendere la manicure più duratura, ma anche per dare un aspetto glossy allo smalto. Sul medio, invece, ho aggiunto una mano del cromato Layla Black as Ebony (che si applica una meraviglia sopra lo Scorn, molto meglio che su una base vera e proprio o direttamente sull'unghia nuda!). Con lo stesso smalto ho poi disegnato qualche puntino sul mignolo. Niente top coat qui, volevo mantenere inalterato il finish originario dello Scorn.
In questo modo, in una manicure semplice e veloce da realizzare, ho racchiuso ben tre finish!
E anche per oggi è tutto, vi auguro uno splendido Ferragosto e vi dò appuntamento a presto!


sabato 10 agosto 2013

Neon Lights: Neon Water Marble!

Ciao a tutte e buon sabato!
Quando Francine ha proposto un post a tema neon non ho potuto davvero esimermi, anche perché era da tanto tempo che desideravo creare una water marble neon.
E quindi eccoci qui: ho scelto di realizzare un semplice design a petalo, che comunque reputo di grande effetto. Per quanto riguarda i colori, invece, ho optato per un fucsia sparato di Layla, il Fluo Colour F05, e un blu spettacolare della Coral Prosilk, il #600 della linea neon.
E' stato difficilissimo catturare i colori in tutto il loro splendore, ci sono riuscita ma dal vivo sono persino più intensi!
Vi lascio alle mie foto e alle creazioni delle altre smaltare pazze, spero che la mia water marble vi piaccia, nel qual caso vi consiglio di rimanere sintonizzate perché è in arrivo il video tutorial!

Hi ladies and happy Saturday!
A few weeks ago Francine proposed us a post with neon as main theme... I couldn't refuse her invite! I immediately decided that I wanted to do a neon water marble so... Here it is!
I created a simple petal design, which is one of the basic patterns for water marbles but it's, IMO, beautiful. About the colors: I picked a super bright pink by Layla, Fluo Colour F05, and a stunning and intense blue by Coral Prosilk, #600 from Neon Collection.
It was so hard to capture all the brightness of these colours, I swear that they are even more vibrant in real life!
Hope that you like this creation, I did a video tutorial and I'm going to work on it during this week since I'm on holiday and I finally have more time to dedicate to my blog.
Thank you for reading and watching and have a nice evening!


venerdì 9 agosto 2013

Holothon #08: Perfect H5

C'è qualcosa di meglio di uno smalto che costa solo 1€ e ha un effetto olografico che lascia senza fiato? Io dico di no!
Bene, signore, vi presento uno degli smalti olografici della Perfect, H05, un rosa molto delicato dall'effetto arcobaleno marcatissimo. Prima di essere applicato deve essere shakerato davvero a lungo, ma questo è l'unico difetto che posso imputargli.
Consiglierei di utilizzare una base apposita (in questo caso io mi sono affidata all'Aqua Base di Nfu Oh) per rendere l'applicazione più agevole. Due mani per la perfetta coprenza, asciugatura rapidissima e durata discreta.
Dire che mi è piaciuto moltissimo è riduttivo, ne sono a dir poco entusiasta.
Vi lascio alle foto e vi auguro uno splendido fine settimana!

Is it anything better that a holo polish with a stunning linear effect which costs only 1€? I think it's one of the best thing in the life of a polishaholic!
Ladies, today I'm going to show you Perfect H5, a light and delicate pink with an amazing holo effect. You have to shake the bottle a lot before applying it, but this is the only con it has.
As a base coat I used Nfu Oh Aqua Base, it really helps application. Two thin coats of Perfect H5 in my pics, it dries super fast and has a fair longevity.
I'm really in love with this polish, I still can't believe that I bought this splendor for such a small price, I'm enthusiast about it.
That's all I have for you today, thank you for reading and watching and have a nice week-end!


 Applicazione / Application
4/5
Asciugatura / Drying time
5/5
Coprenza / Pigmentation
4.5/5
Durata / Longevity
2.5/5
GIUDIZIO FINALE / OVERALL
4/5


mercoledì 7 agosto 2013

Mish Mash Challenge #02: TAPING [Rainbow Beams Nail Art]


Hi ladies!
I know, I'm late for the party... Again! But better late than never, so I'm ready for my first post of MISH MASH Challenge hosted by Kimber! I'm so happy to be part of this amazing group of ladies again, ABC Challenge was such a wonderful experience and I was so sorry when it was over.
Anyway, the theme of today's post is TAPING, and I decided to use striping tape in a creative way.
I did a video tutorial for this nail art so I won't bore you with the details of the procedure.
But here it is the list of the nail polishes I used:
- Orly Dayglow as base color for the rainbow gradient;
- Orly Glowstick (yellow), Orly Melt Your Popsicle (orange), Orly Beach Cruiser (bright pink), Orly Skinny Dip (blue), Inocos Verde Txaran (green) for the rainbow gradient itself;
- Orly Liquid Vinyl (black) as contrast color.
I know, this post is very picture heavy but I'm really proud of this nail art, it's probably my favourite creation ever and I hope you like it too!
Don't forget to take a look at the other ladies' amazing posts and have a nice day!

Buongiorno ragazze!
Sono in ritardo alla festa, ma meglio tardi che mai! Eh sì, con le ragazze della ABC Challenge 2013 abbiamo deciso di imbarcarci in un'altra impresa, la Mish Mash! Sono davvero felice di essere di nuovo parte di questo gruppo composto da splendide persone.

In ogni caso, il tema del post di oggi è il TAPING, e io ho deciso di utilizzare lo striping tape in modo più creativo possibile. Ho fatto un video tutorial per questa nail art, che editerò appena possibile, per cui non starò a tediarvi coi dettagli del procedimento. Nel frattempo, ecco la lista dei prodotti utilizzati:
- Orly Dayglow come base bianca per esaltare la gradient arcobaleno;
- Orly Glowstick (giallo), Orly Melt Your Popsicle (arancio), Orly Beach Cruiser (rosa acceso), Orly Skinny Dip (azzurro), Inocos Verde Txaran (verde) per la gradient arcobaleno stessa;
- Orly Liquid Vinyl (nero) come colore di contrasto.
Lo so, questo post è strapieno di foto ma sono particolarmente orgogliosa di questa nail art, probabilmente è la mia preferita tra le mie creazioni, e ovviamente spero che piaccia anche a voi.
E anche per oggi è tutto, date un'occhiata a cosa hanno combinato le altre figliole e non ve ne pentirete, e vi auguro una splendida giornata!


***Gli smalti Orly usati per questa nail art mi sono stati inviati a scopo recensione*** 
***Orly nail polishes used for this nail art were sent me for review*** 


lunedì 5 agosto 2013

CND Vinylux Gilded Pleasure

Ciao a tutte!
Oggi vi mostro lo smalto che mi ha tenuto compagnia durante i miei sei giorni di vacanza a Lisbona, ovvero il CND Vinylux Gilded Pleasure. Non avendo nessuna intenzione di mettermi a smaltarmi le unghie in ferie, ho optato per un prodotto a durata supergarantita.
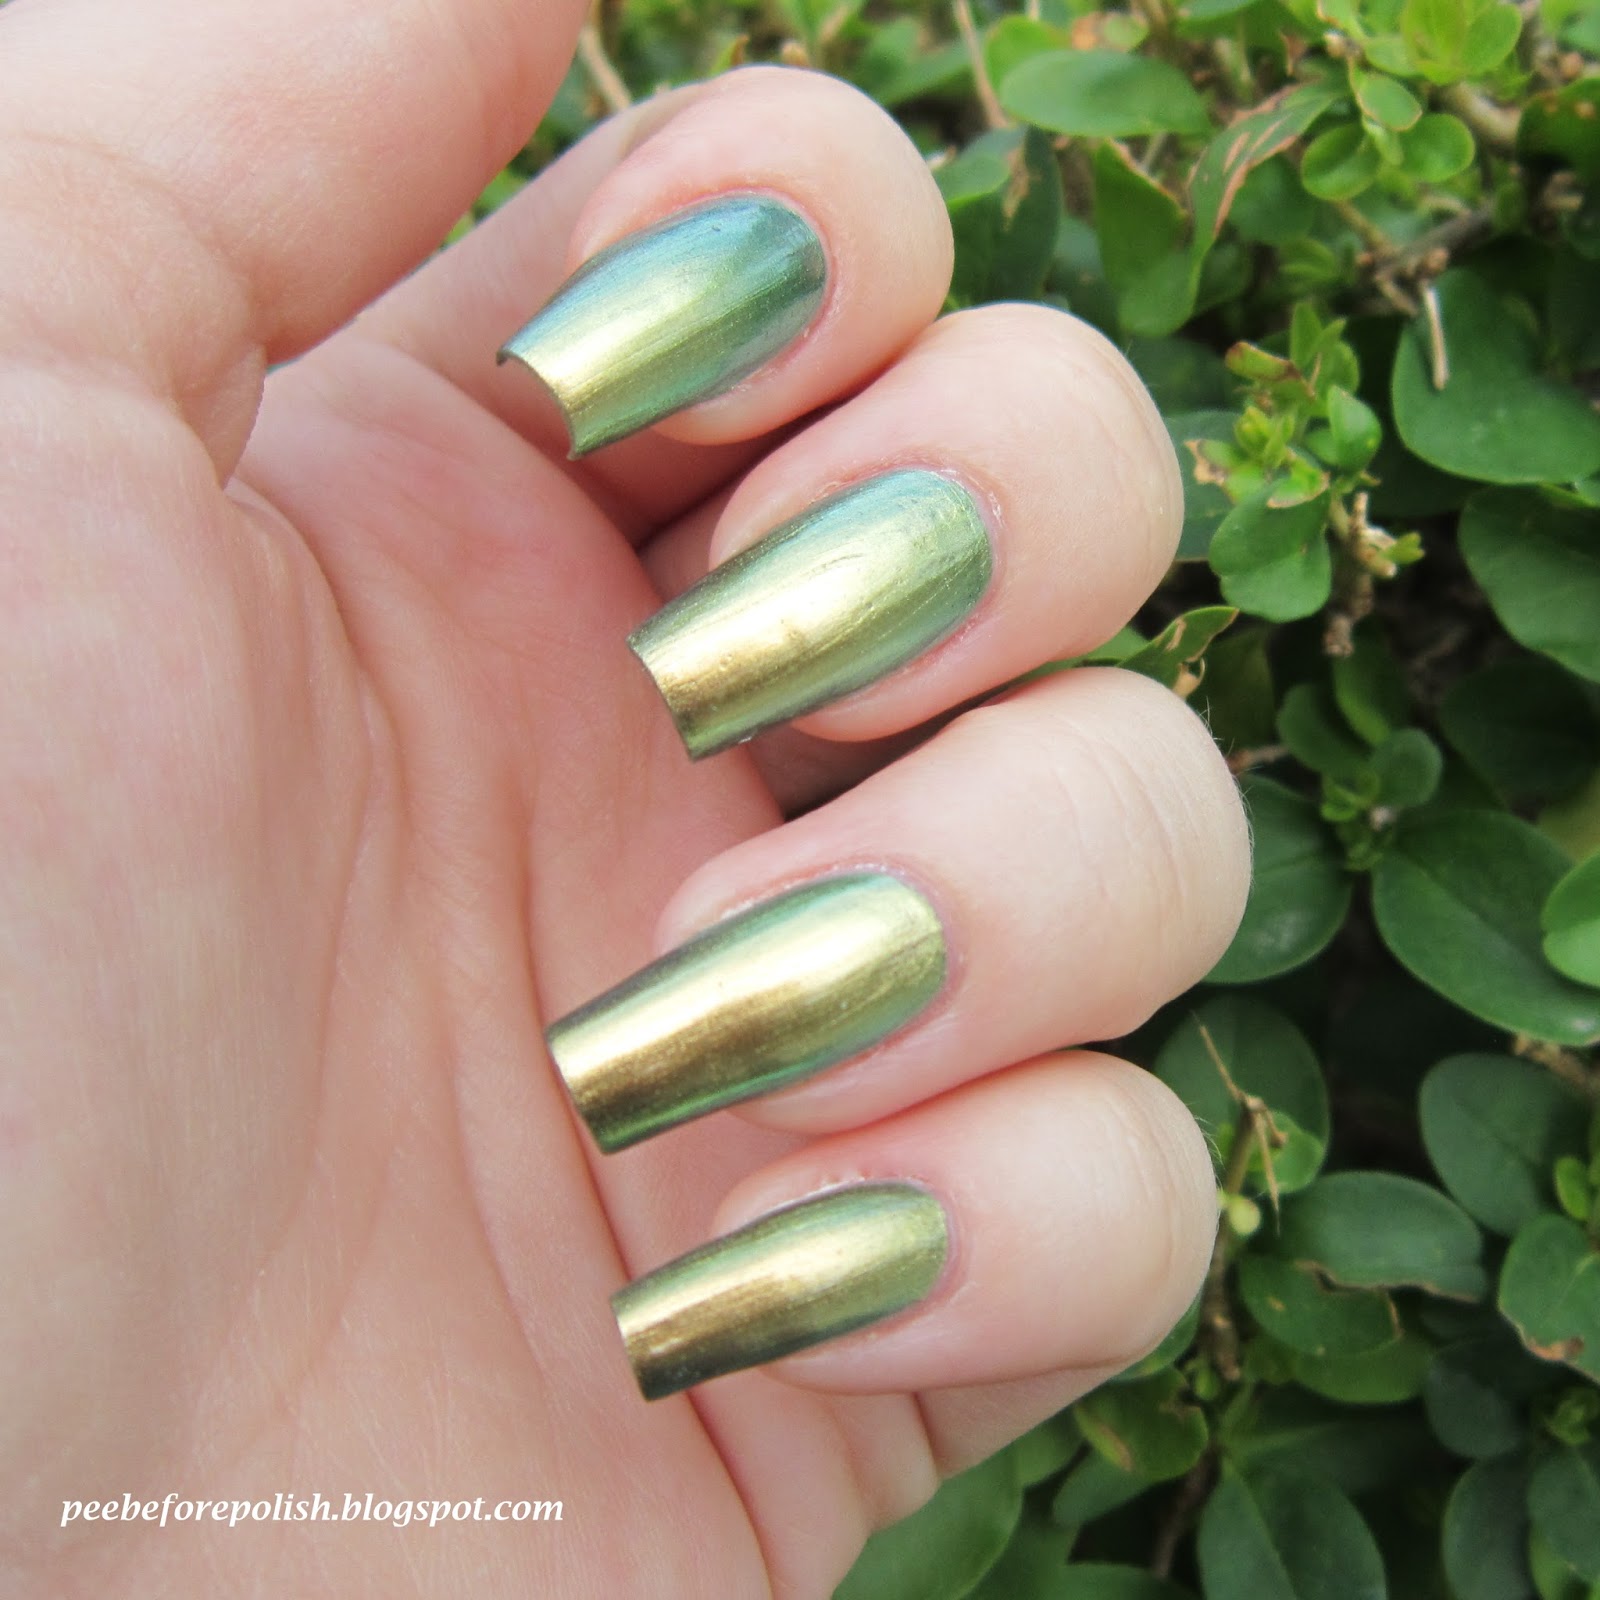
Gilded Pleasure fa parte di quella numerosa famiglia di duochrome verde-oro (con un tocco di azzurro) simili (se non identici) al famoso Chanel Péridot.
Gilded Pleasure è coprente in due passate molto sottili, si applica con facilità, asciuga rapidamente e... Ovviamente dura davvero un sacco!
Se foste interessate ad avere più info sulla linea Vinylux e vi foste perse i miei post precedenti, eccoli qua:
- post introduttivo
- foto e recensione completa
- video-recensione sul mio canale You Tube.
Vi abbraccio, ma non troppo strette viste le temperature bollenti, e vi dò appuntamento a prestissimo!

Hi ladies!
Today I'm going to show you the nail polish I wore during my trip to Lisbon, that's CND Vinylux Gilded Pleasure. I didn't want to do my nails during that holiday, so I decided to wear a nail polish which has a very high longevity.

Gilded Pleasure is one of the many Chanel Péridot dupes (or Péridupe if you prefer) with a strong green-gold duochrome effect (with a slight touch of turquoise).
Gilded Pleasure applies easily and nicely, it is opaque in two thin coats, it dries fast and, of course, has an excellent longevity too!
If you're interested in more info about Vinylux products and you missed my previous post, here they are:
- introduction
- swatches and review
- video review on my You Tube Channel (in Italian only).
That's all I have for you today, thank you for reading and watching and have a nice evening!


Applicazione / Application
4.75/5
Asciugatura / Drying time
4.75/5
Coprenza / Pigmentation
4.75/5
Durata / Longevity
5/5
GIUDIZIO FINALE / OVERALL
4.75/5

***Il prodotto del post mi è stato inviato a scopo recensione da Ladybird House, distributore italiano di CND***
***The product of the post was sent me for review by CND Italian distributor***

venerdì 2 agosto 2013

Holothon #07: Depend Holographic #2036 Ocean Green

Ciao ragazze!
Questo è il primo post "in diretta" che scrivo da un po' di tempo a questa parte, eheheh. Vorrei ringraziare tutte quelle che sulla mia pagina Facebook o nei commenti dello scorso post si sono preoccupate per la sorte dei miei bagagli e rassicurarle, sono arrivati a casa sani e salvi anche se lerci, zozzi ed inclusivi di impronte di scarpe. Non mancava niente e solo un paio di oggetti sono stati leggermente danneggiati ma nulla di grave.
[per chi si fosse persa i miei piagnistei: al ritorno da Lisbona non hanno imbarcato sull'aereo le nostre valigie, le hanno lasciate a vegetare nell'area bagagli dell'aeroporto... Bruttissima sensazione vedere il nastro trasportatore vuoto, tutti che se ne sono andati via coi loro bagagli, e te lì come una povera stronza!!!!!]
Comunque, giornata di holo, per cui rieccomi con un Depend Holographic, il 2036, un bell'azzurro intenso. Depend è una marca assai economica (questo l'ho pagato sui 2.50€) dal formato piccino picciò (5 ml), e devo dire che i loro holo linear spaccano, l'effetto è davvero assai evidente!
La texture è jelly, e difatti ci sono volute tre mani per la coprenza delle foto, anche se poi non asciuga in modo particolarmente lucido. Nulla da eccepire sulla stesura, liscia come l'olio anche senza base apposita, e sui tempi di asciugatura, davvero rapidi. Sono soddisfatta anche della durata.
Tuttavia questo smalto non è riuscito a convincermi appieno; forse sono rimasta delusa dal colore, che è sì bello, ma negli swatches che avevo trovato in giro prima di acquistarlo appariva come un bel verde acqua!!!!!
Insomma, da un lato non posso lamentarmi della qualità, dall'altra continuo ad avere un po' di amaro in bocca perché non è come me lo aspettavo.
E anche per oggi è tutto, vi lascio alle scelte delle altre smaltare pazze e vi auguro un buon week-end!

Hello girls! 
This is the first "live" post I write after a bit of time! 
Firstly, I would like to thank all those lovely girls who wrote me on my Facebook page or in the comments of my last post and were worried about the fate of my luggage. I'd like to reassure them, my bags finally arrived at home safe even if dirty and filthy and there were footprints over them. Nothing was missing and only a couple of items were slightly damaged but nothing serious. 
[for those who had lost my whining after my return from Lisbon: they lost our bags, and then we discovered that they didn't board them on our plane... It's a very bad feeling to see the empty conveyor belt, all the other passengers gone with their luggage, and you stay there like a poor bitch!!] 
However, you know that on Friday we wear holos, so here I am with a Depend Holographic, #2036, a beautiful and intense light blue. 
Depend is a very cheap brand (around € 2.50 per polish); the bottle size is quite small (5 ml), and I must say that their holo polishes rock, the rainbow effect is really amazing! 
This polish has a jelly texture, and in fact it took three coats for the coverave of my pics; anyway, this polish does not dry with that super glossy finish typical of jellies. Nothing to complain about application, which is smooth and easy even without an aqua or rubberized base coat, and the drying time is really fast. I am satisfied with its longevity too. 
However, Depend #2036 has failed to fully convince me, maybe I was disappointed by the color, which is so beautiful but it isn't what I expected: in the swatches that I saw before buying it, it looked like a beautiful aqua green, and not a light blue one!! 
In short, on the one hand I cannot complain about its quality and its price, but on the other hand I still have a little bitter taste in my mouth because it is not what I expected. And that's all I have for you today, don't forget to take a look at the other ladies' entries and have a wonderful week-end! 


Applicazione / Application
5/5
Asciugatura / Drying time
4.5/5
Coprenza / Pigmentation
3.5/5
Durata / Longevity
4.5/5
GIUDIZIO FINALE / OVERALL
4.25/5