Ciau a tutte!
Finalmente sono in pari con la ABC Challenge, e ciò implica che oggi vi presento la lettera GGGGG!
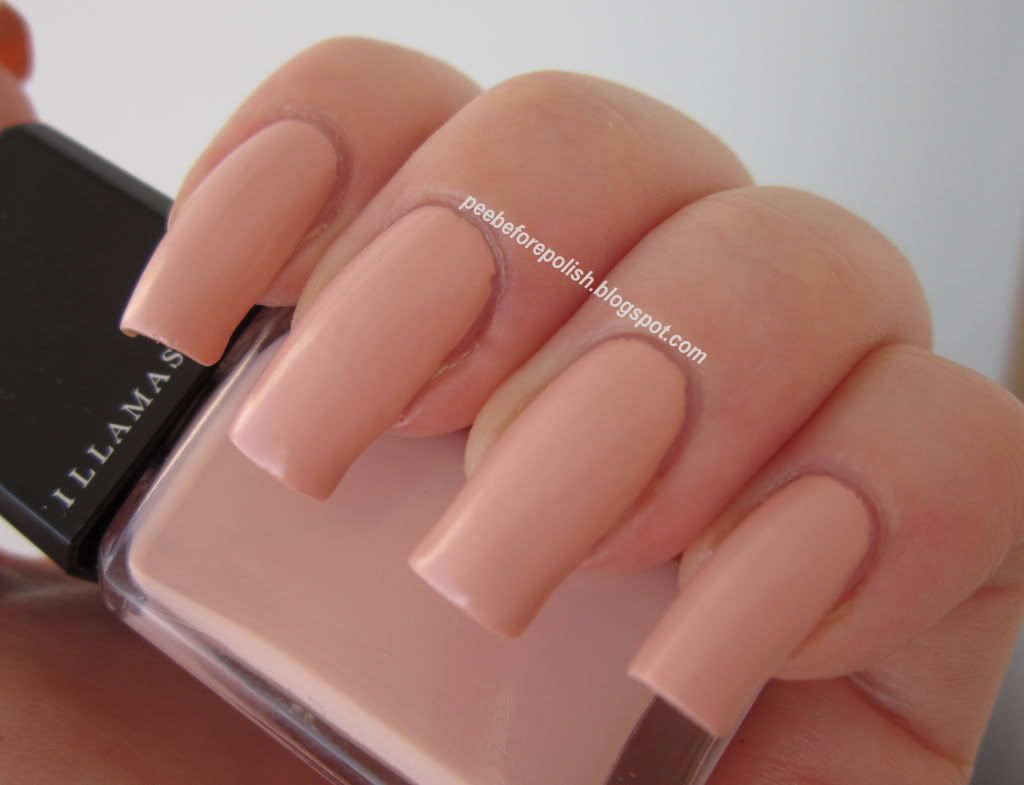
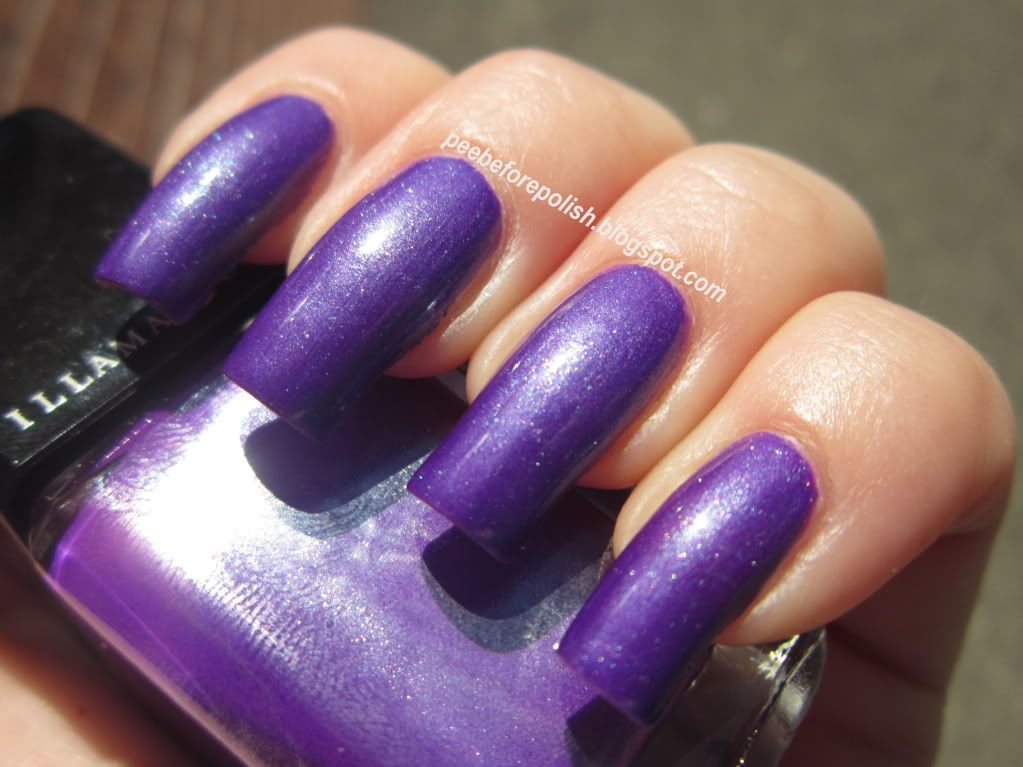
G che sta per il Glitterati di Illamasqua, uno smalto che ho molto amato finché... Non mi sono lavata i capelli. Eeeeeh? No, non sono impazzita. Giuro che tutto ciò ha un senso. Ma andiamo per ordine.
Visualizzazione post con etichetta Illamasqua. Mostra tutti i post
lunedì 22 febbraio 2016
domenica 28 giugno 2015
Stamping time: Tropical Neon Flowers
Ciao a tutte!
Purtroppo anche questo week-end estivo è finito. Io continuo a sognare spiagge tropicali, ma sono incastrata nel cemento della città, per cui ho deciso di portare per lo meno i Tropici sulle mie unghie!
Etichette:
China Glaze,
Green,
Illamasqua,
Konad,
MoYou London,
Neon,
Stamping,
Yellow
giovedì 2 aprile 2015
Happy Easter Nail Art
Buonasera a tutte!
Innanzitutto voglio scusarmi per essere incredibilmente indietro coi commenti, sono stati giorni impegnativi. Anche ora vado particolarmente di fretta, per cui, senza troppi fronzoli, ecco a voi la mia nail art pasquale!
Etichette:
Blue,
Illamasqua,
Nail art,
Purple,
SdP Plates,
Stamping,
Water Marble,
Zoya
giovedì 11 dicembre 2014
Review: Illamasqua Light Liquid Foundation [in #150]
Raramente ho atteso tanto per scrivere una review quanto col prodotto del giorno, l'Illamasqua Light Liquid Foundation (nella colorazione #150, per pelli medio-chiare con sottotono rosa). Dopo parecchie settimane ho infine deciso: il mio rapporto con lui è di amore-odio.
mercoledì 18 giugno 2014
Review: Illamasqua Atomic Lipstick
Buonasera a tutte!
Di solito mostro rossetti solo in occasione del Discontinued Day, ma sono sicura che mi perdonerete quest'eccezione perché si tratta di un prodotto davvero... Atomico, come dice il suo stesso nome.
Insomma, sto parlando dell'Illamasqua Atomic, collezione Toxic Nature della primavera/estate 2011.
giovedì 13 febbraio 2014
GOT Challenge #6: Valentine's! [Hearts Water Marble]
Hi ladies!
Today's theme for GOT Challenge is Valentine's, and I decided to create a heart shaped water marble! The original idea comes from this video by Colette.
Etichette:
Essence,
Illamasqua,
Nail art,
Pink,
Purple,
Water Marble
domenica 1 dicembre 2013
November Empties
Per me il 1 dicembre significa solo una cosa: l'attivazione del countdown per il Natale. Pur nel mio ateismo conclamato e consolidato, adoro questa festività, per i piacevoli ricordi passati che mi scatena, e perché significa che finalmente posso tornare a casa dai miei cari per un po' di giorni.
In ogni caso, è anche il momento di fare il mio bilancio novembrino dei prodotti terminati. Eccoli qua:
Etichette:
Essence,
Illamasqua,
Lush,
Monthly Empties
venerdì 22 novembre 2013
Illamasqua Viridian
Ciao ragazze
e buon venerdì sera! Oggi vi mostro uno smalto Illamasqua che ho ricevuto come extra in uno swap, il Viridian. Smalto che, purtroppo, mi ha delusa un tantino.
Etichette:
Green,
Illamasqua,
Shimmer
mercoledì 13 novembre 2013
Mish Mash Challenge #16: FAUX STONE [Labradorite Nail Art]
Etichette:
Catrice,
China Glaze,
Green,
Illamasqua,
Kiko,
Mish Mash Challenge,
Nail art
domenica 10 novembre 2013
Review: Illamasqua Cream Foundation in #120
Anche la storia d'amore più travolgente può attraversare dei momenti critici. E questo è quanto è accaduto tra me ed Illamasqua.
Possiedo davvero un numero consistente di loro prodotti, con un buon range a livello di tipologia (fondotinta, blush, pigmenti, ombretti in crema e compatti, rossetti e lipgloss). Ad eccezione di uno smalto, che non mi ha entusiasmata, con tutto il resto è stato puro amore a prima vista.
Questa love story all'apparenza perfetta ha subito un brusco stop dopo aver provato questo prodotto, il Cream Foundation (colorazione 120, per pelli chiare con sottotono rosa).
Il packaging è semplicemente splendido: classico nero lucido, con attenzione maniacale ai dettagli, e spugnetta quadrata con nome e logo del brand. Include un ampio specchio. E fin qui, tutto perfetto.
Ma il prodotto in sé... Non ci siamo proprio. Innanzitutto la texture è davvero pesante e difficile da lavorare. In secondo luogo, a prescindere dal metodo di applicazione (pennello da fondo o spugnetta inclusa), il prodotto sembra non riuscirsi a fondersi bene con la pelle, creando delle chiazze ed andando a sottolineare le imperfezioni anziché nasconderle o minimizzarle. O addirittura le crea dal nulla: come potete vedere nella foto sottostante, si deposita in maniera talmente strana che sembra che io abbia una pelle super secca e costellata di pellicine, quando invece io ho la pelle normale tendente al misto e, qui in particolare, avevo appena effettuato una maschera purificante e un accurato scrub. Inoltre sottolinea ogni minima rughetta di espressione ed evidenzia i pori in una maniera invereconda.
Dopo poche ore dall'applicazione, e sebbene io abbia sempre applicato una cipria opacizzante, tende a lucidarsi e a creare ulteriori spot di colore, insomma scordatevi un incarnato uniforme.
Dovrebbe fornire una coprenza medio-alta, ma secondo me è impossibile ottenerla, perché più prodotto si applica, più tenderanno a formarsi queste chiazze di colore in certi punti, e non c'è proprio modo di sfumarle e fonderle bene con l'incarnato.
L'unico modo per ottenere un risultato pseudo-decente è usare il prodotto in quantità minime (e ciao ciao alla coprenza) e lavorarlo in piccole aree e con movimenti circolari... Ma francamente l'idea di metterci 10-15 minuti per applicare un fondotinta che comunque non mi dà una resa soddisfacente e si lucida in modo sconvolgente dopo 2-3 ore non è affatto esaltante.
In conclusione: no, no ed ancora no. Da un brand come Illamasqua, con prezzi non certo bassi (ma per fortuna io questo l'ho acquistato in saldo a 10£), non me l'aspettavo proprio. Soprattutto dopo aver usato, ed essermi perdutamente innamorata, del loro Liquid Foundation.
E con questa sòla vi saluto e vi dò appuntamento a presto!
Even the most passionate love story can cross critical moments. And this is what happened between Illamasqua and me.
I have a large number of their products: foundations, a blush , pigments, cream and compact eyeshadows, lipsticks and lipglosses. With every single item (with the exception of a nail polish, which partially disappointed me) it was pure love at first sight.
This apparently perfect love story has sharply stopped when I started using the product of the day, Illamasqua Cream Foundation (in 120, for light skin with pink undertones).
Its packaging is simply beautiful: a black and shiny plastic box in the typical Illamasqua shape. It includes a big mirror and a square sponge with Illamasqua logo. So far, so good.
But let's talk about the product itself... OMG, what a disaster!
Firstly, the texture is very heavy and thick and difficult to work with. Secondly, it's difficult to blend into the skin or to apply it uniformly; it creates patches and spots of colour and it points out my flaws rather than hide or minimize them. I tried to apply it both with a foundation brush and with the included sponge, but no way.
It even creates flaws and imperfection from nothing: as you can see in the picture below, there are strange spots on my skin and it seems that I have super dry skin with wild pellicles. NO. I have normal-combination skin and, before taking that picture and applying the foundation, I had just done a purifying face mask and an accurate scrub. Moreover, this foundation creeps into all the little lines under my eyes and around my mouth and attaches to dry spots.
After a few hours my skin becomes shiny and oily, although I always use a mattifying powder.
This foundation should provide a medium-full coverage, but I think it is impossible to obtain this coverage, because it isn't buildable: the more you apply, the more it will tend to form these patches and spots of colour in some areas.
The only way to get a pseudo-decent result is to apply it in small quantities (and farewell medium-full coverage!), working in sections to stipple it onto the skin and very slightly blending out that section with circular motions...
It takes me approx. 10-15 minutes to apply this foundation in that way, and it still does not give me a satisfactory result. After 2 or 3 hours, my skin again looks shiny and oily.
In conclusion: no, no and again... NO! Luckily I paid "only" 10£ for Cream Foundation because it was on sale, but I didn't expect such an awful product from a brand like Illamasqua. Expecially because they proved me that they could do amazing and perfect foundations (I tried their Liquid Foundation and it's one of the best foundation ever!).
So... Thank you for reading this super long review and talk to you soon!
Etichette:
Foundation,
Illamasqua,
Worst products ever
lunedì 19 agosto 2013
Illamasqua Scorn
Ciao a tutte!
Sono tornata da poco dalle ferie e, oltre ad essere sul depresso-andante, sono anche stanca morta... Per cui, per il post di stasera ho deciso di vincere facile e mostrarvi uno smalto così di qualità da necessitare di pochi commenti.
L'Illamasqua Scorn, che avete già visto in azione nella mia manicure a tema Metallic dello scorso mercoledì, è uno splendido nero pece dal finish matte/rubber coprente in una sola passata. Si stende meravigliosamente e asciuga in fretta, e anche la durata è veramente ottima.
Forse non sarà uno smalto prettamente estivo, ma di certo è da avere!
E anche per oggi è tutto, vi auguro una splendida serata!
Hi ladies!
I just came back home after one week of holidays and relax. I'm a bit depressed and also super tired, so for today's post I picked a nail polish which doesn't need many words to be described.
Illamasqua Scorn, that you already saw in action in my Metallic manicure of last Wednesday, is a gorgeous pitch black with a matte/rubber finish.
In my pics you can see just one coat of polish.
It applies super easily and dries fast too. Moreover, it has a very good longevity.
Maybe it's not a summer polish, but IMO Illamasqua Scorn is a must have!
That's all I have for you today, thank you for reading and watching and have a nice evening!
Sono tornata da poco dalle ferie e, oltre ad essere sul depresso-andante, sono anche stanca morta... Per cui, per il post di stasera ho deciso di vincere facile e mostrarvi uno smalto così di qualità da necessitare di pochi commenti.
L'Illamasqua Scorn, che avete già visto in azione nella mia manicure a tema Metallic dello scorso mercoledì, è uno splendido nero pece dal finish matte/rubber coprente in una sola passata. Si stende meravigliosamente e asciuga in fretta, e anche la durata è veramente ottima.
Forse non sarà uno smalto prettamente estivo, ma di certo è da avere!
E anche per oggi è tutto, vi auguro una splendida serata!
Hi ladies!
I just came back home after one week of holidays and relax. I'm a bit depressed and also super tired, so for today's post I picked a nail polish which doesn't need many words to be described.
Illamasqua Scorn, that you already saw in action in my Metallic manicure of last Wednesday, is a gorgeous pitch black with a matte/rubber finish.
In my pics you can see just one coat of polish.
It applies super easily and dries fast too. Moreover, it has a very good longevity.
Maybe it's not a summer polish, but IMO Illamasqua Scorn is a must have!
That's all I have for you today, thank you for reading and watching and have a nice evening!
| Applicazione / Application |
5/5
|
| Asciugatura / Drying time |
4.5/5
|
| Coprenza / Pigmentation |
5/5
|
| Durata / Longevity |
4.5/5
|
| GIUDIZIO FINALE / OVERALL |
4.75/5
|
mercoledì 14 agosto 2013
Mish Mash Challenge #03: METALLIC
Hi ladies and welcome back to the third appointment with Mish Mash Challenge!
Today's theme is metallic, and I decided to play a bit with different finishes and with the studs of my Born Pretty Store set.
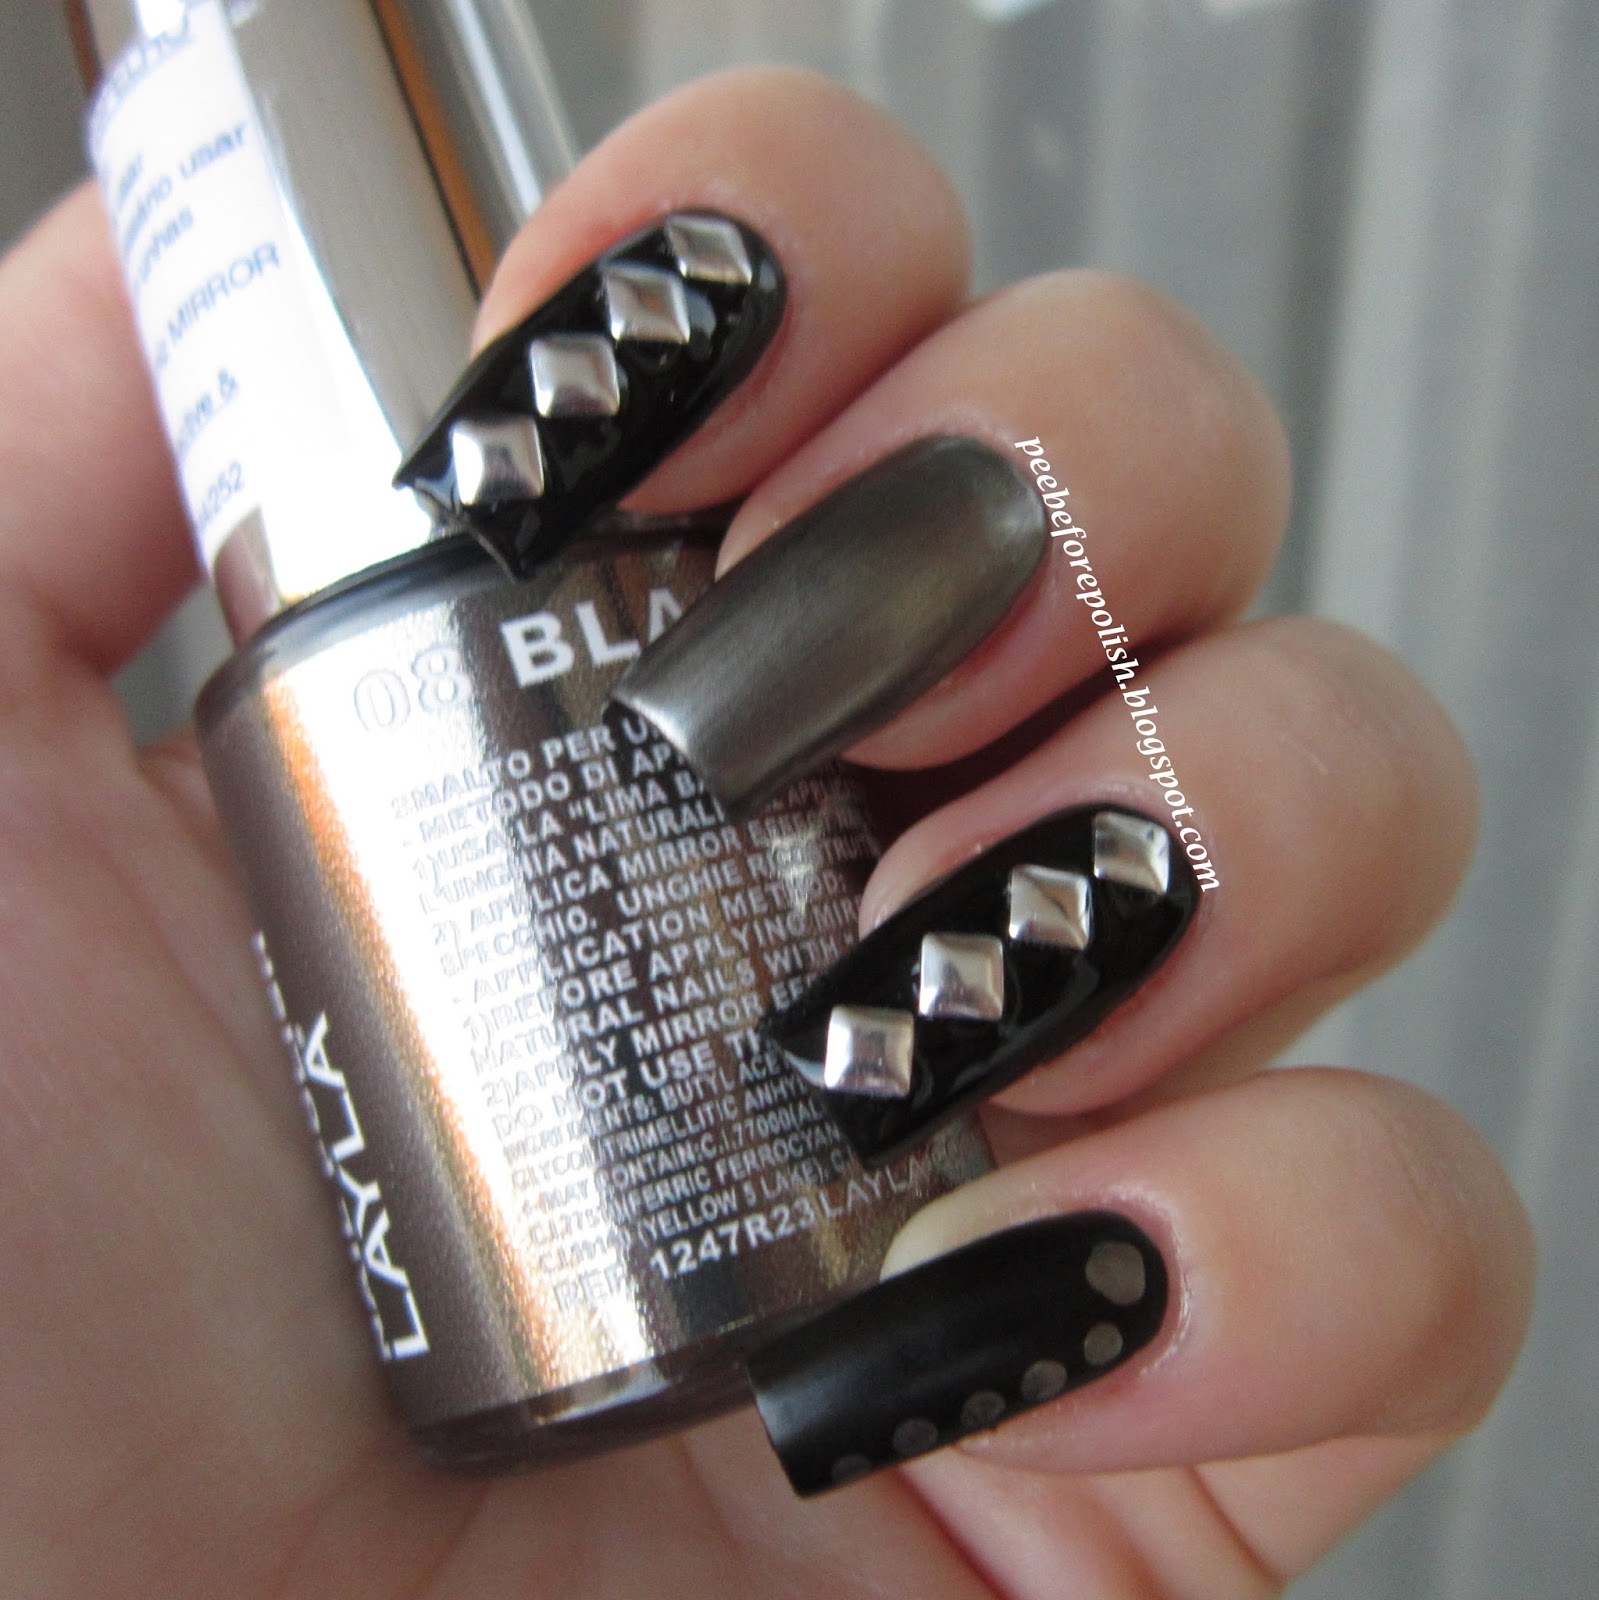
I started with painting my nails with just one coat of Illamasqua Scorn, a beautiful intense black with a matte/rubber finish. Then I added some squared, silver studs on my index and ring fingers. I used Seche Vite to seal the little stones and to give a glossy touch to my nails too.
On my middle finger I applied just one coat of Layla Black as Ebony, which has a chrome/mirror finish. I used this same polish to create a couple of simple dots on my pinkie. I didn't apply a top coat here because I wanted to keep the original matte aspect of Illamasqua Scorn.
So we have three different finishes in a super simple and easy-to-do manicure!
That's all I have for you today, don't forget to take a look at the entries of the other ladies and have a nice evening!
Ciao a tutte e ben ritrovate con la terza puntata della Mish Mash Challenge!
Per il tema di oggi, Metallic, ho deciso di giocare con diversi finish e con le borchiette del mio kit di Born Pretty Store.
Per prima cosa ho steso una mano di Illamasqua Scorn, un fantastico nero dal finish matte/gommoso. Poi, solo su indice e anulare, ho aggiunto qualche borchia argentata, sigillando tutto col Seche Vite non solo per rendere la manicure più duratura, ma anche per dare un aspetto glossy allo smalto. Sul medio, invece, ho aggiunto una mano del cromato Layla Black as Ebony (che si applica una meraviglia sopra lo Scorn, molto meglio che su una base vera e proprio o direttamente sull'unghia nuda!). Con lo stesso smalto ho poi disegnato qualche puntino sul mignolo. Niente top coat qui, volevo mantenere inalterato il finish originario dello Scorn.
In questo modo, in una manicure semplice e veloce da realizzare, ho racchiuso ben tre finish!
E anche per oggi è tutto, vi auguro uno splendido Ferragosto e vi dò appuntamento a presto!
Today's theme is metallic, and I decided to play a bit with different finishes and with the studs of my Born Pretty Store set.
I started with painting my nails with just one coat of Illamasqua Scorn, a beautiful intense black with a matte/rubber finish. Then I added some squared, silver studs on my index and ring fingers. I used Seche Vite to seal the little stones and to give a glossy touch to my nails too.
On my middle finger I applied just one coat of Layla Black as Ebony, which has a chrome/mirror finish. I used this same polish to create a couple of simple dots on my pinkie. I didn't apply a top coat here because I wanted to keep the original matte aspect of Illamasqua Scorn.
So we have three different finishes in a super simple and easy-to-do manicure!
That's all I have for you today, don't forget to take a look at the entries of the other ladies and have a nice evening!
Ciao a tutte e ben ritrovate con la terza puntata della Mish Mash Challenge!
Per il tema di oggi, Metallic, ho deciso di giocare con diversi finish e con le borchiette del mio kit di Born Pretty Store.
Per prima cosa ho steso una mano di Illamasqua Scorn, un fantastico nero dal finish matte/gommoso. Poi, solo su indice e anulare, ho aggiunto qualche borchia argentata, sigillando tutto col Seche Vite non solo per rendere la manicure più duratura, ma anche per dare un aspetto glossy allo smalto. Sul medio, invece, ho aggiunto una mano del cromato Layla Black as Ebony (che si applica una meraviglia sopra lo Scorn, molto meglio che su una base vera e proprio o direttamente sull'unghia nuda!). Con lo stesso smalto ho poi disegnato qualche puntino sul mignolo. Niente top coat qui, volevo mantenere inalterato il finish originario dello Scorn.
In questo modo, in una manicure semplice e veloce da realizzare, ho racchiuso ben tre finish!
E anche per oggi è tutto, vi auguro uno splendido Ferragosto e vi dò appuntamento a presto!
Etichette:
Black,
Born Pretty Store,
Chrome,
Illamasqua,
Layla,
Mish Mash Challenge,
Nail art
mercoledì 8 maggio 2013
ABC Challenge: R for Reciprocal Gradient Nail Art
Hi ladies!
Today I'm going to show you a nail art which was inspired by this tutorial. Colette is probably my favourite youtuber ever, she's known as the Water Marble Goddess but she also creates other fabulous designs.
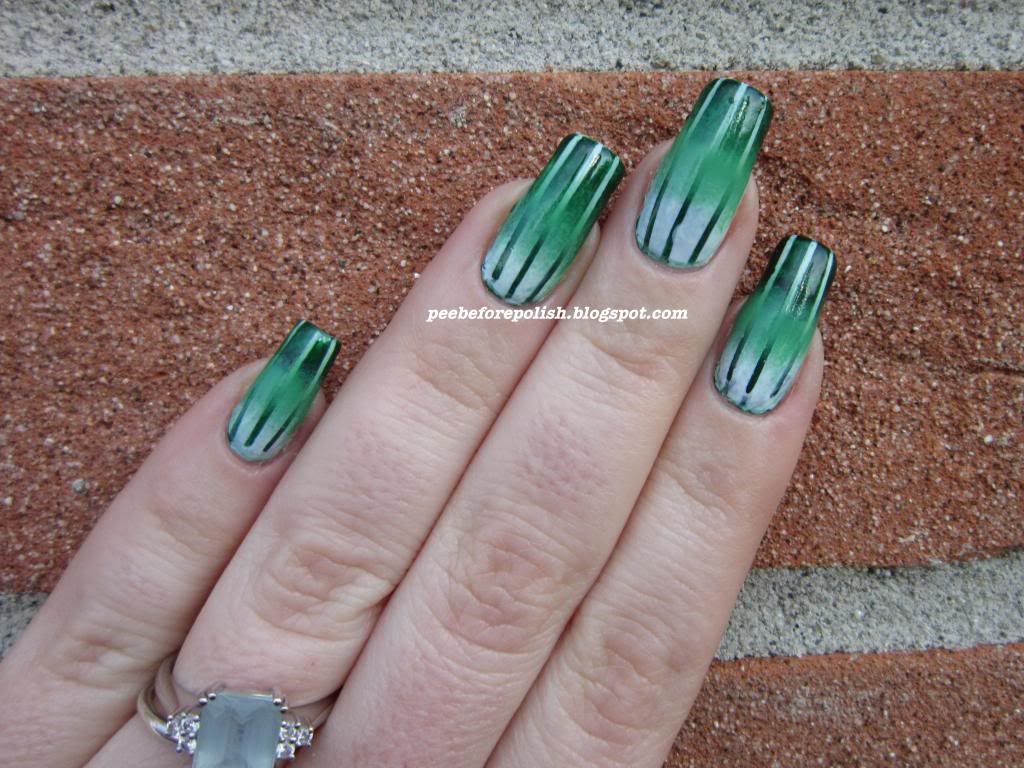
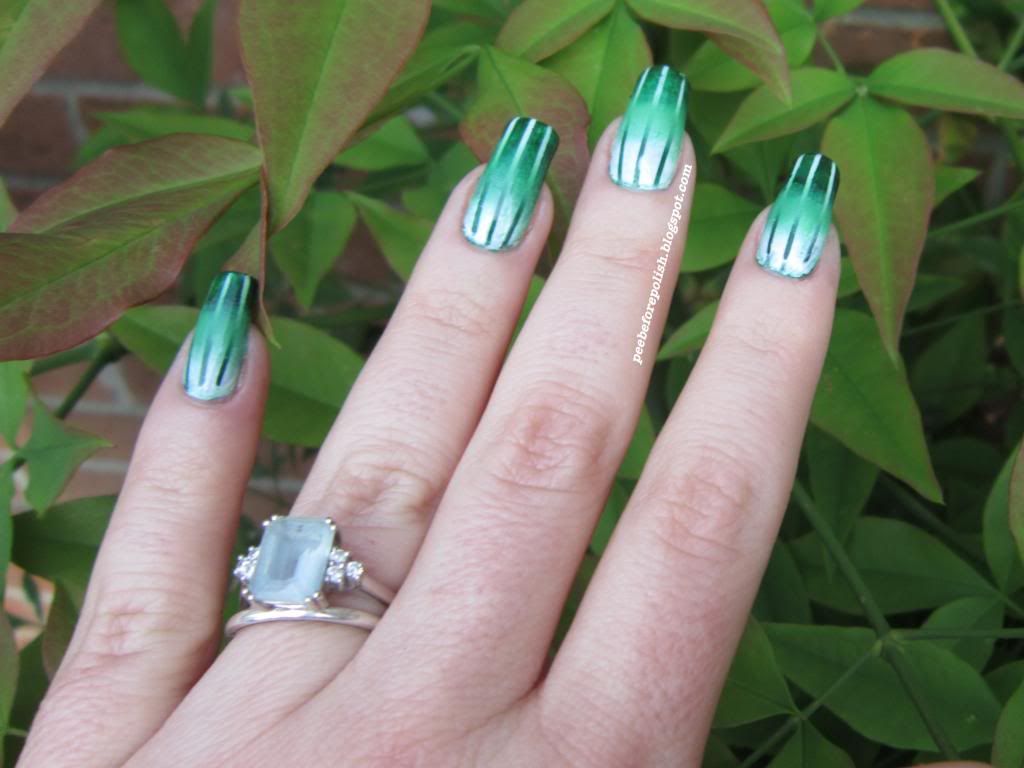
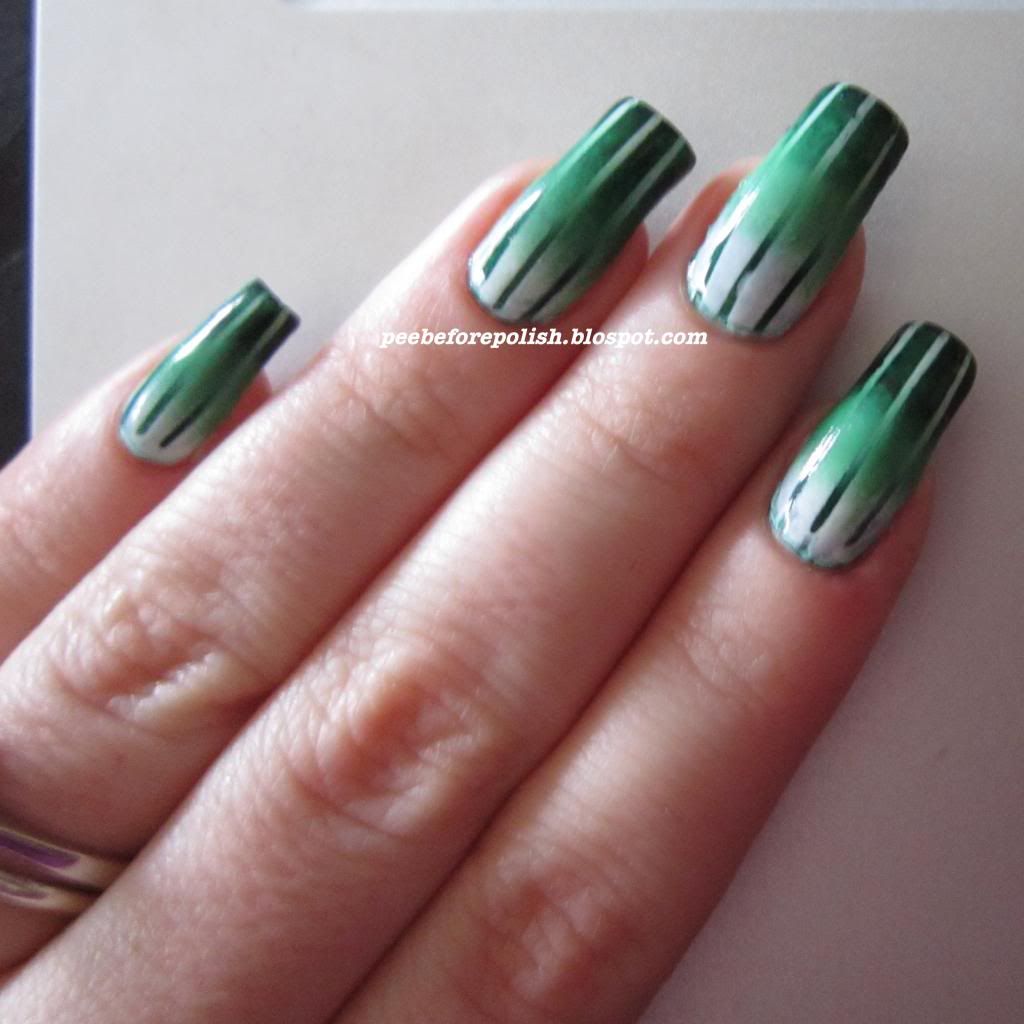
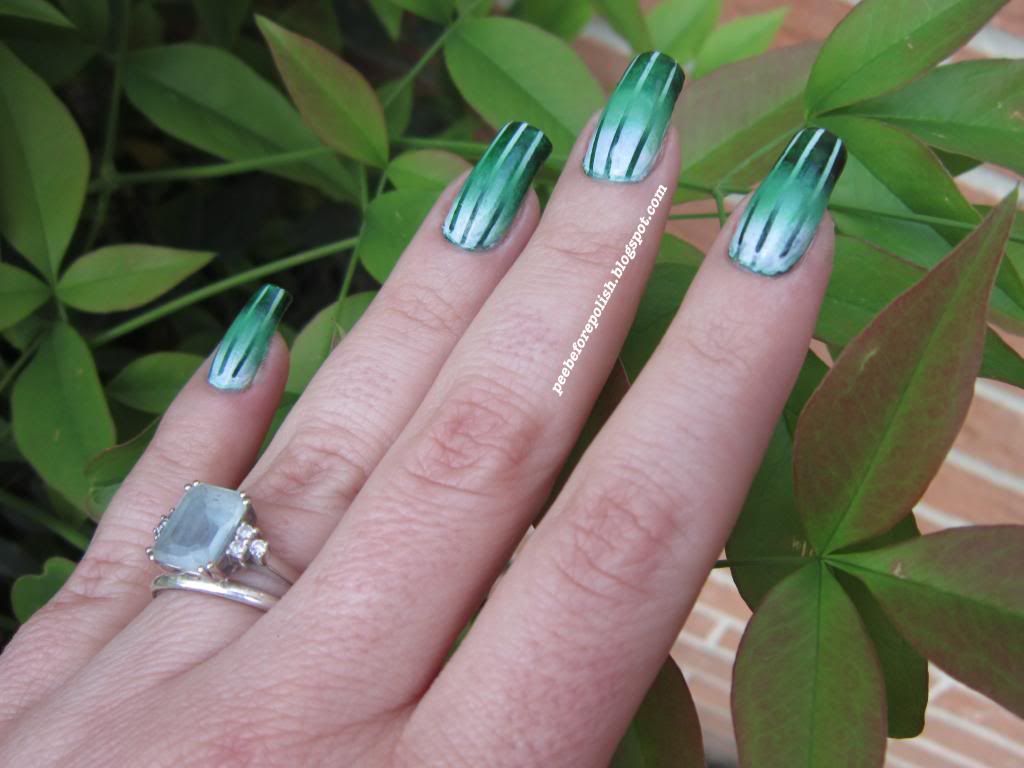
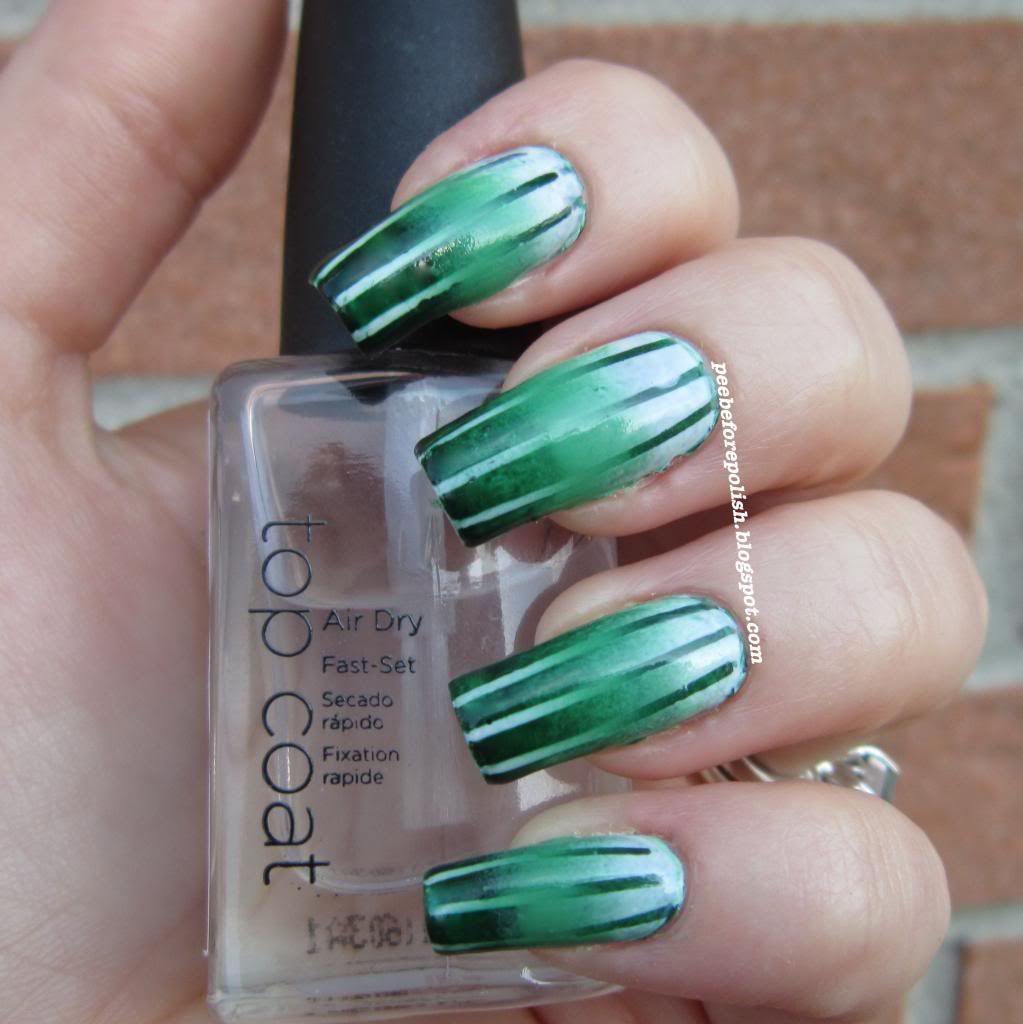
Anyway, for my version of Reciprocal Gradient nail art I decided to use green as predominant color. The dark green is Rampage by Illamasqua, the lighter green is Mojito Madness by Essie and I used a cheap polish by the Italian brand Chic for the white.
Since Colette did a perfect tutorial, I won't explain how I did this nail art, but I'd like to share a couple of considerations. This nail art is not that difficult, but it's really, really time consuming and you have to be extremely patient. Take your time. I will repeat it again: you'll need a LOT of time.
I think it looks best on long nails, but if you have medium nails you can try with two colors instead of three. I also think that the best results can be obtained with creme polishes: in my opinion it will be difficult to show a neat and clean gradient contrast with other finishes.
I really, really like the final result. Now I'd like to play with many other colors! Maybe blue, purple, pink or red...!
Hope you like it too, thank you for reading and watching and... Have a nice day!
Ciao ragazze!
Oggi vi propongo un'altra nail art che ho realizzato seguendo questo tutorial di Colette, conosciuta come regina indiscussa della water marble, ma che è bravissima anche con altri design.
Per la mia versione di Reciprocal Gradient ho deciso di usare il verde come colore predominante: il verde più scuro è Rampage di Illamasqua, il verde più chiaro è Essie Mojito Madness mentre per il bianco ho optato per l'italica ed economica Chic (una volta si trovava da Acqua&Sapone al solito prezzo di 0.99€, ma ormai non la vedo più da un pezzo).
Dal momento che c'è già un tutorial fantastico di Colette non mi dilungherò sul procedimento (anche se spero di farne uno a mia volta in italiano), ma vorrei aggiungere un paio di considerazioni. Non si tratta di una nail art difficilissima, ma per realizzarla servono un casino di tempo e pazienza. Lasciatemelo ripetere: se avete intenzione di riprodurla, prendetevi TANTO, TANTO tempo.
Credo altresì che sia una nail art che rende al meglio sulle unghie lunghe, se le avete medie provate semmai a giocare con due colori anziché tre. Infine, nella mia opinione è meglio usare smalti creme, dal momento che altri finish più "accessoriati" potrebbero non far rendere al meglio il dettaglio del contrasto delle due gradient.
A me il risultato finale ha fatto letteralmente impazzire, tanto da farmi indulgere nell'insano proposito di ricrearla in blu, rosso, rosa, viola...!
Spero sia piaciuta anche a voi, grazie per la visita e... Buona giornata!
Today I'm going to show you a nail art which was inspired by this tutorial. Colette is probably my favourite youtuber ever, she's known as the Water Marble Goddess but she also creates other fabulous designs.
Anyway, for my version of Reciprocal Gradient nail art I decided to use green as predominant color. The dark green is Rampage by Illamasqua, the lighter green is Mojito Madness by Essie and I used a cheap polish by the Italian brand Chic for the white.
Since Colette did a perfect tutorial, I won't explain how I did this nail art, but I'd like to share a couple of considerations. This nail art is not that difficult, but it's really, really time consuming and you have to be extremely patient. Take your time. I will repeat it again: you'll need a LOT of time.
I think it looks best on long nails, but if you have medium nails you can try with two colors instead of three. I also think that the best results can be obtained with creme polishes: in my opinion it will be difficult to show a neat and clean gradient contrast with other finishes.
I really, really like the final result. Now I'd like to play with many other colors! Maybe blue, purple, pink or red...!
Hope you like it too, thank you for reading and watching and... Have a nice day!
Ciao ragazze!
Oggi vi propongo un'altra nail art che ho realizzato seguendo questo tutorial di Colette, conosciuta come regina indiscussa della water marble, ma che è bravissima anche con altri design.
Per la mia versione di Reciprocal Gradient ho deciso di usare il verde come colore predominante: il verde più scuro è Rampage di Illamasqua, il verde più chiaro è Essie Mojito Madness mentre per il bianco ho optato per l'italica ed economica Chic (una volta si trovava da Acqua&Sapone al solito prezzo di 0.99€, ma ormai non la vedo più da un pezzo).
Dal momento che c'è già un tutorial fantastico di Colette non mi dilungherò sul procedimento (anche se spero di farne uno a mia volta in italiano), ma vorrei aggiungere un paio di considerazioni. Non si tratta di una nail art difficilissima, ma per realizzarla servono un casino di tempo e pazienza. Lasciatemelo ripetere: se avete intenzione di riprodurla, prendetevi TANTO, TANTO tempo.
Credo altresì che sia una nail art che rende al meglio sulle unghie lunghe, se le avete medie provate semmai a giocare con due colori anziché tre. Infine, nella mia opinione è meglio usare smalti creme, dal momento che altri finish più "accessoriati" potrebbero non far rendere al meglio il dettaglio del contrasto delle due gradient.
A me il risultato finale ha fatto letteralmente impazzire, tanto da farmi indulgere nell'insano proposito di ricrearla in blu, rosso, rosa, viola...!
Spero sia piaciuta anche a voi, grazie per la visita e... Buona giornata!
Etichette:
ABC Challenge 2013,
Creme,
Essie,
Green,
Illamasqua,
Nail art,
White
mercoledì 6 marzo 2013
ABC Challenge: I for Illamasqua Rampage
Hi ladies
and welcome back to our ABC Challenge! For today's post I picked a nail polish I used a few weeks ago for a glitter gradient: Illamasqua Rampage. I'm really sorry for this, but during last week-end I was very busy - I created two different and time consuming nail arts for the final post of Rainbow Thursdays - and I didn't have the time to paint my nails with a new nail polish, test its quality and take good pics.
Anyway I think that Rampage is soooo beautiful that it deserves an entire and dedicated post.
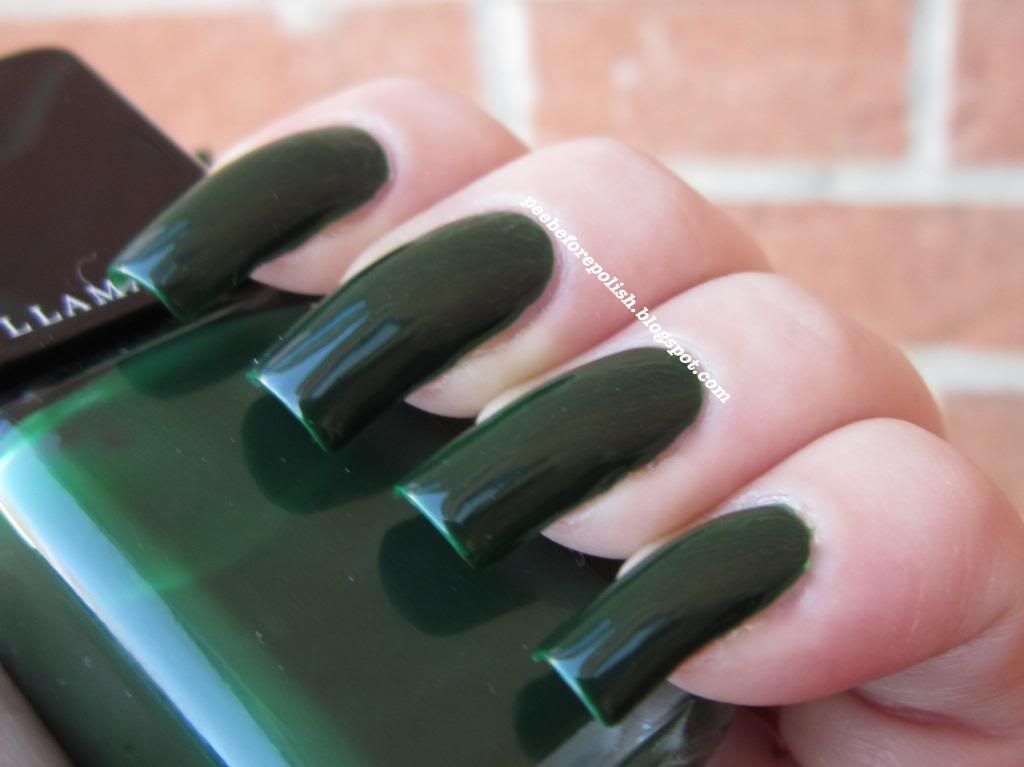
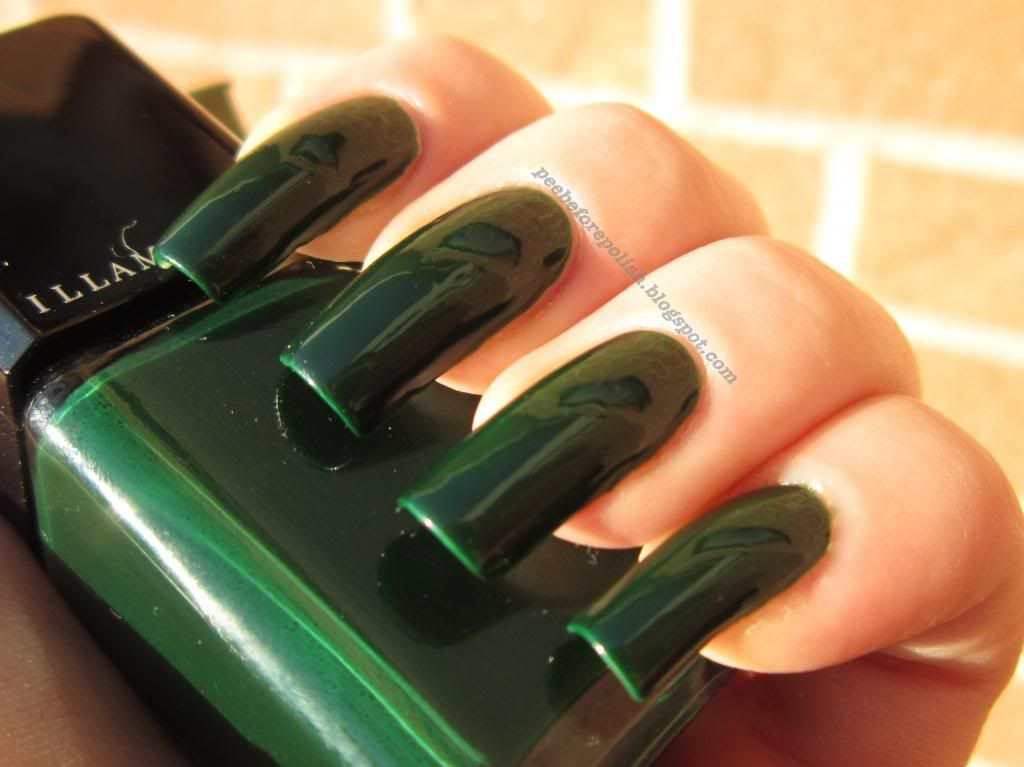
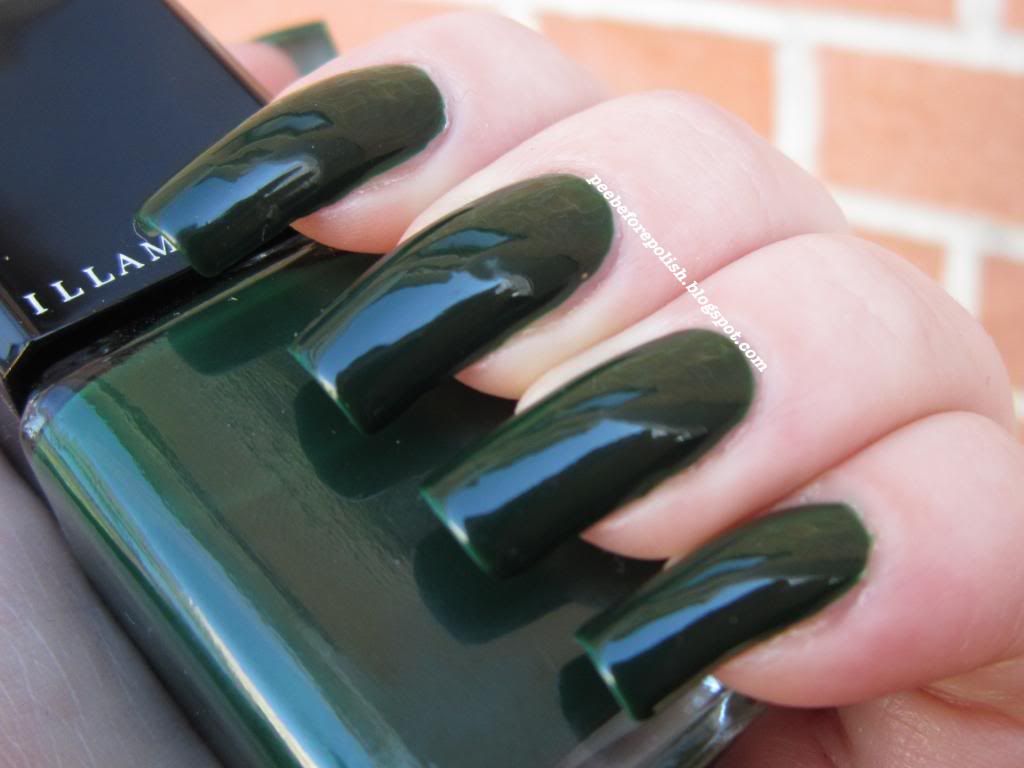
Rampage is a dark forest green with a jelly finish. It is an excellent dupe for NARS Zulu, which is more expensive and needs four coats for the perfect coverage. If you decide to wear Rampage, two thin coats and you're ready to go!
Formula is just perfect, it dries fast and has an excellent longevity.
In conclusion: I love this polish, it's a stunning color and has an amazing quality too!
That's all I have for you today, don't forget to take a look at the entries of the other ladies and have a nice evening!
Salve ragazze, e ben ritrovate col consueto appuntamento settimanale con la ABC Challenge.
Per il post del giorno sono andata un po' al riciclo, ho pescato le foto dell'Illamasqua Rampage che avete già visto in azione qualche settimana fa per questa glitter gradient. Nel week-end sono stata super impegnata nel creare due impegnative nail arts per il post conclusivo della Rainbow (ma sono spilorcia e domani ve ne mostrerò solo una) e non ho proprio avuto il tempo di indossare, testare e fotografare un altro smalto.
Comunque Rampage è così bello che si merita davvero un post tutto suo! Si tratta di uno splendido verde foresta dal finish jelly. E' un ottimo dupe del blasonato NARS Zulu che, però, oltre ad essere persino più costoso, necessità di quattro mani per la coprenza perfetta. Col Rampage, 2 mani sottili e via! La formula è perfetta, si applica divinamente, asciuga in fretta e dura davvero a lungo.
Devo specificare che lo adoro?!
Per oggi è tutto, a domani per il "post col botto", e nel frattempo vi auguro una splendida serata!
*** Illamasqua Rampage mi è stato inviato a scopo valutativo ***
*** Illamasqua Rampage was sent me for review ***
and welcome back to our ABC Challenge! For today's post I picked a nail polish I used a few weeks ago for a glitter gradient: Illamasqua Rampage. I'm really sorry for this, but during last week-end I was very busy - I created two different and time consuming nail arts for the final post of Rainbow Thursdays - and I didn't have the time to paint my nails with a new nail polish, test its quality and take good pics.
Anyway I think that Rampage is soooo beautiful that it deserves an entire and dedicated post.
Rampage is a dark forest green with a jelly finish. It is an excellent dupe for NARS Zulu, which is more expensive and needs four coats for the perfect coverage. If you decide to wear Rampage, two thin coats and you're ready to go!
Formula is just perfect, it dries fast and has an excellent longevity.
In conclusion: I love this polish, it's a stunning color and has an amazing quality too!
That's all I have for you today, don't forget to take a look at the entries of the other ladies and have a nice evening!
Salve ragazze, e ben ritrovate col consueto appuntamento settimanale con la ABC Challenge.
Per il post del giorno sono andata un po' al riciclo, ho pescato le foto dell'Illamasqua Rampage che avete già visto in azione qualche settimana fa per questa glitter gradient. Nel week-end sono stata super impegnata nel creare due impegnative nail arts per il post conclusivo della Rainbow (ma sono spilorcia e domani ve ne mostrerò solo una) e non ho proprio avuto il tempo di indossare, testare e fotografare un altro smalto.
Comunque Rampage è così bello che si merita davvero un post tutto suo! Si tratta di uno splendido verde foresta dal finish jelly. E' un ottimo dupe del blasonato NARS Zulu che, però, oltre ad essere persino più costoso, necessità di quattro mani per la coprenza perfetta. Col Rampage, 2 mani sottili e via! La formula è perfetta, si applica divinamente, asciuga in fretta e dura davvero a lungo.
Devo specificare che lo adoro?!
Per oggi è tutto, a domani per il "post col botto", e nel frattempo vi auguro una splendida serata!
| Applicazione / Application |
5/5
|
| Asciugatura / Drying time |
5/5
|
| Coprenza / Pigmentation |
4.5/5
|
| Durata / Longevity |
5/5
|
| GIUDIZIO FINALE / OVERALL |
4.75/5
|
*** Illamasqua Rampage mi è stato inviato a scopo valutativo ***
*** Illamasqua Rampage was sent me for review ***
Etichette:
ABC Challenge 2013,
Green,
Illamasqua,
Jelly
giovedì 7 febbraio 2013
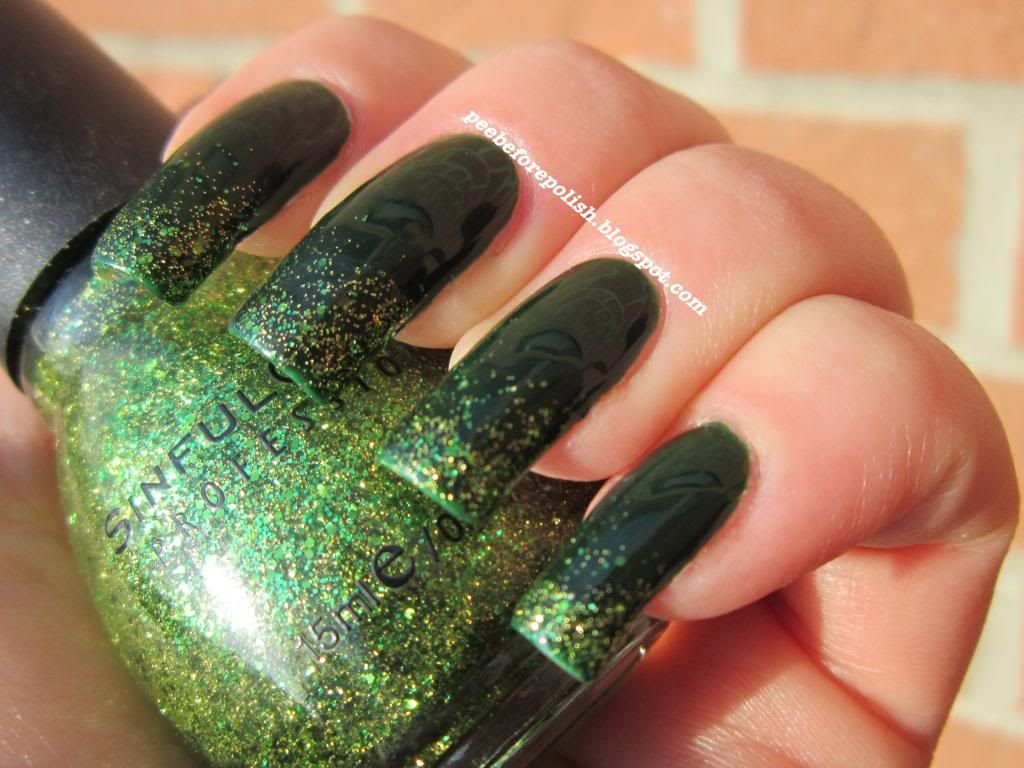
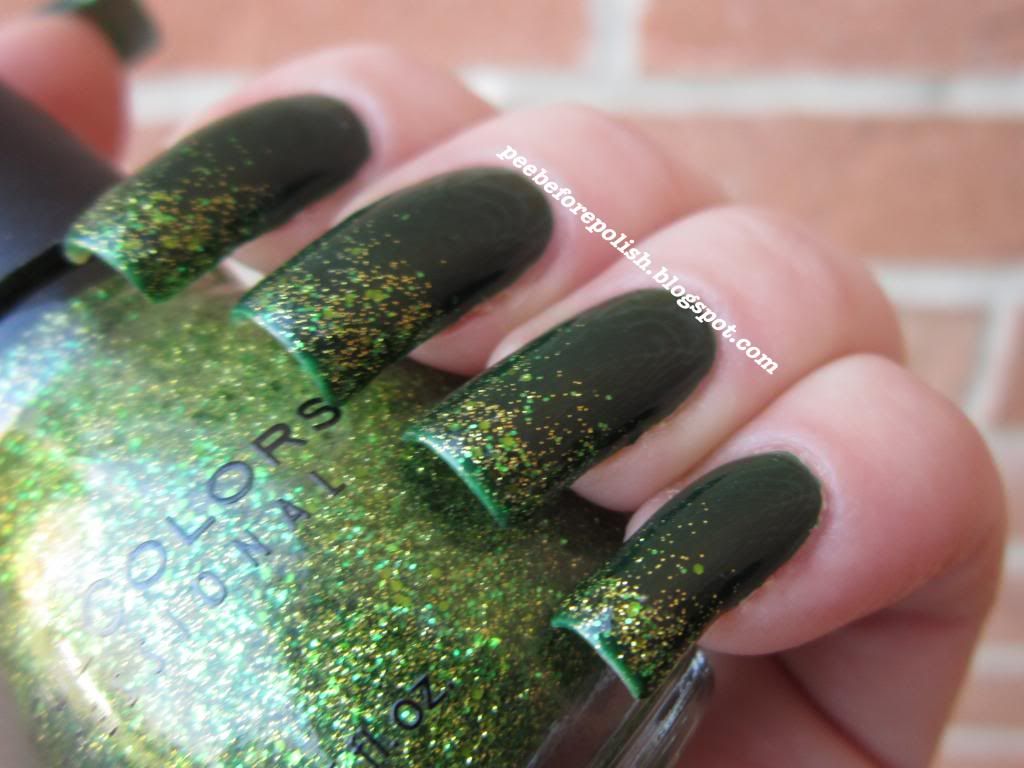
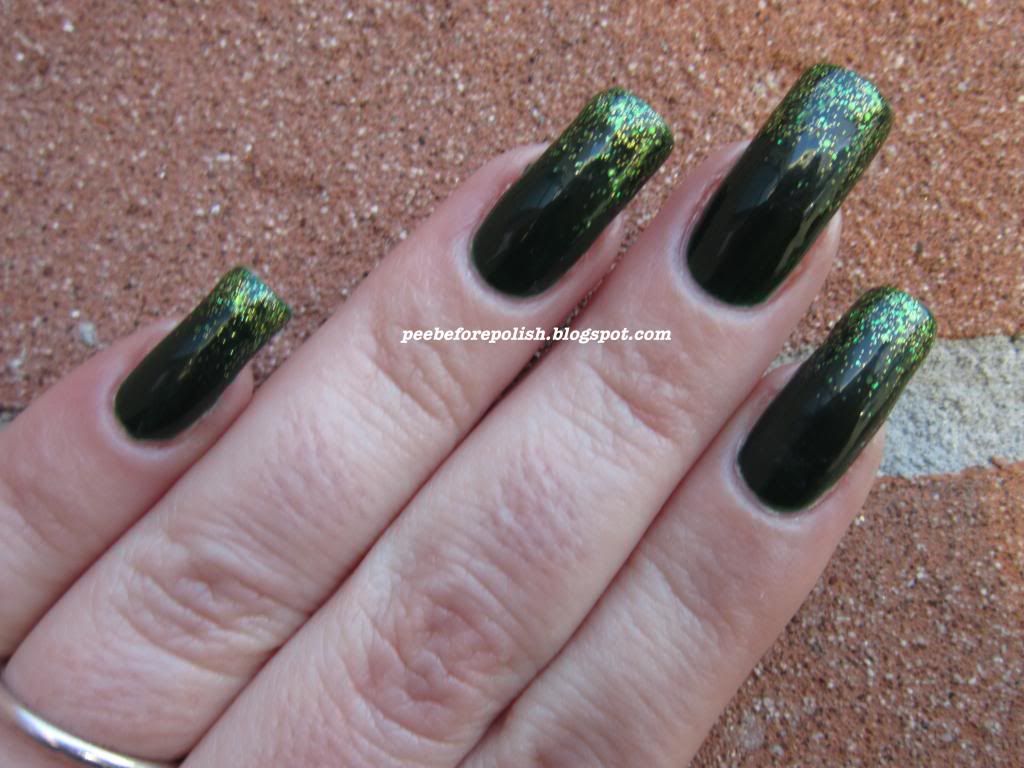
The Rainbow Ladies #4: GREEN [Illamasqua Rampage & Sinful Colors Call You Later]
Ed eccoci nuovamente al nostro quarto appuntamento con i giovedì arcobalenosi!
Nell'ottica del "tu is megl che uan" (un Accorsi vecchia maniera docet), oggi mi gioco due bellissimi smalti verdi, assai diversi tra loro, ma che stanno molto bene combinati insieme in una gradient.
L'Illamasqua Rampage, il colore di base, è uno spettacolare verde foresta dal finish jelly, dunque molto luminoso già senza top coat. Coprenza perfetta in due mani sottili, asciuga in fretta e ha davvero una formula ineccepibile, scorre sull'unghia che è un piacere
Il Sinful Colors Call You Later è, invece, un chiassoso glitter dalla base trasparente con particelle glitterose di diverse dimensioni e forme, nonché diversi colori, tutti sulle tonalità del verde (verde chiaro-dorato e verde erba). Credo che stia davvero bene su un verde scuro come il Rampage, sono davvero soddisfatta di questa gradient!
Consigli per gli acquisti: la Sinful Colors è ormai distribuita da qualche mese dalla Revlon, dunque è assai più reperibile di prima (si trovava qualcosa in Coin) ed anche il prezzo è stato abbassato da 4.99€ a 3.70€ (prezzo di listino, ma io li ho trovati scontati anche a 2.98€).
Spero che questa gradient vi sia piaciuta e non dimenticate di buttare un occhio alle creazioni ed alle scelte delle altre signorinelle!
Hi ladies
and welcome back to our Rainbow Thusday! For this fourth post I picked two polishes which are very different in terms of finish, but which look very nice together.
Illamasqua Rampage, the base color, is a dark forest green with a jelly finish, so you can easily imagine that it dries super glossy even without a top coat. Two coats in my pics, it dries fast and has an amazing formula.
Sinful Colors Call You Later, the glitter one, has a clear base and differently sized and shaped glitter particles in light golden green and grass green. I think it looks great on a dark green such as Rampage, I'm really happy with this gradient manicure!
I'm also happy that Sinful Colors can be finally easily found also here in Italy. Until a few months ago, it was available only in a few store and was more expensive: 4.99€ for each polish, a lot of money considering the original price (I think Sinful polishes retail for a couple of dollars or even less in the US). Now they are available in a lot of stores and they retail for 3.70€, but can be easily found for a little less (I bought four of them three months ago and I paid 2.98€ each).
Hope you like this gradient mani and don't forget to take a look at the entries here above. Thank you for reading and watching and see you soon with my Valentine nails!
*** Illamasqua Rampage mi è stato inviato a scopo valutativo ***
*** Illamasqua Rampage was sent me for review ***
Nell'ottica del "tu is megl che uan" (un Accorsi vecchia maniera docet), oggi mi gioco due bellissimi smalti verdi, assai diversi tra loro, ma che stanno molto bene combinati insieme in una gradient.
L'Illamasqua Rampage, il colore di base, è uno spettacolare verde foresta dal finish jelly, dunque molto luminoso già senza top coat. Coprenza perfetta in due mani sottili, asciuga in fretta e ha davvero una formula ineccepibile, scorre sull'unghia che è un piacere
Il Sinful Colors Call You Later è, invece, un chiassoso glitter dalla base trasparente con particelle glitterose di diverse dimensioni e forme, nonché diversi colori, tutti sulle tonalità del verde (verde chiaro-dorato e verde erba). Credo che stia davvero bene su un verde scuro come il Rampage, sono davvero soddisfatta di questa gradient!
Consigli per gli acquisti: la Sinful Colors è ormai distribuita da qualche mese dalla Revlon, dunque è assai più reperibile di prima (si trovava qualcosa in Coin) ed anche il prezzo è stato abbassato da 4.99€ a 3.70€ (prezzo di listino, ma io li ho trovati scontati anche a 2.98€).
Spero che questa gradient vi sia piaciuta e non dimenticate di buttare un occhio alle creazioni ed alle scelte delle altre signorinelle!
Hi ladies
and welcome back to our Rainbow Thusday! For this fourth post I picked two polishes which are very different in terms of finish, but which look very nice together.
Illamasqua Rampage, the base color, is a dark forest green with a jelly finish, so you can easily imagine that it dries super glossy even without a top coat. Two coats in my pics, it dries fast and has an amazing formula.
Sinful Colors Call You Later, the glitter one, has a clear base and differently sized and shaped glitter particles in light golden green and grass green. I think it looks great on a dark green such as Rampage, I'm really happy with this gradient manicure!
I'm also happy that Sinful Colors can be finally easily found also here in Italy. Until a few months ago, it was available only in a few store and was more expensive: 4.99€ for each polish, a lot of money considering the original price (I think Sinful polishes retail for a couple of dollars or even less in the US). Now they are available in a lot of stores and they retail for 3.70€, but can be easily found for a little less (I bought four of them three months ago and I paid 2.98€ each).
Hope you like this gradient mani and don't forget to take a look at the entries here above. Thank you for reading and watching and see you soon with my Valentine nails!
*** Illamasqua Rampage mi è stato inviato a scopo valutativo ***
*** Illamasqua Rampage was sent me for review ***
Etichette:
Glitter,
Green,
Illamasqua,
Jelly,
Nail art,
Rainbow Thursdays,
Sinful Colors
lunedì 17 dicembre 2012
ABC Challenge: W for Watercolor Nails
-4. Ebbene sì, siam quasi giunte alla fine della nostra maratona. Tristi? Felici? Francamente ve ne infischiate?
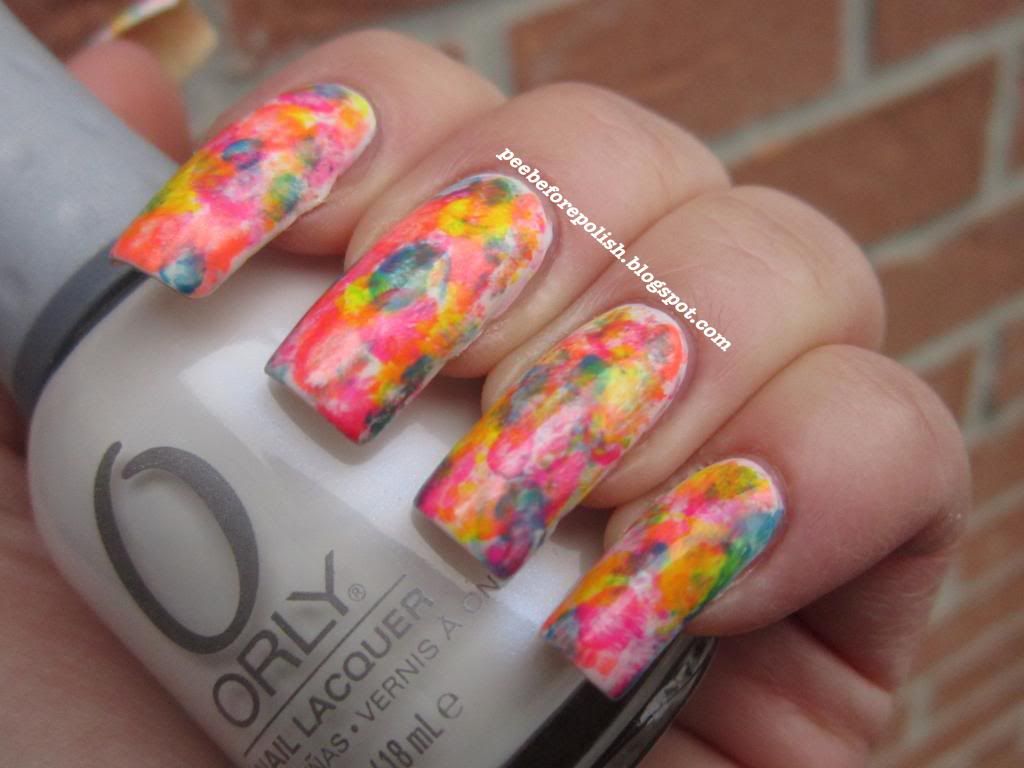
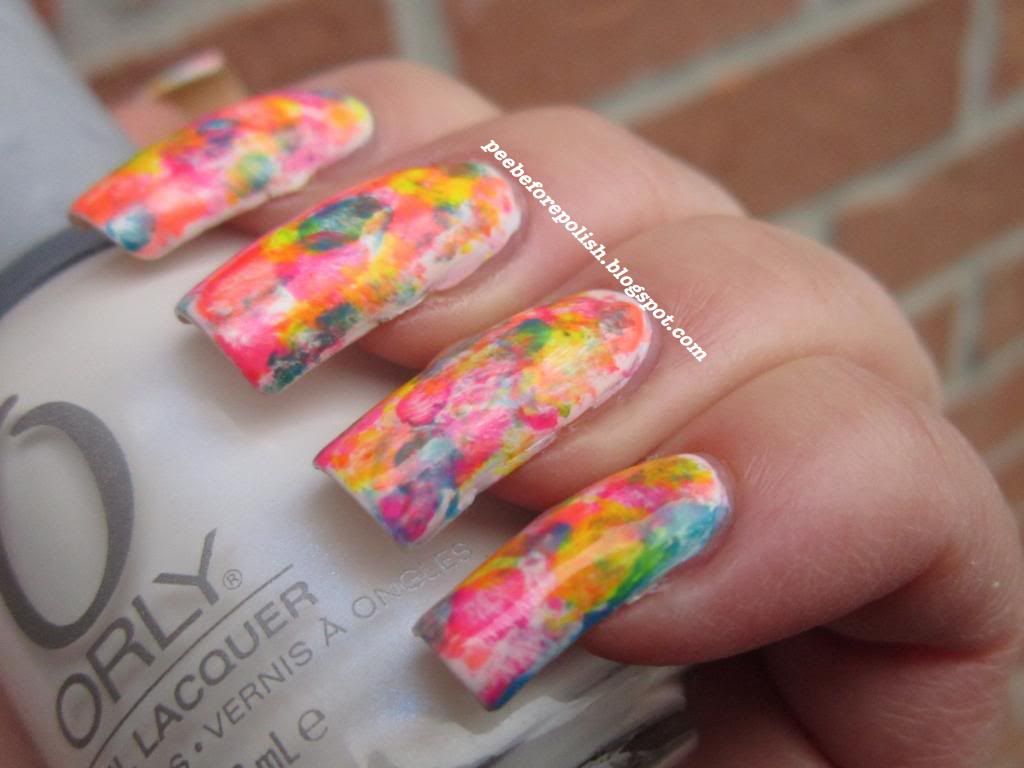
Qualunque sia la vostra risposta, oggi vi cuccate la nostra W, che io ho deciso di destinare ad una nail art. Ma perché fare una rodata water marble? Meglio sperimentare, no? Per cui, eccovi la mia prima Watercolor Nail Art.
Per realizzarla è necessario quello che, normalmente, è il nemico numero uno dello smalto: ovvero, l'acetone.
Ho iniziato stendendo due mani di Orly Dayglow; ho poi applicato un top coat, cosa che reputo importantissima: sulle unghie finte avevo fatto delle prove senza ed il risultato è che viene fuori un paciugo pazzesco. Il top coat, invece, costituisce un ulteriore film protettivo della base bianca che deve rimanere inalterata, perché tutto il marasma "impressionista" deve avvenire sopra ad essa.
Dopodiché ho ho iniziato ad applicare il primo colore scelto per il decoro: applicate due o tre piccole goccine di ogni smalto, e poi picchiettatelo su tutta l'unghia, creando il decoro a voi più confacente, con un pennello intinto nell'acetone. Questo processo va ripetuto con ogni smalto prescelto, avendo cura di pulire bene il pennello in particolare quando si cambia "drasticamente" tonalità.
Io ho seguito quest'ordine: Color Club Youthquake (fuchsia neon), Tangerine Scream (arancio neon), Orly Glowstick (giallo neon) e Catrice Blue Cara Ciao (azzurro intenso).
I consigli che vi posso dare, oltre a quello di proteggere la base bianca con un top coat, sono questi: scegliete l'acetone puro - il solvente contiene aromi e fragranze che possono interferire, inoltre l'acetone lavora più in fretta; utilizzate un pennello con setole morbide e punta stondata, orientandovi tra quelli di dimensione compresa tra il 4 e il 6 (a seconda della dimensione della vostra unghia); lasciate per ultimo il colore che più si differenzia dagli altri a livello cromatico, in questo caso il blu; usate smalti pigmentati, giocoforza sbiadiranno molto a contatto con l'acetone.
Spero che questo mio esperimento vi sia piaciuto, ditemi se vi può interessare un video tutorial (no, non fatelo, vi prego!) e non scordatevi di controllare le entries delle altre puelle!
-4. Our marathon is going to end soon. Are you sad for this? Are you happy? Or maybe you don't care at all...!
Well, today I show you my letter W, and I picked another nail art. You probably remember that I love water marbles, I think I'm quite good with that technique, but I wanted to change and experiment another kind of nail art: watercolor nails.
The "secret" ingredient of this nail art is acetone, which is usually the #1 enemy of nail polish.
I started painting my nails with two coats of Orly Dayglow and applying a top coat over it; I think this is a very important step: before realizing this nail art on my nails, I did a couple of tests on fake nails without applying a top coat and the result was very messy. The top coat will protect your base and you will be able to create your "impressionist" effect only on the surface of your nails.
Then I applied three tiny drops of the first polish I picked for the design and I dipped my brush in the acetone, and then start spreading the blobs of color. I did the same with all the other colors I chose.
Pay attention to clean your brush when you change color.
In this case, I applied the nail polishes in this order: Color Club Youthquake (neon fuchsia), Tangerine Scream (neon orange), Orly Glowstick (neon yellow) and Catrice Blue Cara Ciao (intense blue).
Just a few tips: use pure acetone, and not a nail polish remover - this can contain parfums or other ingredients that can interfer, moreover acetone works faster; choose a brush with round and soft bristles - mine was too hard and it was a nightmare!; just to give you an idea of the size of the brush, choose between #4 and #6, depending on the shape and lenght of your nails; the strongest color (here Catrice Blue Cara Ciao) should be the last to be applied; choose pigmented polishes, since the acetone will strongly fade their color.
Hope you'll like this nail art, if you want a video tutorial for this technique feel free to ask... And don't forget to check the other ladies' entries!
***Due degli smalti di questo post (Orly Glowstick e Dayglow) mi sono stati inviati a scopo valutativo. Tutti gli altri prodotti sono stati acquistati da me***
***Two of the nail polished of this post (Orly Glowstick and Dayglow) were sent me for review. All the other products were bought by me***
Qualunque sia la vostra risposta, oggi vi cuccate la nostra W, che io ho deciso di destinare ad una nail art. Ma perché fare una rodata water marble? Meglio sperimentare, no? Per cui, eccovi la mia prima Watercolor Nail Art.
Per realizzarla è necessario quello che, normalmente, è il nemico numero uno dello smalto: ovvero, l'acetone.
Ho iniziato stendendo due mani di Orly Dayglow; ho poi applicato un top coat, cosa che reputo importantissima: sulle unghie finte avevo fatto delle prove senza ed il risultato è che viene fuori un paciugo pazzesco. Il top coat, invece, costituisce un ulteriore film protettivo della base bianca che deve rimanere inalterata, perché tutto il marasma "impressionista" deve avvenire sopra ad essa.
Dopodiché ho ho iniziato ad applicare il primo colore scelto per il decoro: applicate due o tre piccole goccine di ogni smalto, e poi picchiettatelo su tutta l'unghia, creando il decoro a voi più confacente, con un pennello intinto nell'acetone. Questo processo va ripetuto con ogni smalto prescelto, avendo cura di pulire bene il pennello in particolare quando si cambia "drasticamente" tonalità.
Io ho seguito quest'ordine: Color Club Youthquake (fuchsia neon), Tangerine Scream (arancio neon), Orly Glowstick (giallo neon) e Catrice Blue Cara Ciao (azzurro intenso).
I consigli che vi posso dare, oltre a quello di proteggere la base bianca con un top coat, sono questi: scegliete l'acetone puro - il solvente contiene aromi e fragranze che possono interferire, inoltre l'acetone lavora più in fretta; utilizzate un pennello con setole morbide e punta stondata, orientandovi tra quelli di dimensione compresa tra il 4 e il 6 (a seconda della dimensione della vostra unghia); lasciate per ultimo il colore che più si differenzia dagli altri a livello cromatico, in questo caso il blu; usate smalti pigmentati, giocoforza sbiadiranno molto a contatto con l'acetone.
Spero che questo mio esperimento vi sia piaciuto, ditemi se vi può interessare un video tutorial (no, non fatelo, vi prego!) e non scordatevi di controllare le entries delle altre puelle!
-4. Our marathon is going to end soon. Are you sad for this? Are you happy? Or maybe you don't care at all...!
Well, today I show you my letter W, and I picked another nail art. You probably remember that I love water marbles, I think I'm quite good with that technique, but I wanted to change and experiment another kind of nail art: watercolor nails.
The "secret" ingredient of this nail art is acetone, which is usually the #1 enemy of nail polish.
I started painting my nails with two coats of Orly Dayglow and applying a top coat over it; I think this is a very important step: before realizing this nail art on my nails, I did a couple of tests on fake nails without applying a top coat and the result was very messy. The top coat will protect your base and you will be able to create your "impressionist" effect only on the surface of your nails.
Then I applied three tiny drops of the first polish I picked for the design and I dipped my brush in the acetone, and then start spreading the blobs of color. I did the same with all the other colors I chose.
Pay attention to clean your brush when you change color.
In this case, I applied the nail polishes in this order: Color Club Youthquake (neon fuchsia), Tangerine Scream (neon orange), Orly Glowstick (neon yellow) and Catrice Blue Cara Ciao (intense blue).
Just a few tips: use pure acetone, and not a nail polish remover - this can contain parfums or other ingredients that can interfer, moreover acetone works faster; choose a brush with round and soft bristles - mine was too hard and it was a nightmare!; just to give you an idea of the size of the brush, choose between #4 and #6, depending on the shape and lenght of your nails; the strongest color (here Catrice Blue Cara Ciao) should be the last to be applied; choose pigmented polishes, since the acetone will strongly fade their color.
Hope you'll like this nail art, if you want a video tutorial for this technique feel free to ask... And don't forget to check the other ladies' entries!
***Due degli smalti di questo post (Orly Glowstick e Dayglow) mi sono stati inviati a scopo valutativo. Tutti gli altri prodotti sono stati acquistati da me***
***Two of the nail polished of this post (Orly Glowstick and Dayglow) were sent me for review. All the other products were bought by me***
Etichette:
ABC Challenge 2012,
Blue,
Catrice,
Color Club,
Illamasqua,
Nail art,
Neon,
Orange,
Orly,
Pink,
White,
Yellow
giovedì 1 novembre 2012
ABC Challenge: J for Illamasqua Jo'mina
Ben ritrovate belle sgnacchere!
Passato un buon Halloween? Io ho evitato di uscire a fare la muffa (considerato il diluvio universale in combo col ventaccio) e mi sono data alla sistemazione del blog: ho modificato alcune etichette, ho incorporato le schede sotto il titolo... Tutte microcose non di particolare impatto ma che dovrebbero rendere il blog più fruibile e meno caotico.
Torniamo alla nostra sfida???? Oh yes. Oggi è il turno della J, J come Jo'mina di Illamasqua, collezione Body Electrics del 2010.
Sapete che io amo molto questa marca (l'ultimo ordine che ho fatto un paio di settimane fa e che prima o poi vi mostrerò è l'ennesima dimostrazione di questo mio ammmmore), e pare che questo amore sia ricambiato, perché finora i miei dineros si sono sempre rivelati ben investiti.
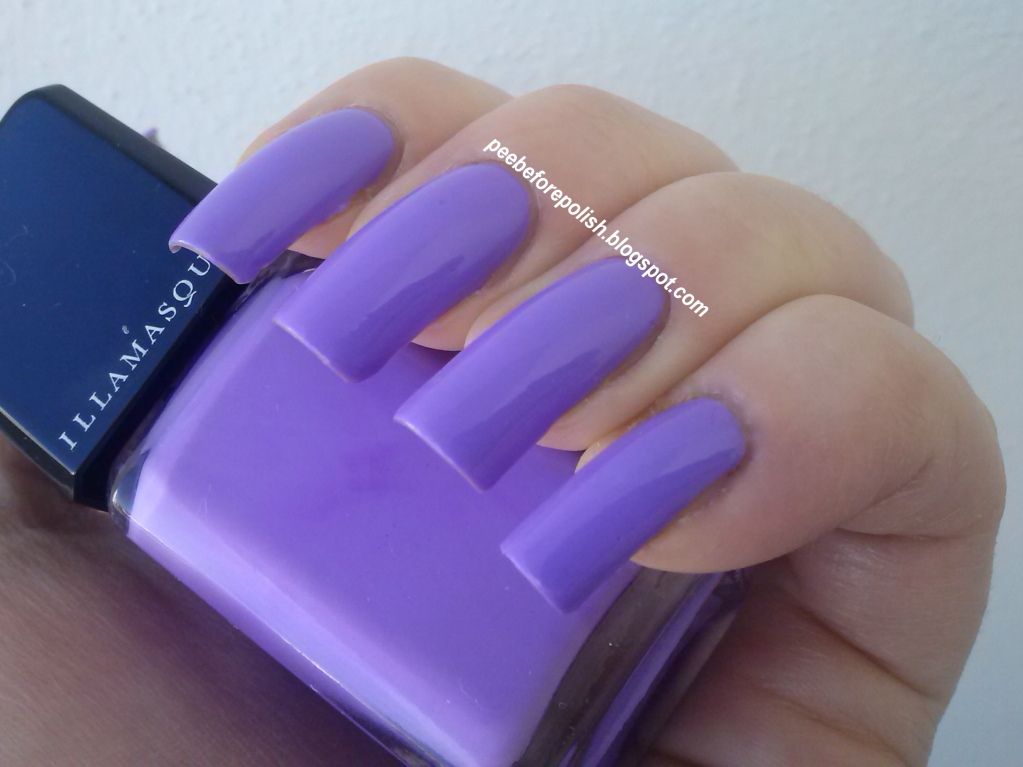
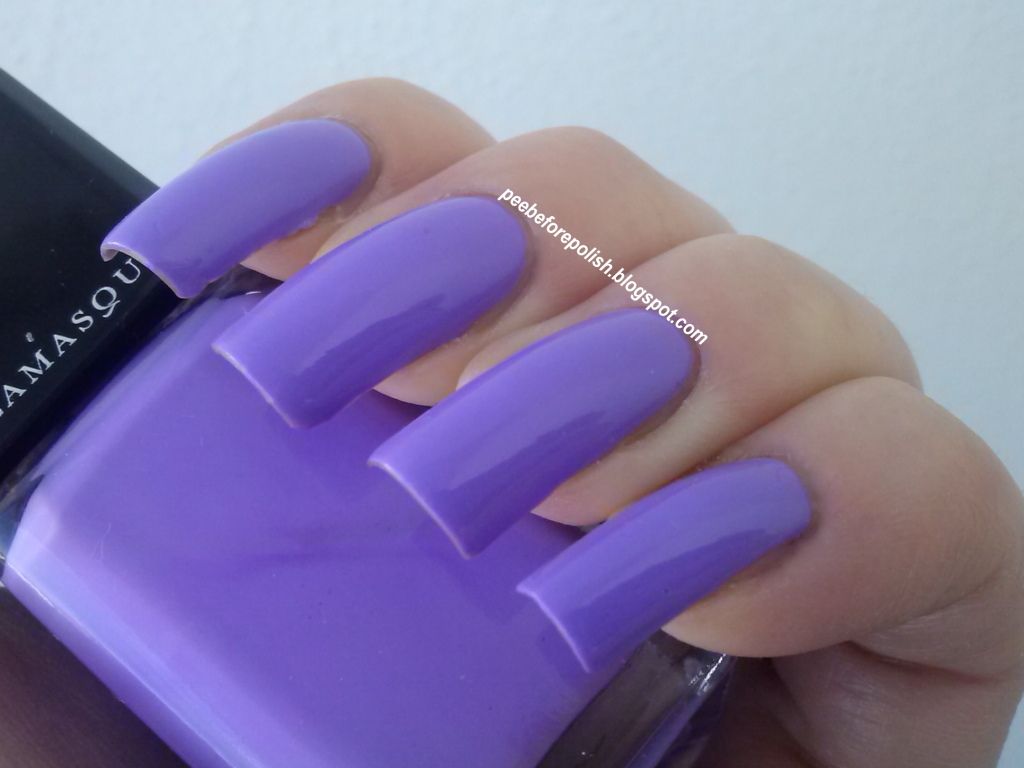
Comunque, Jo'mina è un lilla acceso, deciso e vivace dal finish creme. Trovo che il colore sia fantastico, particolarissimo, anzi direi unico. E' pastello ma è super intenso e luminoso.
La pigmentazione è davvero ottima, calibrando bene la pennellata potrete cavarvela con una sola passata e la durata è fenomenale.
L'unico neo di questo smalto è che necessità di tempi di asciugatura più elevati di quelli che io reputo ottimali, ma date le sue altre caratteristiche direi che vale davvero la pena attendere un po' di più del solito!
Ora scappo letteralmente, sono in partenza e sarò assente per qualche giorno, sul cucuzzolo della collina dove va a malapena il modem a 56k. Cercherò di smoderare i commenti quando sarò fuori ma, dovendo fare tutto da cellulare, dubito che riuscirò a rispondere.
Per questo motivo chiedo scusa alle mie compagne di challenge, non so quando e se riuscirò a commentare le vostre entries, temo che da cellulare mi partirebbe un embolo al commento #2.
Un bacione a tutte e buon ponte!
Hi ladies!
Did you spent a nice Halloween night? Yesterday I stayed at home, the weather was awful (windy and it was raining cats and dogs) and I did some changes to my blog: I edited some labels, I changed the pages under the "header"... Nothing special, but I want to start a restyling and I began from the easier changements.
Back to ABC Challenge: J for Jo'mina by Illamasqua, from Body Electrics Collection (2010).
You know that I love Illamasqua (in fact I recently placed an order, I have to show you ASAP what I bought!) and it seems that Illamasqua loves me too: I have always got a lot of satisfaction from its products.
Anyway, the polish of the day, Jo'mina, is a stunning color: a pastel but super bright and intense lilac with a creme finish. I think that this color is really unique.
Pigmentation is amazing too, only one coat if you do a quite thick layer of polish. Formula is simply perfect and longevity is really high.
Its only defects it's that drying time is a bit longer than usual.
Well, I have to run away now, I will be out of city for three days. I won't have Internet access where I'm going to stay, so I ask your pardon if I won't reply to your comments, it would be too difficult from my smartphone.
I programmed a post for Saturday morning, so stay tuned!
Hope you will have a wonderful day and week end and talk to you soon!
***Il prodotto mi è stato inviato a scopo valutativo dal team Illamasqua***
***This product was sent me for review from Illamasqua Team***
Passato un buon Halloween? Io ho evitato di uscire a fare la muffa (considerato il diluvio universale in combo col ventaccio) e mi sono data alla sistemazione del blog: ho modificato alcune etichette, ho incorporato le schede sotto il titolo... Tutte microcose non di particolare impatto ma che dovrebbero rendere il blog più fruibile e meno caotico.
Torniamo alla nostra sfida???? Oh yes. Oggi è il turno della J, J come Jo'mina di Illamasqua, collezione Body Electrics del 2010.
Sapete che io amo molto questa marca (l'ultimo ordine che ho fatto un paio di settimane fa e che prima o poi vi mostrerò è l'ennesima dimostrazione di questo mio ammmmore), e pare che questo amore sia ricambiato, perché finora i miei dineros si sono sempre rivelati ben investiti.
Comunque, Jo'mina è un lilla acceso, deciso e vivace dal finish creme. Trovo che il colore sia fantastico, particolarissimo, anzi direi unico. E' pastello ma è super intenso e luminoso.
La pigmentazione è davvero ottima, calibrando bene la pennellata potrete cavarvela con una sola passata e la durata è fenomenale.
L'unico neo di questo smalto è che necessità di tempi di asciugatura più elevati di quelli che io reputo ottimali, ma date le sue altre caratteristiche direi che vale davvero la pena attendere un po' di più del solito!
Ora scappo letteralmente, sono in partenza e sarò assente per qualche giorno, sul cucuzzolo della collina dove va a malapena il modem a 56k. Cercherò di smoderare i commenti quando sarò fuori ma, dovendo fare tutto da cellulare, dubito che riuscirò a rispondere.
Per questo motivo chiedo scusa alle mie compagne di challenge, non so quando e se riuscirò a commentare le vostre entries, temo che da cellulare mi partirebbe un embolo al commento #2.
Un bacione a tutte e buon ponte!
Hi ladies!
Did you spent a nice Halloween night? Yesterday I stayed at home, the weather was awful (windy and it was raining cats and dogs) and I did some changes to my blog: I edited some labels, I changed the pages under the "header"... Nothing special, but I want to start a restyling and I began from the easier changements.
Back to ABC Challenge: J for Jo'mina by Illamasqua, from Body Electrics Collection (2010).
You know that I love Illamasqua (in fact I recently placed an order, I have to show you ASAP what I bought!) and it seems that Illamasqua loves me too: I have always got a lot of satisfaction from its products.
Anyway, the polish of the day, Jo'mina, is a stunning color: a pastel but super bright and intense lilac with a creme finish. I think that this color is really unique.
Pigmentation is amazing too, only one coat if you do a quite thick layer of polish. Formula is simply perfect and longevity is really high.
Its only defects it's that drying time is a bit longer than usual.
Well, I have to run away now, I will be out of city for three days. I won't have Internet access where I'm going to stay, so I ask your pardon if I won't reply to your comments, it would be too difficult from my smartphone.
I programmed a post for Saturday morning, so stay tuned!
Hope you will have a wonderful day and week end and talk to you soon!
| Applicazione / Application |
5/5
|
| Asciugatura / Drying time |
4/5
|
| Coprenza / Pigmentation |
5/5
|
| Durata / Longevity |
5/5
|
| GIUDIZIO FINALE / OVERALL |
4.75/5
|
***Il prodotto mi è stato inviato a scopo valutativo dal team Illamasqua***
***This product was sent me for review from Illamasqua Team***
Etichette:
ABC Challenge 2012,
Creme,
Illamasqua,
Purple
lunedì 17 settembre 2012
Post #200: Illamasqua Rare
Salve a tutte!
Post numero 200, e nella logica del "ricorrenza speciale, smalto speciale", vi presento l'Illamasqua Rare.
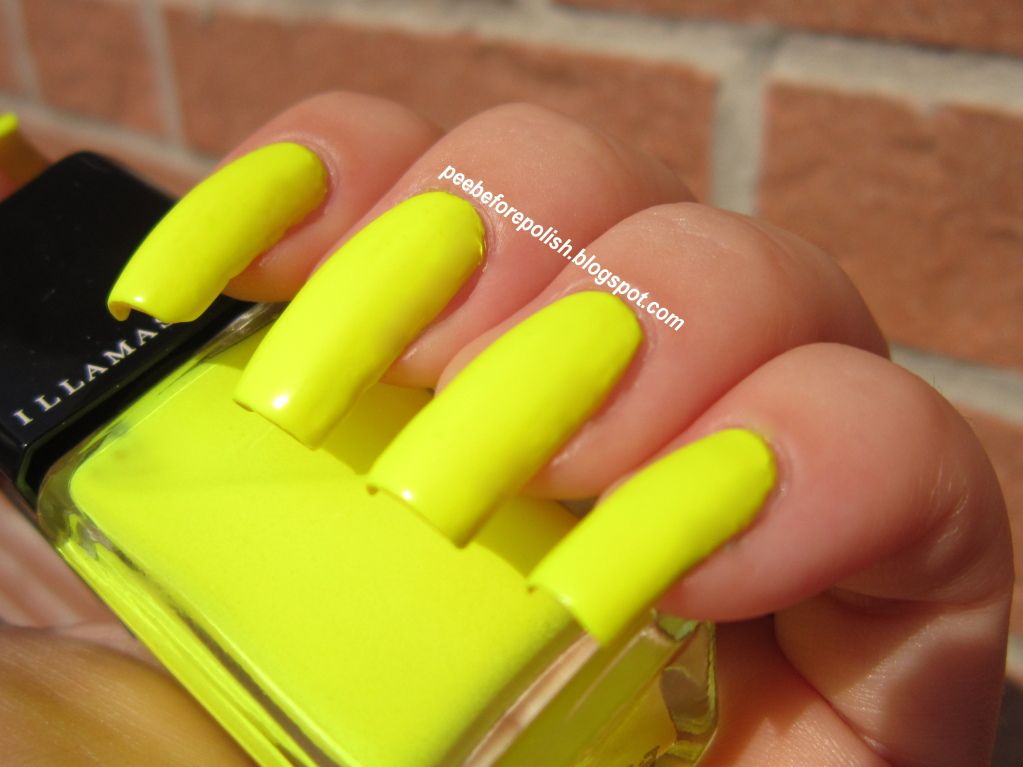
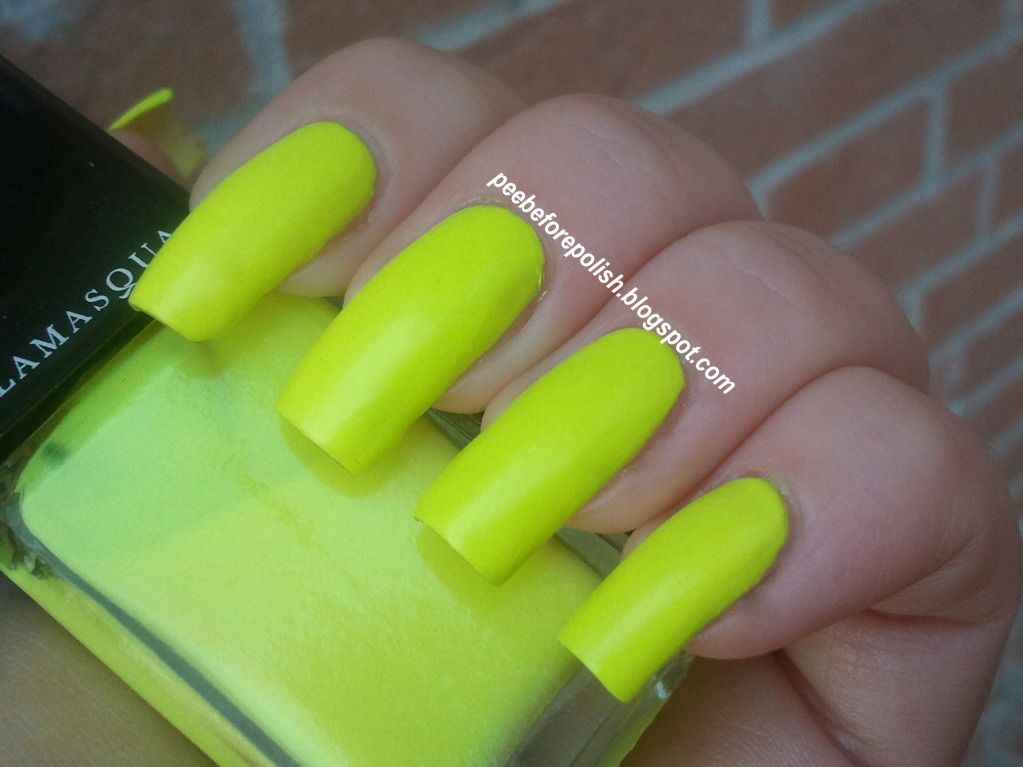
Il Rare è un giallo neon pazzesco che asciuga, come spesso accade, satin matte.
Cos'ha di tanto eccezionale, a parte il colore sparaflesciosissimo? Che la coprenza perfetta si ottiene in appena due mani.
Lo ripeto, perché la combo giallo-neon-coprenza è più unica che... Rara: due mani e BASTA.
Applicazione perfetta, formula leggermente più liquida della media di Illamasqua ma confortevolissima da stendere e sempre autolivellante, durata mostruosa.
Se applicato senza top coat per conservare l'effetto satin, consiglio di lasciar passare 5 minuti tra la stesura di una mano e l'altra in modo da non dover vegetare immobili mezzora a manicure completata.
Io sono innamorata perdutamente... E voi?
Hi ladies!
Since this is a special post (#200!), I chose a very special polish, Illamasqua Rare.
Rare is a yellow neon that dries satin matte, like most neon polishes.
Why is it so special besides the stunning shade? It has a wonderful pigmentation. Two coats and you're ready to go.
I want to write it one more time, since the combo yellow-neon-high pigmentation is really... Rare. Only TWO coats.
Formula is great, less thicker than the other Illamasqua polishes I have in my stash, but it's perfect. The longevity is very high, too.
If you don't apply a top coat over it, I suggest to wait 5 minutes between the first and the second coat, your final manicure will dry faster.
I'm in love... And what about you?
Post numero 200, e nella logica del "ricorrenza speciale, smalto speciale", vi presento l'Illamasqua Rare.
Il Rare è un giallo neon pazzesco che asciuga, come spesso accade, satin matte.
Cos'ha di tanto eccezionale, a parte il colore sparaflesciosissimo? Che la coprenza perfetta si ottiene in appena due mani.
Lo ripeto, perché la combo giallo-neon-coprenza è più unica che... Rara: due mani e BASTA.
Applicazione perfetta, formula leggermente più liquida della media di Illamasqua ma confortevolissima da stendere e sempre autolivellante, durata mostruosa.
Se applicato senza top coat per conservare l'effetto satin, consiglio di lasciar passare 5 minuti tra la stesura di una mano e l'altra in modo da non dover vegetare immobili mezzora a manicure completata.
Io sono innamorata perdutamente... E voi?
Hi ladies!
Since this is a special post (#200!), I chose a very special polish, Illamasqua Rare.
Rare is a yellow neon that dries satin matte, like most neon polishes.
Why is it so special besides the stunning shade? It has a wonderful pigmentation. Two coats and you're ready to go.
I want to write it one more time, since the combo yellow-neon-high pigmentation is really... Rare. Only TWO coats.
Formula is great, less thicker than the other Illamasqua polishes I have in my stash, but it's perfect. The longevity is very high, too.
If you don't apply a top coat over it, I suggest to wait 5 minutes between the first and the second coat, your final manicure will dry faster.
I'm in love... And what about you?
| Applicazione / Application |
5/5
|
| Asciugatura / Drying time |
4/5
|
| Coprenza / Pigmentation |
4/5
|
| Durata / Longevity |
5/5
|
| GIUDIZIO FINALE / OVERALL |
4.5/5
|
Etichette:
Illamasqua,
Neon,
Satin,
Yellow
giovedì 21 giugno 2012
Illamasqua Monogamous (and some remarks on Naked Strangers Collection)
Buonasera a tutte!
Lo so, ultimamente latito. Troppi impegni, troppo lavoro e troppo caldo!
Spero di farmi perdonare mostrandovi l'Illamasqua Monogamous, uno dei tre smalti della nuova collezione Illamasqua per l'estate 2012.
Ma prima qualche considerazione sulla collezione stessa. Chi conosce Illamasqua sa che è un brand che, poco ma sicuro, stupisce ogni volta. Punta su collezioni visionarie ed audaci e su un packaging minimal ma di grande ricercatezza.
Con la Naked Strangers non si sono smentiti: mentre tutti puntano sui colori vivaci e neon, Illamasqua propone oro e nude, indugiando nella tentazione dello sfavillio discreto ed elegante.
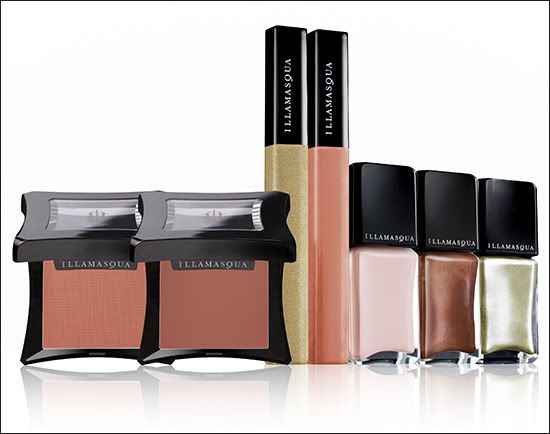
Per oggi mi limiterò a parlare degli smalti che, come dicevo poco sopra, sono tre: Monogamous (nude semi matte), Faithful (bronzo leggermente shimmer) e Swinger (oro foil).
Hi ladies!
I know, I'm not posting as often as usual. I'm really busy at work and, moreover, it's really hot here in North Italy, my neurons are evaporating!
Hope you will forgive me after this review of Illamasqua Monogamous and some general considerations on Naked Strangers Collection for Summer 2012.
All of us perfectly know that Illamasqua is a brand that never ceases to amaze with unusual and visionary collections.
With Naked Strangers Collections they didn't live up their reputation: almost all brands are focusing on bright and neon colors for summer, but they chose nude and gold, indulging in the temptation of elegant and subtle sparkle.
For today I will talk about nail polishes only. There are three varnishes in this collection: Monogamous (semi matte nude pink), Faithful (shimmering bronze) and Swing (foil neutral gold).
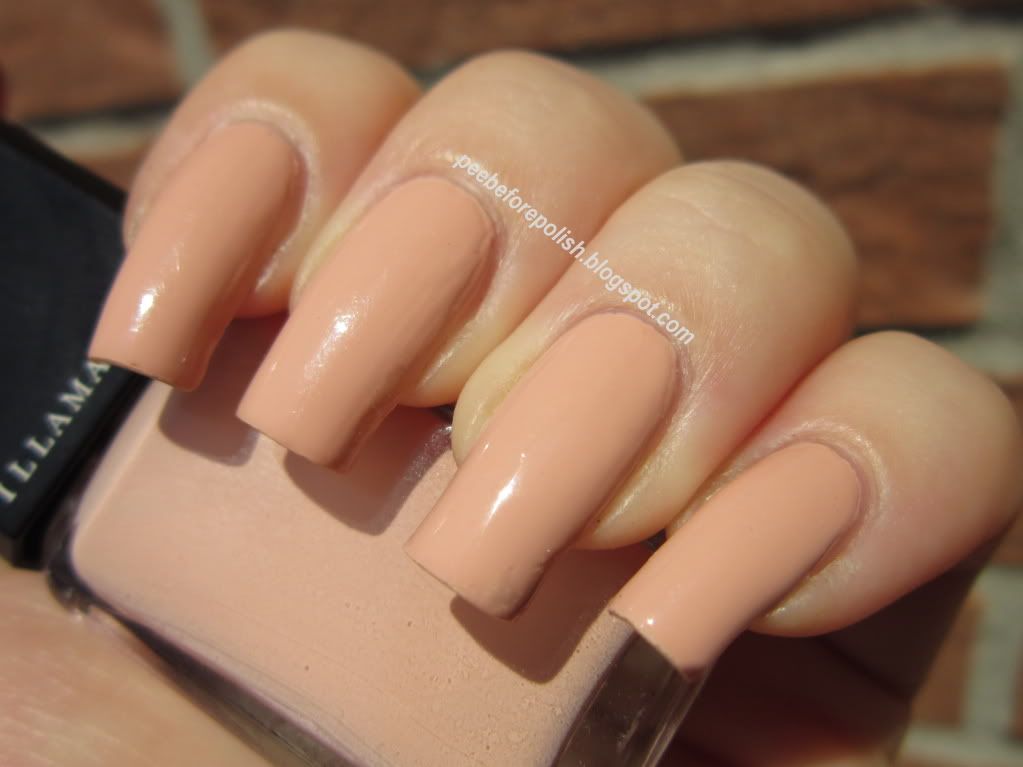
E veniamo ora a Monogamous: sulla carta è un nude rosato che asciuga semi matte. Da quel che ho potuto leggere in altre recensioni e vedere nelle relative foto, è un colore che assume inflessioni diverse a seconda della carnagione di chi lo indossa: su alcune bloggers virava decisamente al pesca, su di me, con la mia carnagione superchiara dal sottotono rosa, appare proprio di ques'ultimo colore.
La formula è un qualcosa di grandioso, e conferma ciò che scrissi sul Nomad: è densa, ma non in modo fastidioso, anzi. L'applicazione è favolosa e se mai doveste fare qualche pasticcietto addensando una quantità eccessiva di prodotto in un punto dell'unghia, no problem: si autolivella da solo.
L'asciugatura è rapida e la durata grandiosa.
Non sono certo tipo da nude, ma questo "cambio d'aspetto" sulle mie unghie mi ha stupita in positivo. In particolar modo, lo sto poi adorando per la pedicure, lo trovo perfetto per chi, come me, non ama e non ha il tempo di abbinare smalto delle mani e dei piedi. Monogamous, in questo senso, è un perfetto passepartout.
Conquistata dallo smalto e conquistata dalla collezione: ma voi che ne pensate? Vi piace questo tocco di insolito nude estivo o preferite sempre e comunque il colore vibrante per la stagione calda, anzi caldissima?
And now, let's focus on Monogamous. I watched and read a lot of review on line, and after this I think that this nail polish changes a bit depending on the skin undertone of the lady who wears it. I saw that it turns peach on some bloggers' skin, but on me it definitely turns nude pink (I have a very pale skin with pink undertone).
Formula is really great and it's really similar to Nomad's one: it's thick, but not too thick. Application is great, drying time is fast and longevity very high.
If you have been reading my posts since a while, you would probably know that I'm not a nude lover. But I must admit that I really appreciated this "change of look" on my nails! From neon to nude: wow.
I was conquered by this nail polish and by the collection in general: but what about YOU? Do you like this touch of unusual colors for summer or you prefer vibrant and bright colors for the hot (very hot!) season?
***Il prodotto mi è stato inviato a scopo valutativo dal team Illamasqua***
***This product was sent me for review from Illamasqua Team***
Lo so, ultimamente latito. Troppi impegni, troppo lavoro e troppo caldo!
Spero di farmi perdonare mostrandovi l'Illamasqua Monogamous, uno dei tre smalti della nuova collezione Illamasqua per l'estate 2012.
Ma prima qualche considerazione sulla collezione stessa. Chi conosce Illamasqua sa che è un brand che, poco ma sicuro, stupisce ogni volta. Punta su collezioni visionarie ed audaci e su un packaging minimal ma di grande ricercatezza.
Con la Naked Strangers non si sono smentiti: mentre tutti puntano sui colori vivaci e neon, Illamasqua propone oro e nude, indugiando nella tentazione dello sfavillio discreto ed elegante.
Per oggi mi limiterò a parlare degli smalti che, come dicevo poco sopra, sono tre: Monogamous (nude semi matte), Faithful (bronzo leggermente shimmer) e Swinger (oro foil).
Hi ladies!
I know, I'm not posting as often as usual. I'm really busy at work and, moreover, it's really hot here in North Italy, my neurons are evaporating!
Hope you will forgive me after this review of Illamasqua Monogamous and some general considerations on Naked Strangers Collection for Summer 2012.
All of us perfectly know that Illamasqua is a brand that never ceases to amaze with unusual and visionary collections.
With Naked Strangers Collections they didn't live up their reputation: almost all brands are focusing on bright and neon colors for summer, but they chose nude and gold, indulging in the temptation of elegant and subtle sparkle.
For today I will talk about nail polishes only. There are three varnishes in this collection: Monogamous (semi matte nude pink), Faithful (shimmering bronze) and Swing (foil neutral gold).
E veniamo ora a Monogamous: sulla carta è un nude rosato che asciuga semi matte. Da quel che ho potuto leggere in altre recensioni e vedere nelle relative foto, è un colore che assume inflessioni diverse a seconda della carnagione di chi lo indossa: su alcune bloggers virava decisamente al pesca, su di me, con la mia carnagione superchiara dal sottotono rosa, appare proprio di ques'ultimo colore.
La formula è un qualcosa di grandioso, e conferma ciò che scrissi sul Nomad: è densa, ma non in modo fastidioso, anzi. L'applicazione è favolosa e se mai doveste fare qualche pasticcietto addensando una quantità eccessiva di prodotto in un punto dell'unghia, no problem: si autolivella da solo.
L'asciugatura è rapida e la durata grandiosa.
Non sono certo tipo da nude, ma questo "cambio d'aspetto" sulle mie unghie mi ha stupita in positivo. In particolar modo, lo sto poi adorando per la pedicure, lo trovo perfetto per chi, come me, non ama e non ha il tempo di abbinare smalto delle mani e dei piedi. Monogamous, in questo senso, è un perfetto passepartout.
Conquistata dallo smalto e conquistata dalla collezione: ma voi che ne pensate? Vi piace questo tocco di insolito nude estivo o preferite sempre e comunque il colore vibrante per la stagione calda, anzi caldissima?
And now, let's focus on Monogamous. I watched and read a lot of review on line, and after this I think that this nail polish changes a bit depending on the skin undertone of the lady who wears it. I saw that it turns peach on some bloggers' skin, but on me it definitely turns nude pink (I have a very pale skin with pink undertone).
Formula is really great and it's really similar to Nomad's one: it's thick, but not too thick. Application is great, drying time is fast and longevity very high.
If you have been reading my posts since a while, you would probably know that I'm not a nude lover. But I must admit that I really appreciated this "change of look" on my nails! From neon to nude: wow.
I was conquered by this nail polish and by the collection in general: but what about YOU? Do you like this touch of unusual colors for summer or you prefer vibrant and bright colors for the hot (very hot!) season?
| In the shade WITH top coat |
| In direct sunlight WITH top coat |
| In the shade WITHOUT top coat |
| Applicazione / Application |
4.5/5
|
| Asciugatura / Drying time |
4.5/5
|
| Coprenza / Pigmentation |
4.75/5
|
| Durata / Longevity |
5/5
|
| GIUDIZIO FINALE / OVERALL |
4.75/5
|
***Il prodotto mi è stato inviato a scopo valutativo dal team Illamasqua***
***This product was sent me for review from Illamasqua Team***
mercoledì 13 giugno 2012
Illamasqua Poke
Salve a tutte!
Oggi vi presento il mio primissimo (insieme a Rare) smalto Illamasqua, il Poke.
Poke è un viola davvero luminosissimo arricchito da un generoso shimmer fuchsia e blu. Questo shimmer è talmente ricco che è stato un problema catturarlo in foto, nella vita reale "illumina" molto di più!
La formula è grandiosa: come per Nomad, né troppo densa né troppo liquida. Due passate e la coprenza è servita.
Tempi di asciugatura rapidi e durata ottima.
Sono davvero contenta di questo acquisto, decisamente soldi ben spesi!
Hi ladies!
Illamasqua Poke was the first polish of the brand that I bought - I ordered it a few months ago together with the stunning Rare.
Poke is a bright and super vibrant purple with a generous fuchsia and blue shimmer. This shimmer really "lights up" the base color and is even more gorgeous IRL!
Formula is great: not too thick and not too thin. It took two coats to obtain the perfect opacity and it dries fast. Moreover, the longevity is great.
I'm really happy with this purchase, this polish really is good value for money!
Oggi vi presento il mio primissimo (insieme a Rare) smalto Illamasqua, il Poke.
Poke è un viola davvero luminosissimo arricchito da un generoso shimmer fuchsia e blu. Questo shimmer è talmente ricco che è stato un problema catturarlo in foto, nella vita reale "illumina" molto di più!
La formula è grandiosa: come per Nomad, né troppo densa né troppo liquida. Due passate e la coprenza è servita.
Tempi di asciugatura rapidi e durata ottima.
Sono davvero contenta di questo acquisto, decisamente soldi ben spesi!
Hi ladies!
Illamasqua Poke was the first polish of the brand that I bought - I ordered it a few months ago together with the stunning Rare.
Poke is a bright and super vibrant purple with a generous fuchsia and blue shimmer. This shimmer really "lights up" the base color and is even more gorgeous IRL!
Formula is great: not too thick and not too thin. It took two coats to obtain the perfect opacity and it dries fast. Moreover, the longevity is great.
I'm really happy with this purchase, this polish really is good value for money!
| Applicazione / Application |
4.5/5
|
| Asciugatura / Drying time |
5/5
|
| Coprenza / Pigmentation |
4.5/5
|
| Durata / Longevity |
5/5
|
| GIUDIZIO FINALE / OVERALL |
4.75/5
|
Etichette:
Illamasqua,
Purple,
Shimmer
Iscriviti a:
Post (Atom)