Ads 468x60px

Visualizzazione post con etichetta Neon. Mostra tutti i post

mercoledì 10 agosto 2016

Stamping time: Summer Flowers

Ciao a tutte!
Dopo tanto tempo torno a proporvi una nail art. Avevo voglia di colori neon e stamping in contrasto, e ovviamente fiori!

lunedì 23 maggio 2016

Stamping time: Hypnotize U!

Ciao a tutte!
Sono certa che ricorderete lo sparaflesciosissimo Color Club East Austin. Dal momento che adoro l'accostamento neon-stamping, e in particolar modo corallo-nero, ho deciso di improvvisare una velocissima nail art.

giovedì 19 maggio 2016

Color Club East Austin

Ciao a tutte!
Anche se qui freddo e pioggia non accennano a mollare, io sento forte la voglia di colori carichi e forti. E cosa ci può essere di meglio di un bel neon sparaflescioso?

domenica 27 settembre 2015

Morgan Taylor Pop-arazzi Rose

Buona domenica a tutte!
Mentre aspetto che la maschera Mudd faccia il suo dovere, inizio ad imbastire il post del giorno, dedicato allo stupendo Morgan Taylor Pop-arazzi Rose, dalla collezione Hello Pretty per l'estate 2015. Ho avuto occasione di vederlo dal vivo al Cosmoprof su una standista del distributore italiano di Morgan Taylor ed è stato amore a prima vista, ho proprio dovuto acquistarlo!

domenica 28 giugno 2015

Stamping time: Tropical Neon Flowers

Ciao a tutte!
Purtroppo anche questo week-end estivo è finito. Io continuo a sognare spiagge tropicali, ma sono incastrata nel cemento della città, per cui ho deciso di portare per lo meno i Tropici sulle mie unghie!

venerdì 19 giugno 2015

Finishpedia #24: NEON [China Glaze I'm with the Lifeguard]

CIAONE!
E qui, per quanto mi riguarda, potrebbe tranquillamente finire il testo di questo post. Sono o non sono una vera vulgaris eloquentiae magistra?
Vabbé il concetto che voglio esprimere è che lo smalto di oggi, il China Glaze I'm with the Lifeguard, emblema di quel finish neon che conclude la Finishpedia, lascia davvero stupefatte, senza parole e a occhi sbarrati.

giovedì 23 aprile 2015

Morgan Taylor Anime-azing Color

Sciau a tutte!
Oggi vi presento uno smalto tanto bello quanto impossibile da fotografare, il Morgan Taylor Anime-azing Color, acquistato durante lo scorso Cosmoprof.
Morgan Taylor Anime-azing Color è un favoloso viola neon dal fortissimo sottotono blu. Catturare il colore è stata un'impresa, alla fine ci sono riuscita solo usando la luce artificiale; sapete che preferisco sempre e comunque la luce naturale, ma non ho avuto molta scelta!

lunedì 11 agosto 2014

Labo Led #15 Agata Gialla

Buongiorno a tutte!
Dopo qualche giorno di bagordi e relax totale (ci voleva!) rieccomi qui con uno smalto adattissimo alla stagione, dal momento che si tratta di un giallo neon abbagliante.

mercoledì 6 agosto 2014

Neon Chess Nails and Neon Studs

Buonasera ragazze!
Oggi son distrutta per cui post ridotto all'essenziale. Essenziale come la nail art del giorno, davvero semplice e veloce.

mercoledì 14 maggio 2014

L'Oréal Flashing Lilac

Buongiorno a tutte!
Oggi vi parlo del primo smalto L'Oréal di "nuova generazione" che provo, ovvero il Flashing Lilac della serie Color Riche ed appartenente alla collezione Neon Pop dell'estate 2013.

domenica 23 febbraio 2014

MAC Candy Yum Yum


Buona domenica sera a tutte!
Breve post per parlarvi di un rossetto celeberrimo, il MAC Candy Yum Yum, già intravisto nel mio post haul. Trovo che la migliore definizione per descriverlo sia: bello bello bello in modo assurdo!

sabato 10 agosto 2013

Neon Lights: Neon Water Marble!

Ciao a tutte e buon sabato!
Quando Francine ha proposto un post a tema neon non ho potuto davvero esimermi, anche perché era da tanto tempo che desideravo creare una water marble neon.
E quindi eccoci qui: ho scelto di realizzare un semplice design a petalo, che comunque reputo di grande effetto. Per quanto riguarda i colori, invece, ho optato per un fucsia sparato di Layla, il Fluo Colour F05, e un blu spettacolare della Coral Prosilk, il #600 della linea neon.
E' stato difficilissimo catturare i colori in tutto il loro splendore, ci sono riuscita ma dal vivo sono persino più intensi!
Vi lascio alle mie foto e alle creazioni delle altre smaltare pazze, spero che la mia water marble vi piaccia, nel qual caso vi consiglio di rimanere sintonizzate perché è in arrivo il video tutorial!

Hi ladies and happy Saturday!
A few weeks ago Francine proposed us a post with neon as main theme... I couldn't refuse her invite! I immediately decided that I wanted to do a neon water marble so... Here it is!
I created a simple petal design, which is one of the basic patterns for water marbles but it's, IMO, beautiful. About the colors: I picked a super bright pink by Layla, Fluo Colour F05, and a stunning and intense blue by Coral Prosilk, #600 from Neon Collection.
It was so hard to capture all the brightness of these colours, I swear that they are even more vibrant in real life!
Hope that you like this creation, I did a video tutorial and I'm going to work on it during this week since I'm on holiday and I finally have more time to dedicate to my blog.
Thank you for reading and watching and have a nice evening!


martedì 25 giugno 2013

Moyra #56

Ciao a tutte!
Oggi vi mostro uno smalto Moyra, altro brand scoperto grazie ad Anne di Polishinail.
Il Moyra #56, proveniente dalla linea classica, è un incredibile neon fucsia/viola coprente in sole due passate e che asciuga in modo incredibilmente lucido, contrariamente alla maggior parte dei neon che assume un finish satinato o matte.
Sulla mia pelle (a sottotono rosa) il fucsia è senz'altro il colore che prevale di più, anche se in condizioni di luce meno intensa esce fuori il suo forte sottotono blu e vira più al viola.
La formula è un tantino liquida ma si applica meravigliosamente ed asciuga in un lampo. Infine, la durata è molto buona.
Sono rimasta sbalordita dalla bellezza e dalla qualità di questo smalto, se poi consideriamo che costa solamente 1.50€ per 12 ml di prodotto, beh, si può desiderare di meglio?
Vi ricordo il mio codice CRISTINA-8 che dà diritto ad uno sconto dell'8% (set esclusi) sul negozio di Anne.
Come al solito vi ringrazio per l'attenzione, vi mando un abbraccio e vi dò appuntamento a presto!

Hi ladies!
Today I'm going to show you a nail polish by a new (to me) brand called Moyra. I discovered this Greek company thanks to Anne of Polishinail.

Moyra #56 belongs to the classic series of the brand and it's a stunning fuchsia/purple neon which dries super glossy, contrary to what usually happens with neon polishes, which generally dry with a matte-satin finish. 
On my skin (which has a pink undertone) it looks more fuchsia than purple, and its strong blue undertone is better visible indoors. Two coats in my pics.
Formula is a bit runny but application is very easy and pleasant; moreover it dries fast and has a very good longevity.
I was really surprised by the beauty and the quality of this nail polish; furthermore, it only costs 1.50€ for 12 ml of product! 
Don’t forget you can get 8% off 10€ (sets excluded) if you use code CRISTINA-8 if you order from Polishinail.
And that's all I have for you today, thank you for reading and watching and have a nice evening!


Applicazione / Application
5/5
Asciugatura / Drying time
4.5/5
Coprenza / Pigmentation
4.5/5
Durata / Longevity
5/5
GIUDIZIO FINALE / OVERALL
4.75/5

***Il prodotto mi è stato inviato per essere recensito*** 
***This product was sent me for review***

mercoledì 22 maggio 2013

ABC Challenge: T for Color Club Tangerine Scream

Hi ladies!
Oh my God, I can't believe we are already to letter T!
Anyway, I'm sooooo happy that here in North Italy the weather is a bit better and I finally can wear a neon polish.
Today I'm going to show you Color Club Tangerine Scream, a stunning orange neon shade from Electro Candy Collection for Summer 2009.
Tangerine Scream also has a gorgeous and unusual (for a neon polish) light shimmer. It dries matte so I applied a top coat for my pics. I did three coats of product for every nail, except for my ring finger where I used one coat of Orly Dayglow and two coats of Tangerine Scream.
This polish is a bit on the sheer side, after three coats my nail line was still a bit visible. But I don't mind, its formula is absolutely perfect, it applies easily and evenly. It also dries quite fast and has a good longevity.
That's all I have for you today, thank you for reading and watching and have a nice evening!

Ciao ragazze!
Mi sembra incredibile di essere già arrivate alla lettera T. Finalmente questa primavera avara di sole ha deciso di concederci qualche giorno di tepore, e ovviamente io mi sono precipitata ad indossare uno smalto neon che non vedevo l'ora di mostrarvi, il Color Club Tangerine Scream (collezione estate 2009 Electro Candy).
Tangerine Scream è un arancio abbagliante con la particolarità di essere anche shimmer. Come tutti i neon asciuga con un finish satin-matte, per cui ho applicato un top coat per le foto. Tre passate per ogni unghia, fuorché sull'anulare, dove ho layerizzato due mani di Tangerine Scream sopra una di Orly Dayglow. Insomma, avrete capito che è un tantinello sheer (controluce si può "apprezzare" la linea dell'unghia laddove non c'è la base bianca). Compensa con una formula fantastica, a dir poco perfetta, un'asciugatura rapida e una durata molto buona.
E anche per oggi è tutto, a presto e buona serata!


Applicazione / Application
5/5
Asciugatura / Drying time
4.5/5
Coprenza / Pigmentation
3/5
Durata / Longevity
4.5/5
GIUDIZIO FINALE / OVERALL
4.25/5


lunedì 24 dicembre 2012

ABC Challenge: Y for Color Club Youthquake [and Merry Xmas!]

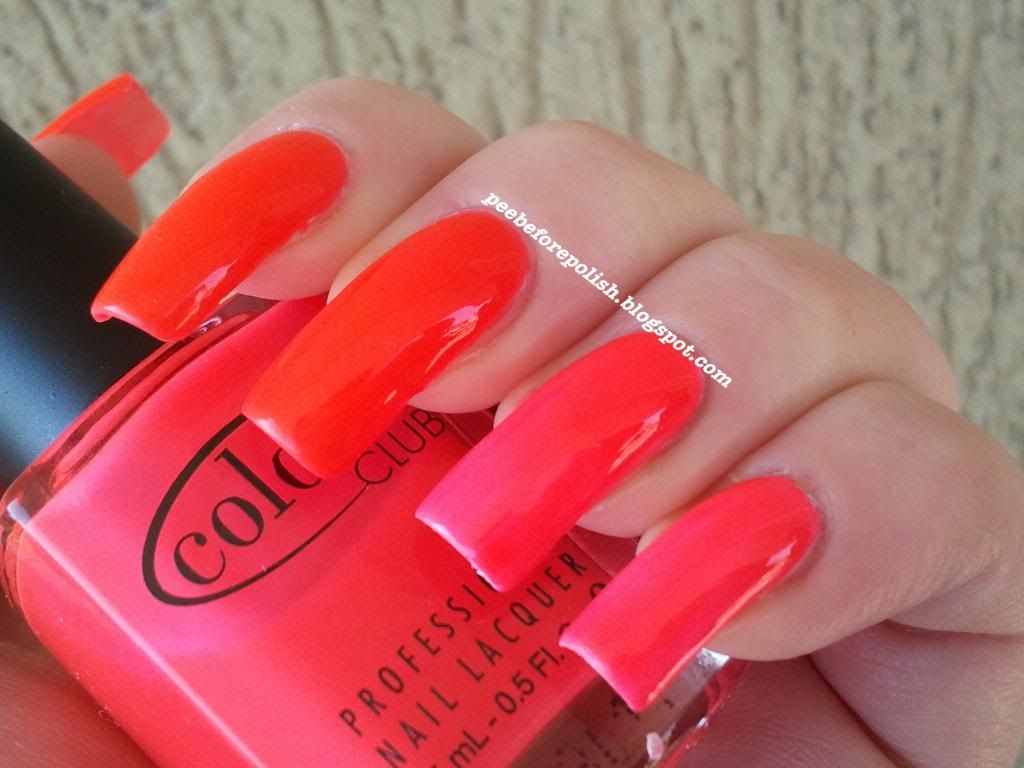
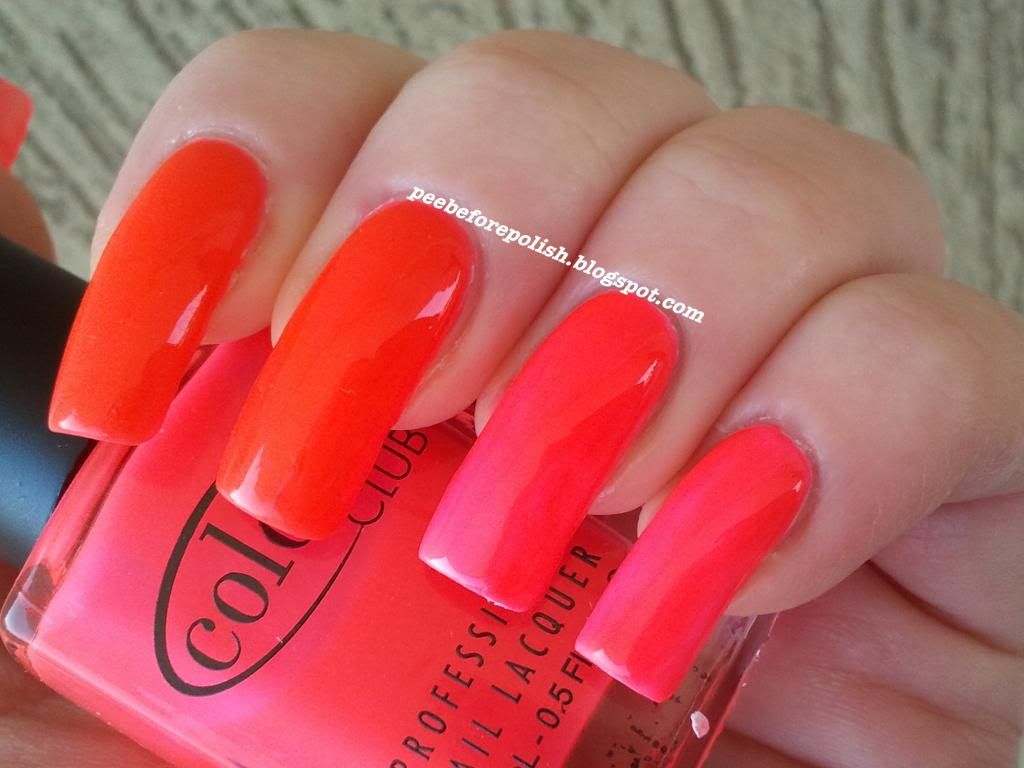
Cosa c'è di più deviante di pubblicare, la vigilia di Natale, uno smalto NEON? Quindi ecco la mia proposta per un Natale smaltifero alternativo: Color Club Youthquake.
Uno smalto molto particolare, in realtà: in boccetta è rosa neon. Ma se lo andate ad applicare da solo, apparirà come un arancio-corallo. E faticherete non poco, perché messo da solo ci vogliono quattro mani per avere la coprenza (che non sarà neppure perfetta).
Se layerizzato sopra un bianco, invece, vi si mostrerà in tutto il suo splendore di rosa evidenziatore (tié, beccateve pure la rima).
Nelle mie foto, su indice e medio ci sono quattro mani di Youthquake solo soletto, su anulare e mignolo ci sono due passate sopra una mano di Orly Dayglow. Per fortuna la formula è fantastica, si applica con semplicità estrema, così il lavoro extra non sarà eccessivamente gravoso. L'asciugatura non è rapidissima, complici le numerose mani da stendere, e la durata è molto buona.
Scappo letteralmente, ho fatto tardissimo e devo prepararmi per il cenone della Vigilia, e ne approfitto per augurare a tutte voi un FAVOLOSO NATALE! Abbraccio voi e le vostre famiglie e... A presto!


This is an "alternative" post. You know, it's quite odd to wear a neon polish during the winter. 
It's even odder to show a neon polish on Christmas Eve. Anyway, this was my pick for letter Y: Color Club Youthquake.
It's a very particular color: in the bottle it looks like a neon pink. But if you wear it alone, it will look like a neon orange-coral. If you apply it over a white base, it will appear like a neon pink. Quite strange, don't you think? 
You can see this difference on my nails: on the index and on the middle there are four (yes, FOUR) coats of Youthquake. On the ring and on the pinkie there are two coats of Youthquake over one coat of Orly Dayglow. 
Its formula is great, which is a good thing, considering that you have to do many coats of this polish. Drying time is a bit longer than usual and longevity is quite good. 
Well, that's all I have for you today, I have to hurry up because I'm late for my Christmas Eve dinner. But before to go, I want to wish to all of you a great Christmas. Best wishes and many hugs from Italy!


Applicazione / Application
5/5
Asciugatura / Drying time
3.5/5
Coprenza / Pigmentation
2/5
Durata / Longevity
5/5
GIUDIZIO FINALE / OVERALL
3.75/5


lunedì 17 dicembre 2012

ABC Challenge: W for Watercolor Nails

-4. Ebbene sì, siam quasi giunte alla fine della nostra maratona. Tristi? Felici? Francamente ve ne infischiate?
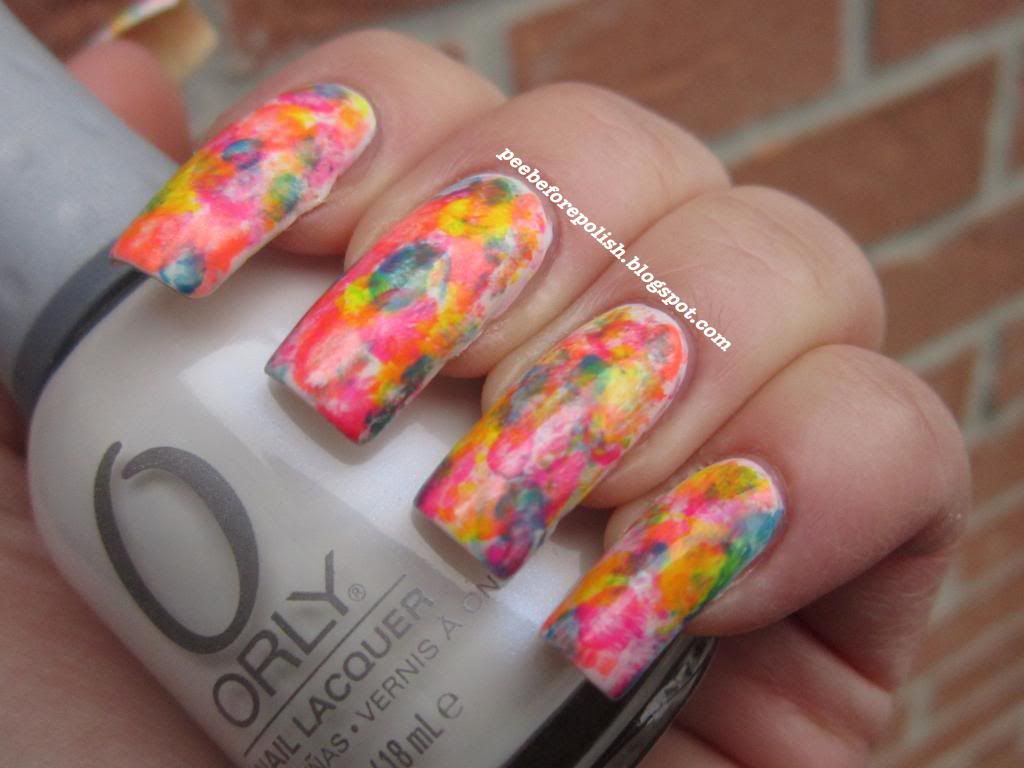
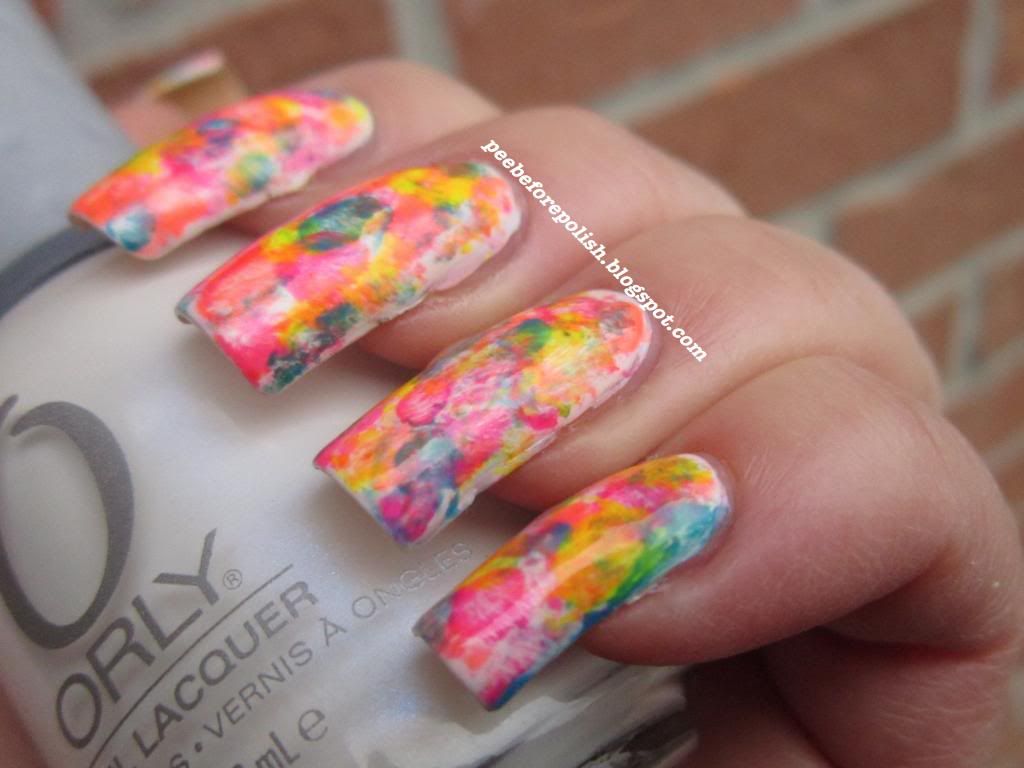
Qualunque sia la vostra risposta, oggi vi cuccate la nostra W, che io ho deciso di destinare ad una nail art. Ma perché fare una rodata water marble? Meglio sperimentare, no? Per cui, eccovi la mia prima Watercolor Nail Art.
Per realizzarla è necessario quello che, normalmente, è il nemico numero uno dello smalto: ovvero, l'acetone.
Ho iniziato stendendo due mani di Orly Dayglow; ho poi applicato un top coat, cosa che reputo importantissima: sulle unghie finte avevo fatto delle prove senza ed il risultato è che viene fuori un paciugo pazzesco. Il top coat, invece, costituisce un ulteriore film protettivo della base bianca che deve rimanere inalterata, perché tutto il marasma "impressionista" deve avvenire sopra ad essa.
Dopodiché ho ho iniziato ad applicare il primo colore scelto per il decoro: applicate due o tre piccole goccine di ogni smalto, e poi picchiettatelo su tutta l'unghia, creando il decoro a voi più confacente, con un pennello intinto nell'acetone. Questo processo va ripetuto con ogni smalto prescelto, avendo cura di pulire bene il pennello in particolare quando si cambia "drasticamente" tonalità.
Io ho seguito quest'ordine: Color Club Youthquake (fuchsia neon), Tangerine Scream (arancio neon), Orly Glowstick (giallo neon) e Catrice Blue Cara Ciao (azzurro intenso).
I consigli che vi posso dare, oltre a quello di proteggere la base bianca con un top coat, sono questi: scegliete l'acetone puro - il solvente contiene aromi e fragranze che possono interferire, inoltre l'acetone lavora più in fretta; utilizzate un pennello con setole morbide e punta stondata, orientandovi tra quelli di dimensione compresa tra il 4 e il 6 (a seconda della dimensione della vostra unghia); lasciate per ultimo il colore che più si differenzia dagli altri a livello cromatico, in questo caso il blu; usate smalti pigmentati, giocoforza sbiadiranno molto a contatto con l'acetone.
Spero che questo mio esperimento vi sia piaciuto, ditemi se vi può interessare un video tutorial (no, non fatelo, vi prego!) e non scordatevi di controllare le entries delle altre puelle!


-4. Our marathon is going to end soon. Are you sad for this? Are you happy? Or maybe you don't care at all...!
Well, today I show you my letter W, and I picked another nail art. You probably remember that I love water marbles, I think I'm quite good with that technique, but I wanted to change and experiment another kind of nail art: watercolor nails.
The "secret" ingredient of this nail art is acetone, which is usually the #1 enemy of nail polish.
I started painting my nails with two coats of Orly Dayglow and applying a top coat over it; I think this is a very important step: before realizing this nail art on my nails, I did a couple of tests on fake nails without applying a top coat and the result was very messy. The top coat will protect your base and you will be able to create your "impressionist" effect only on the surface of your nails.
Then I applied three tiny drops of the first polish I picked for the design and I dipped my brush in the acetone, and then start spreading the blobs of color. I did the same with all the other colors I chose.
Pay attention to clean your brush when you change color.
In this case, I applied the nail polishes in this order: Color Club Youthquake (neon fuchsia), Tangerine Scream (neon orange), Orly Glowstick (neon yellow) and Catrice Blue Cara Ciao (intense blue).
Just a few tips: use pure acetone, and not a nail polish remover - this can contain parfums or other ingredients that can interfer, moreover acetone works faster; choose a brush with round and soft bristles - mine was too hard and it was a nightmare!; just to give you an idea of the size of the brush, choose between #4 and #6, depending on the shape and lenght of your nails; the strongest color (here Catrice Blue Cara Ciao) should be the last to be applied; choose pigmented polishes, since the acetone will strongly fade their color.
Hope you'll like this nail art, if you want a video tutorial for this technique feel free to ask... And don't forget to check the other ladies' entries!


***Due degli smalti di questo post (Orly Glowstick e Dayglow) mi sono stati inviati a scopo valutativo. Tutti gli altri prodotti sono stati acquistati da me***
***Two of the nail polished of this post (Orly Glowstick and Dayglow) were sent me for review. All the other products were bought by me***


giovedì 22 novembre 2012

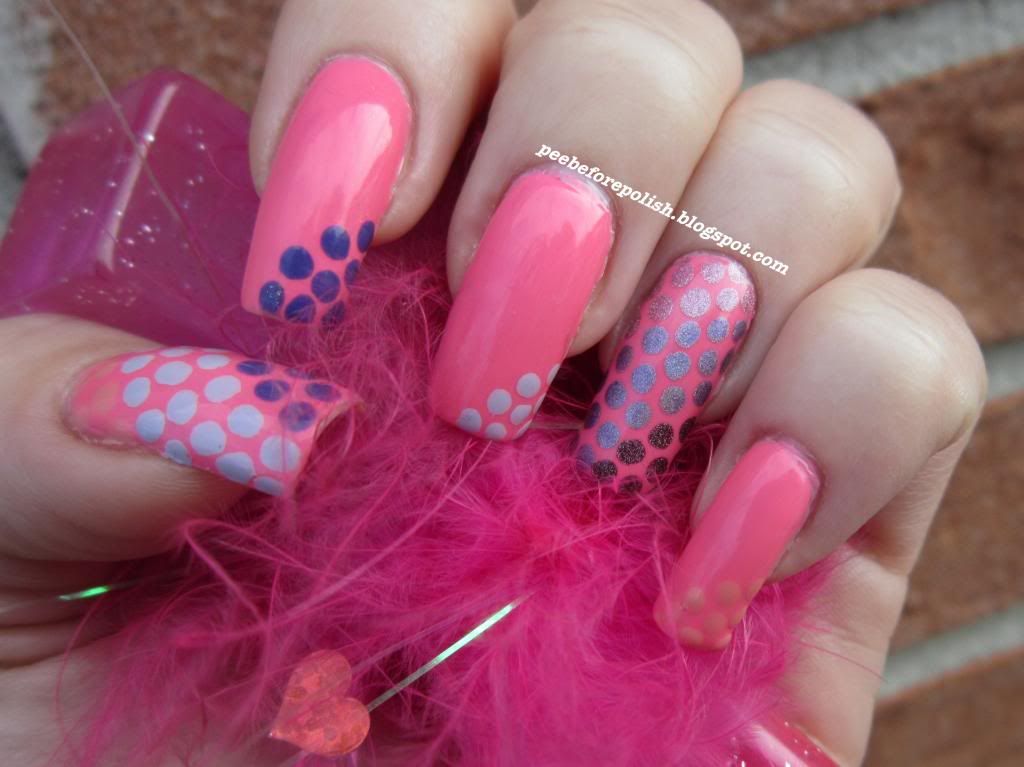
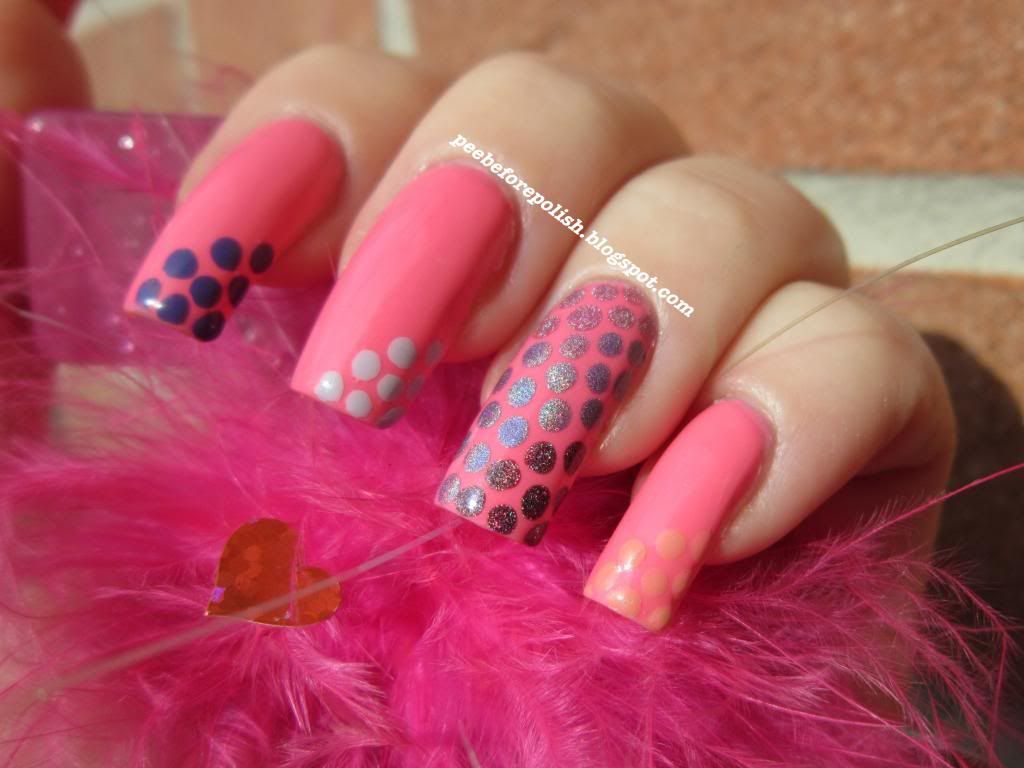
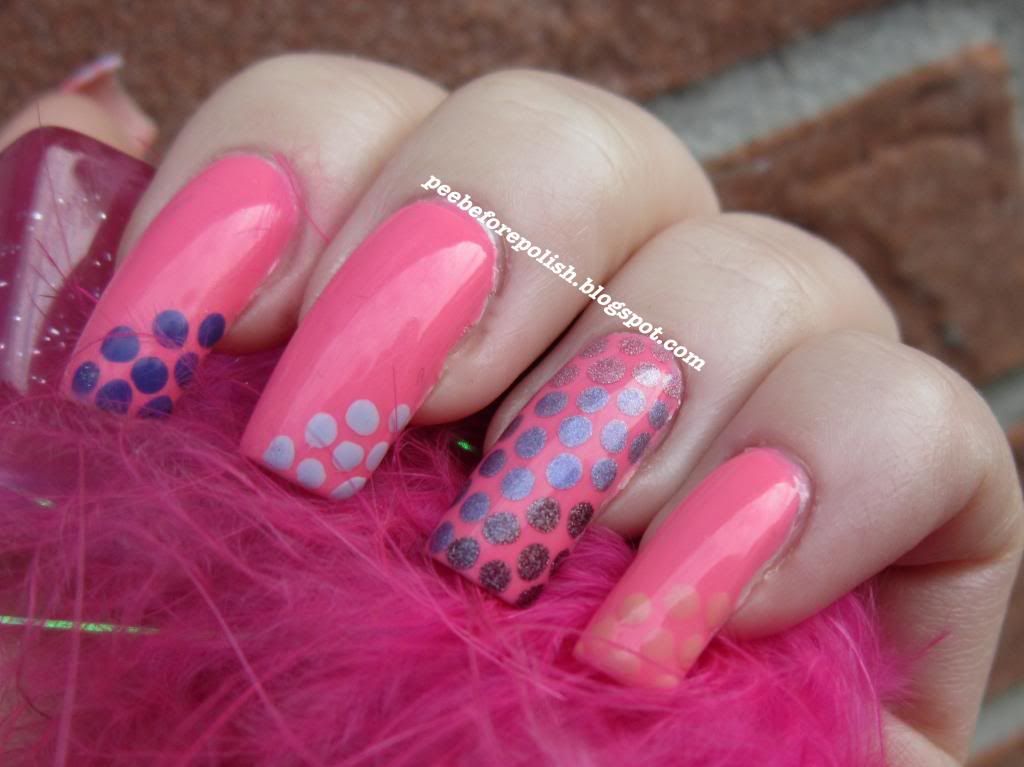
ABC Challenge: P for Polka Dots

Buongiorno a tutte e ben ritrovate con la ABC Challenge!
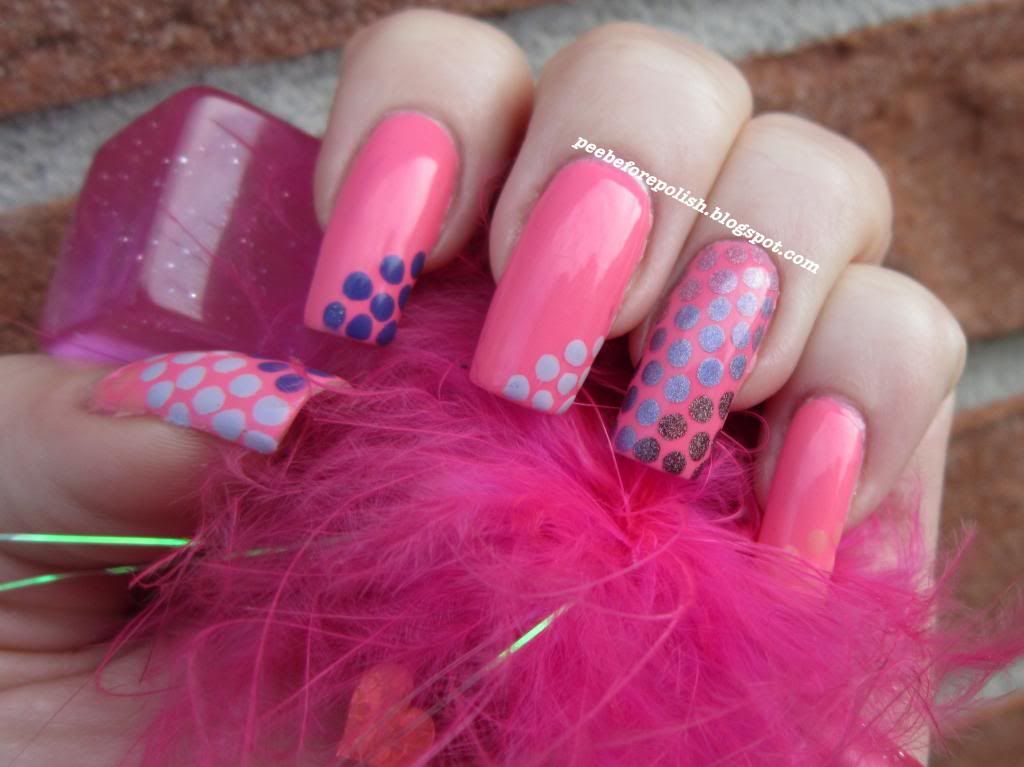
Oggi vi mostro la mia prima nail art a pallini (Polka Dots però fa più phaigo).
Prima, una digressione - ma va? Dovrei seriamente pensare ad un giveaway per chi si legge da cima a fondo i miei pipponi esistenzialistici della post adolescenza.
Io non capisco perché le cose complicate mi riescano con facilità e naturalezza (classici esempio la one stroke o la water marble) mentre una cosa super easy come la polka dots mi abbia fatta sbarellare. Non riuscivo a prelevare la giusta quantità di colore, un pallino mi veniva enorme, l'altro minuscolo, un altro ancora sembrava una quadrato sbilenco e non un pallino. Ma vabbé.
Questo è il risultato finale e, sbiellamenti a parte, mi piace moltissimo!
Lo smalto di base è l'Essie Knockout Pout.
Sull'indice ho applicato, solo in un angolo dell'unghia, l'Orly Purple Leather, un viola carico dal finish vinile.
Sul medio, sempre su un angolo, il China Glaze Light as Air, un lilla chiaro creme.
Sul mignolo, l'Eyeko Nude Polish (vade retro Satana, mai più questo smalto, MAI PIU'), un nude creme dalla formula liquidissima che più liquida non si può.
Sul pollice li ho usati tutti e tre, creando una specie di gradient pallinosa (!) e riempiendo l'intera unghia.
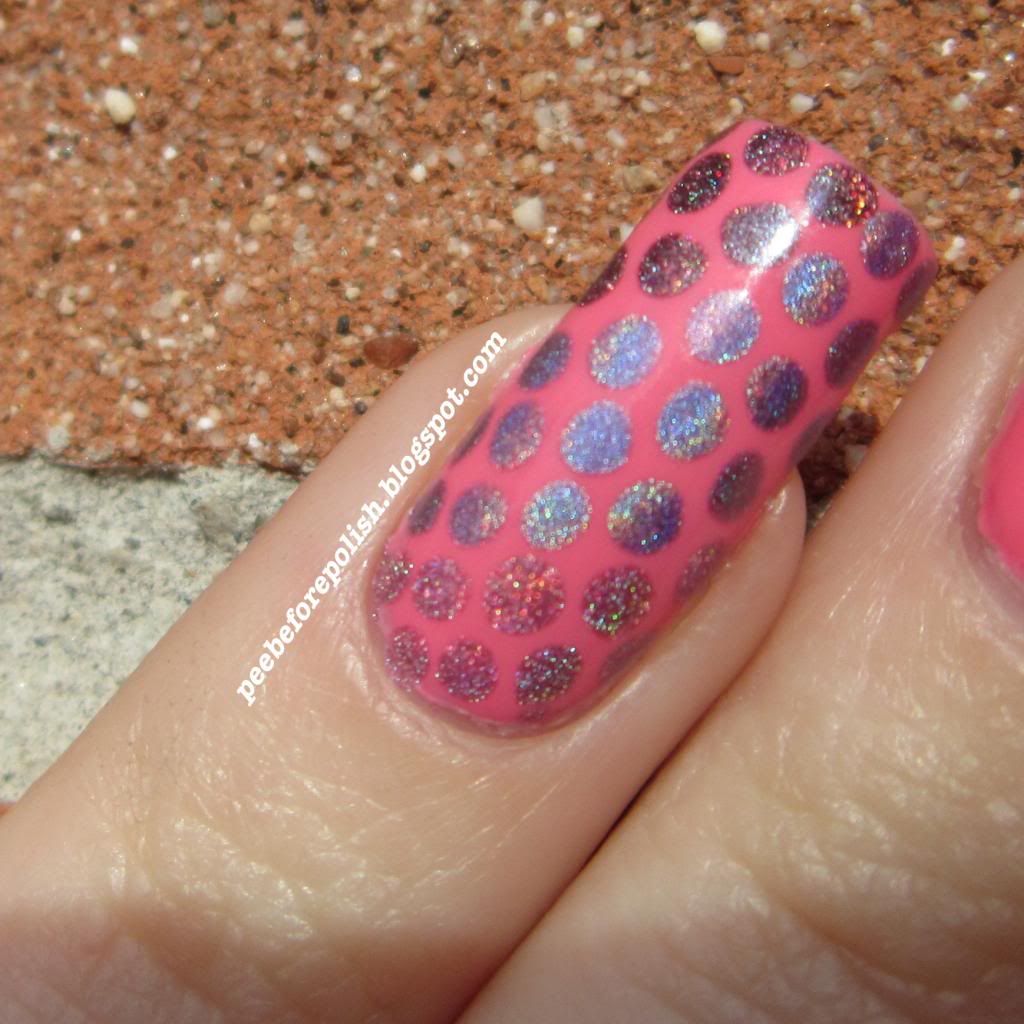
Infine, anche per l'anulare ho scelto un full nail design, optando però per tre colori holo: Layla Misty Blush in alto, al centro China Glaze IDK e alla base dell'unghia Nfu Oh #63.
Non vi sarà difficile immaginare a che carnaio di bocce ci fosse sul mio tavolo quando l'ho realizzata!
Spero che il risultato finale vi piaccia ed a presto con la Q, e non dimenticate di curiosare in mezzo alle entries delle altre dame!


Hi ladies and welcome back to ABC Challenge!
Today I'm going to show you my first Polka Dots manicure.
But first-of-all, a couple of considerations. I don't know why, but those nail arts which are usually considered a bit hard to realize (such as one stroke or water marble) are extremely easy to me.
On the contrary, I have serious issues when I do super simply nail arts or designs, such as polka dots. 
This mani was a real challenge!!!! My dots were different in sizes, even if I used the same dotter to do them. Some of them were not round but square, etc. etc.
In the end, I like a lot the final result, but what a struggle!
Well, this is a list of the products I used. The base color is Essie Knockout Pout.
On the index finger I applied, only in a little part of the nail, Orly Purple Leather, an intense purple with a vynil finish. 
For the middle finger I chose China Glaze Light as Air, a light lilac with a creme finish.
On the pimkie I used Eyeko Nude Polish (I swear, I will never, never, NEVER use this polish again in my entire life), a sheer nude with a creme finish and a super runny formula.
On my thumb I realized a full nail design, using all the polishes written above in a sort of "gradient polka dots".
I chose a full nail design also for my ring finger, but I added a touch of magic with three holographic polishes: Layla Misty Blush on the top, China Glaze IDK in the middle and Nfu Oh #63 at the base of the nail. 
As you can imagine, there was plenty of nail polish bottles on my table during the realization of this nail art!
Hope you like this mani, see you soon with letter Q and don't forget to check the other ladies' entries!


lunedì 5 novembre 2012

ABC Challenge: K for Essie Knockout Pout


Smalto del giorno: Knockout Pout di Essie. Sottotitolo: I'm a Barbie girl, in a Barbie world!
Sì, perché guardando questo smalto mi vengono solo due parole per definirlo: rosa Barbie.
Più tecnicamente, è un rosa molto vivace, praticamente neon. E difatti asciuga con un finish satin.
Parlando di formula ed applicazione, devo fare un passo indietro: nella mia esperienza, gli smalti Essie potrebbero essere divisi in due grandi gruppi. Un gruppo include tutti gli smalti perfetti o quasi, nell'altro quelli con una formula meeeeeeh.
Knockout Pout fa parte della seconda famiglia. La formula in sé non è malvagissima, la consistenza è perfetta. Però ottenere un risultato omogeneo è davvero complicato: pur stendendone uno strato uniforme tende ad asciugare a chiazze. Tant'è che parlando di coprenza in sé e per sé potrebbero bastarne due mani, ma ne ho dovuta stendere una terza proprio per nascondere questa discontinuità nel colore.
Il fatto che siano state necessarie tre mani mi ha sostanzialmente obbligata ad usare un top coat, altrimenti sarei diventata vecchia ad aspettare che asciugasse. Naturalmente ho provato il metodo sandwich (due mani di smalto, top coat e ulteriore mano di smalto) per conservare il finish satin e non attendere troppo per l'asciugatura, ma si ripresenta il problema delle chiazze di colore. O santa pazienza.
Insomma, se volete mantenere il finish originario dello smalto armatevi di tempo e pazienza nel rimanere ferme; magari usate delle goccine se credete che possa servire - personalmente non credo in questo genere di prodotto, avendo preso delle cantonate con le Essence e le Qtica. Se invece volete un finish glossy nessun problema, applicando un top coat (io ho evitato il TC ad asciugatura rapida proprio per valutare meglio questo parametro) i tempi di asciugatura sono piuttosto rapidi.
Per oggi è tutto, non dimenticatevi di guardare le entries delle altre signorine! Peraltro ne approfitto per avvertirle che tornerò ad infestare i loro blogs coi miei commenti, muahahahahahah!


Polish of the day: Knowout Pout by Essie. When I look at this color, I start singing: "I'm a Barbie girl, in a Barbie world!" (do you remember the song???). Because I think that the better description for this color is just Barbie pink.
Technically, it's a super bright, neon pink. In fact it dries satin.
Talking about formula and application, I have to say first that I could split my Essie polishes into two groups: in the first group, all the polishes that have a perfect formula. In the second group, all the polishes which have a meeeeh formula.
Knockout Pout is a meeeeeh! This polish is not too thick or too runny... The thickness is perfect. But it's almost impossible to obtain a smooth result. Even if you apply an even coat, you will notice spots in the color. The perfect coverage could be obtained with two coats, but I always apply three coats to hide these spots and imperfections. 
The final result without top coat is nice, I love polishes that dry satin, but after three coats you will need a lot of time for drying. I tried the sandwich method (two coats of polish, top coat and another coat of polish) but, once again, I couldn't obtain an even result and I noticed spots of color.
If you want to keep the satin look, just wait. And wait. Maybe you can use drying drops if this helps - I don't believe in this kind of product, I tried Essence and Qtica drying drops and they were useless.
If you want a glossy finish, simply apply a top coat - I used a Essence TC which is not fast drying and I waited only a few minutes. 
That all I have for you today, hope you will have a wonderful evening and see you soon with a bestial post!!!!

With top coat
With top coat
Without top coat


Applicazione / Application
3/5
Asciugatura / Drying time
4/5
Coprenza / Pigmentation
3.5/5
Durata / Longevity
4/5
GIUDIZIO FINALE / OVERALL
3.75/5

lunedì 17 settembre 2012

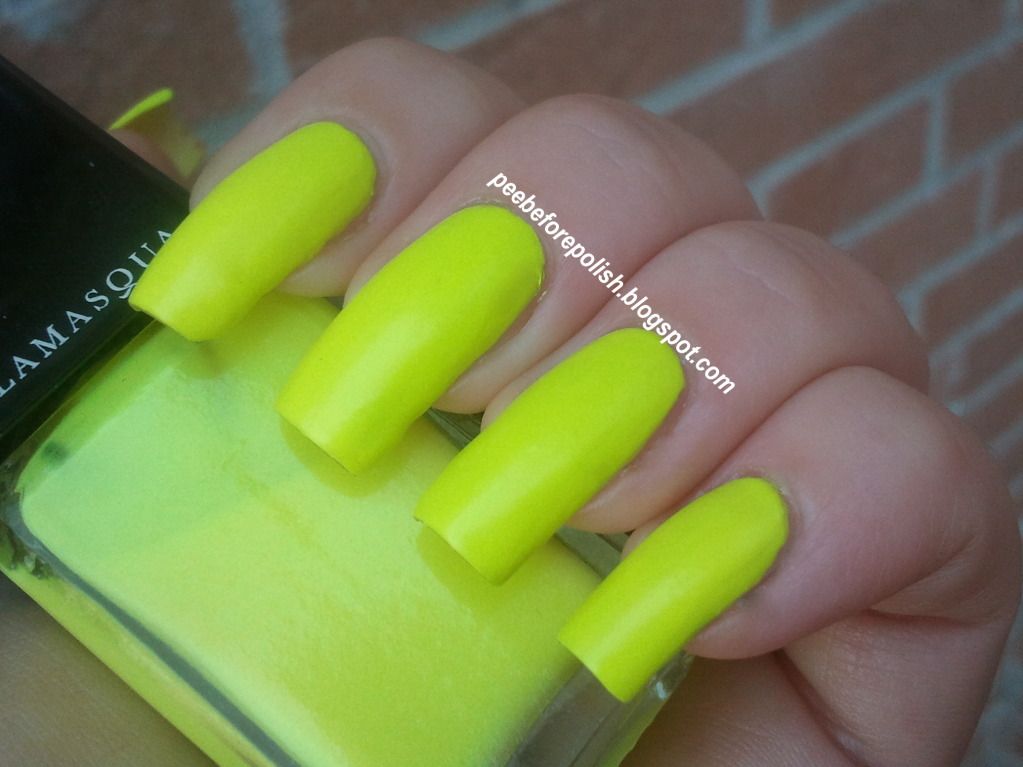
Post #200: Illamasqua Rare

Salve a tutte!
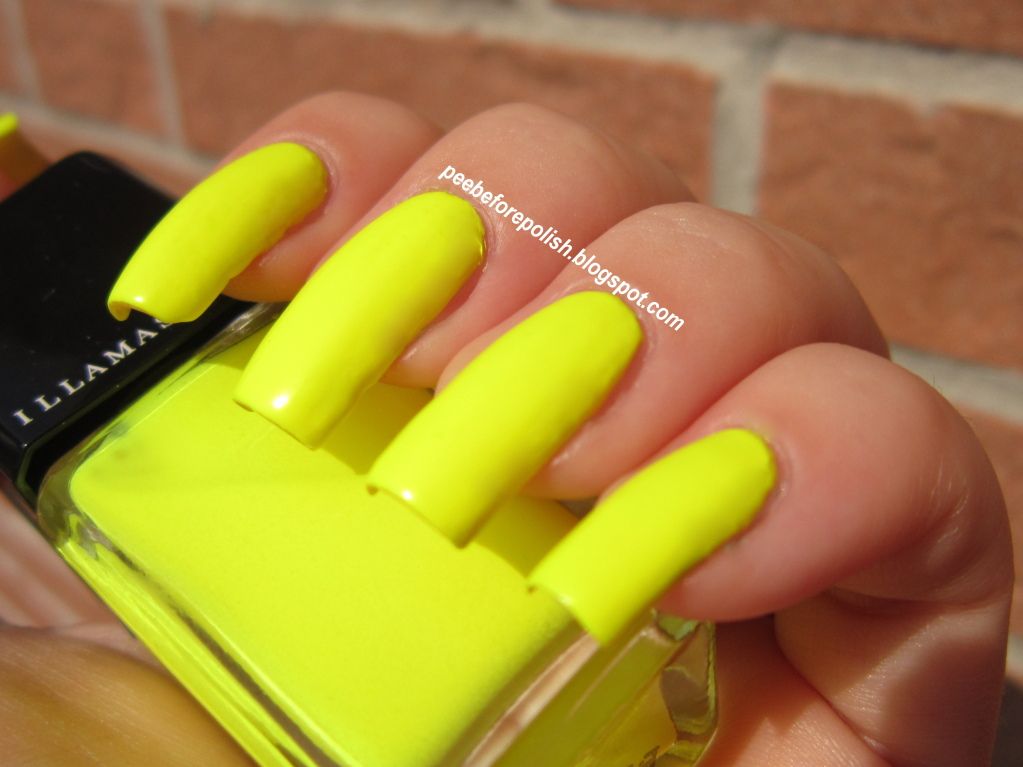
Post numero 200, e nella logica del "ricorrenza speciale, smalto speciale", vi presento l'Illamasqua Rare.
Il Rare è un giallo neon pazzesco che asciuga, come spesso accade, satin matte.
Cos'ha di tanto eccezionale, a parte il colore sparaflesciosissimo? Che la coprenza perfetta si ottiene in appena due mani.
Lo ripeto, perché la combo giallo-neon-coprenza è più unica che... Rara: due mani e BASTA.
Applicazione perfetta, formula leggermente più liquida della media di Illamasqua ma confortevolissima da stendere e sempre autolivellante, durata mostruosa.
Se applicato senza top coat per conservare l'effetto satin, consiglio di lasciar passare 5 minuti tra la stesura di una mano e l'altra in modo da non dover vegetare immobili mezzora a manicure completata.
Io sono innamorata perdutamente... E voi?


Hi ladies!
Since this is a special post (#200!), I chose a very special polish, Illamasqua Rare.
Rare is a yellow neon that dries satin matte, like most neon polishes.
Why is it so special besides the stunning shade? It has a wonderful pigmentation. Two coats and you're ready to go.
I want to write it one more time, since the combo yellow-neon-high pigmentation is really... Rare. Only TWO coats.
Formula is great, less thicker than the other Illamasqua polishes I have in my stash, but it's perfect. The longevity is very high, too.
If you don't apply a top coat over it, I suggest to wait 5 minutes between the first and the second coat, your final manicure will dry faster.
I'm in love... And what about you?
 
Applicazione / Application
5/5
Asciugatura / Drying time
4/5
Coprenza / Pigmentation
4/5
Durata / Longevity
5/5
GIUDIZIO FINALE / OVERALL
4.5/5

lunedì 16 luglio 2012

Nail art time: from Orly Beach Cruiser to Orly Melt Your Popsicle [gradient]

Buonasera a tutte!
Lo so, lo so, la latitanza continua... Troppi pensieri, in questo periodo!
Vi propongo una gradient fatta qualche settimana fa. Per realizzarla ho usato l'Orly Melt Your Popsicle come base e sopra vi ho applicato l'Orly Beach Cruiser.
Mi son quasi esplose le coronarie per cercare di fotografarla, è stata davvero dura "catturare" per bene lo stacco tra due colori così sparaflesciosi!
Difficoltà tecniche a parte, credo che siano due colori che si sposano benissimo. Certo, non è esattamente la manicure che indosserei per un colloquio di lavoro, ma volete mettere che figurone vi farebbe fare in spiaggia???
Per oggi è tutto, un bacione!


Hi ladies!
I'm so sorry that I am posting so rarely in the last period... I have too many thoughts on my mind!
Today I'm going to show you a gradient manicure I realized some weeks ago. I used Orly Melt Your Popsicle as a base and I sponged Orly Beach Cruiser upon it.
I nearly became crazy trying to photograph it, it was so difficult to capture the "break" between the two colors.
But I think that these two colors work very well together. Maybe this isn't a work appropriate manicure but I think it would look great for a night out or on the beach!
That's all I have for you today, have a nice evening!

*** Entrambi gli smalti Orly mi sono stati inviati a scopo recensione ***
*** Both Orly polishes were sent me for review ***