Ads 468x60px

venerdì 29 marzo 2013

Twinsie Friday: duochromes! [Max Factor Fantasy Fire]

Martedì sera sono stata colta da un raptus: quello di accorciarmi drasticamente le unghie. Da qualche tempo avevo una crepa nell'unghia dell'indice della swatching hand, ed iniziava a darmi seriamente noia. Per cui, meglio eliminarla tramite una bella limatina, no? NO.
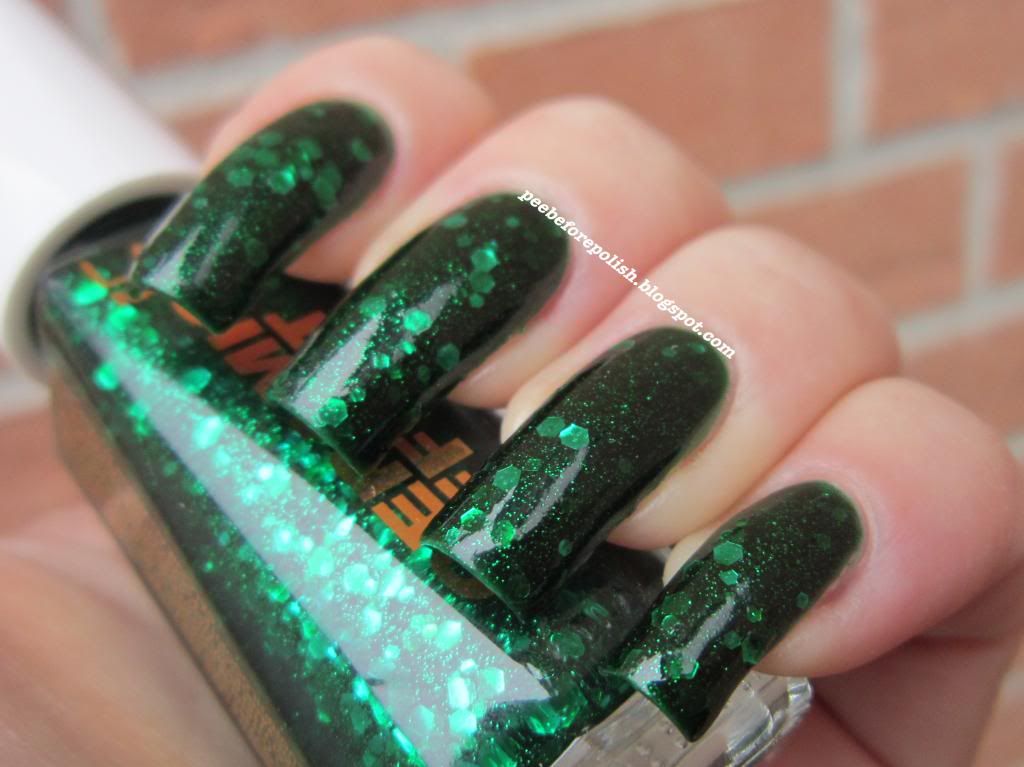
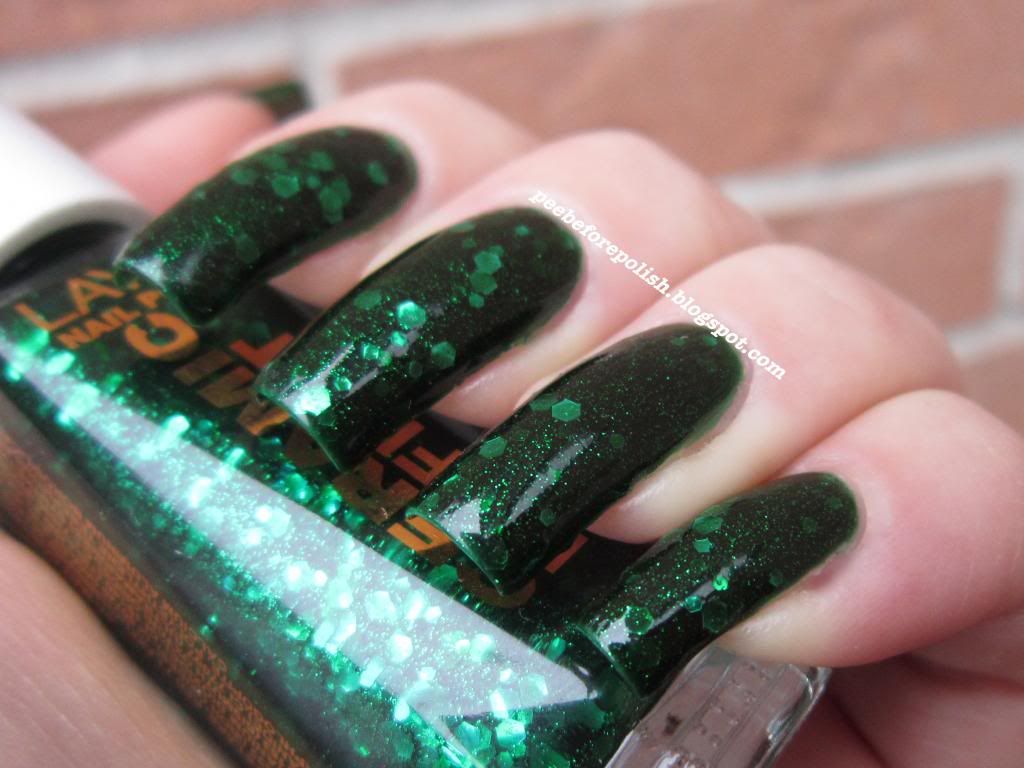
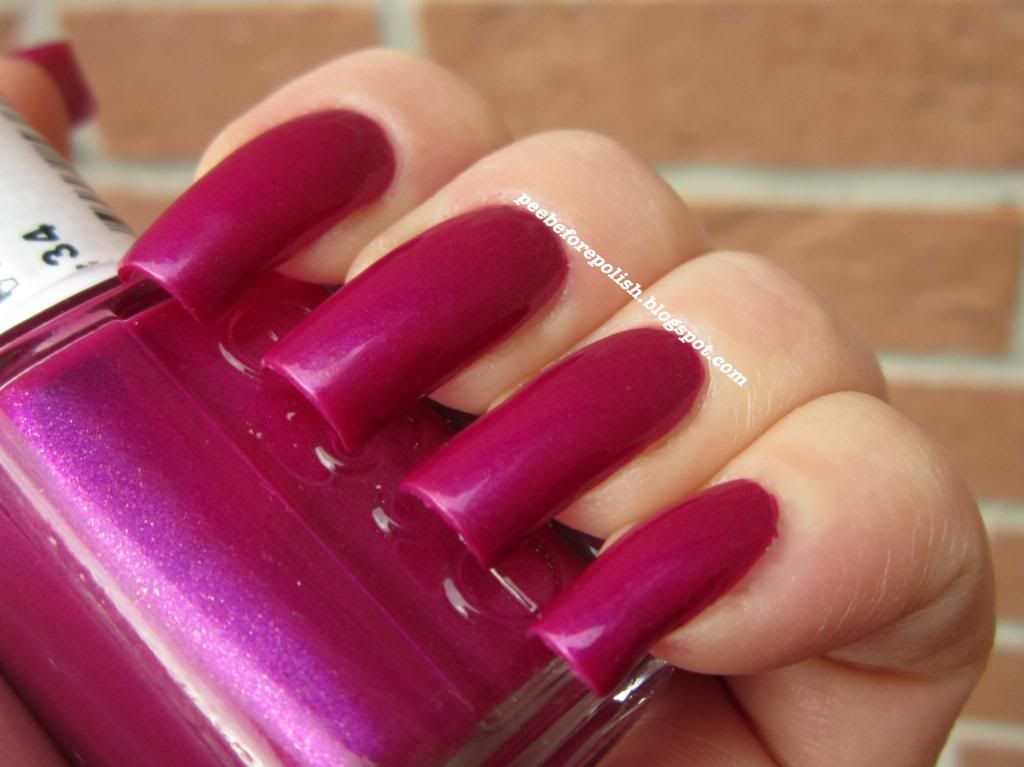
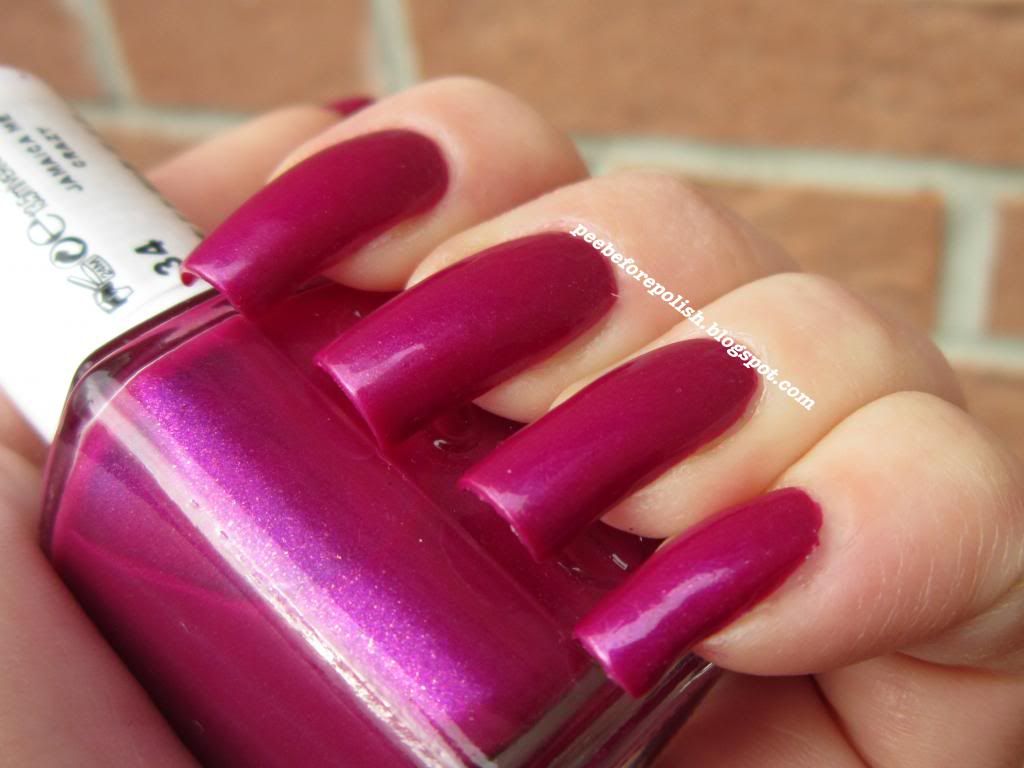
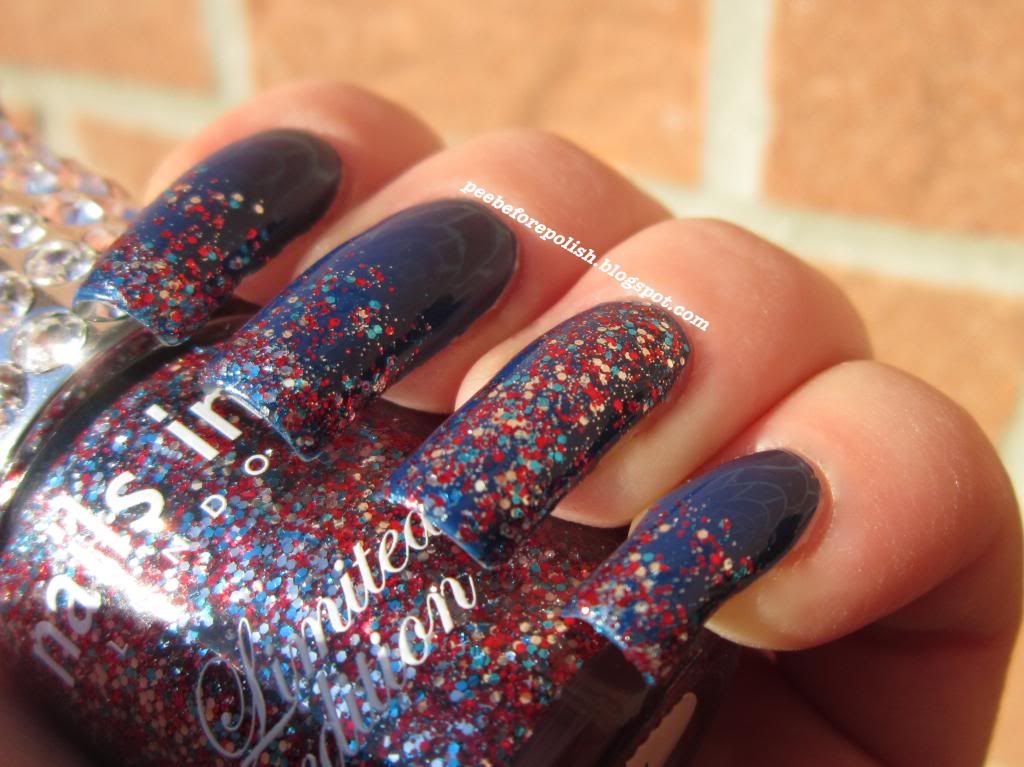
Mi sono resa conto solo a "mutilazione" conclusa di quanto fossero corte le mie unghie. Ovviamente, corte per i miei standard, non certo per un giudizio oggettivo.
Fatto sta che mi sento come Sansone dopo che Dalila aveva ben deciso di tosargli il pelo. Ma mannaggia a me. Chiaramente sto studiando tutte le angolazioni per fotografare le mie unghie in modo che sembrino più lunghe di quanto non siano in realtà...
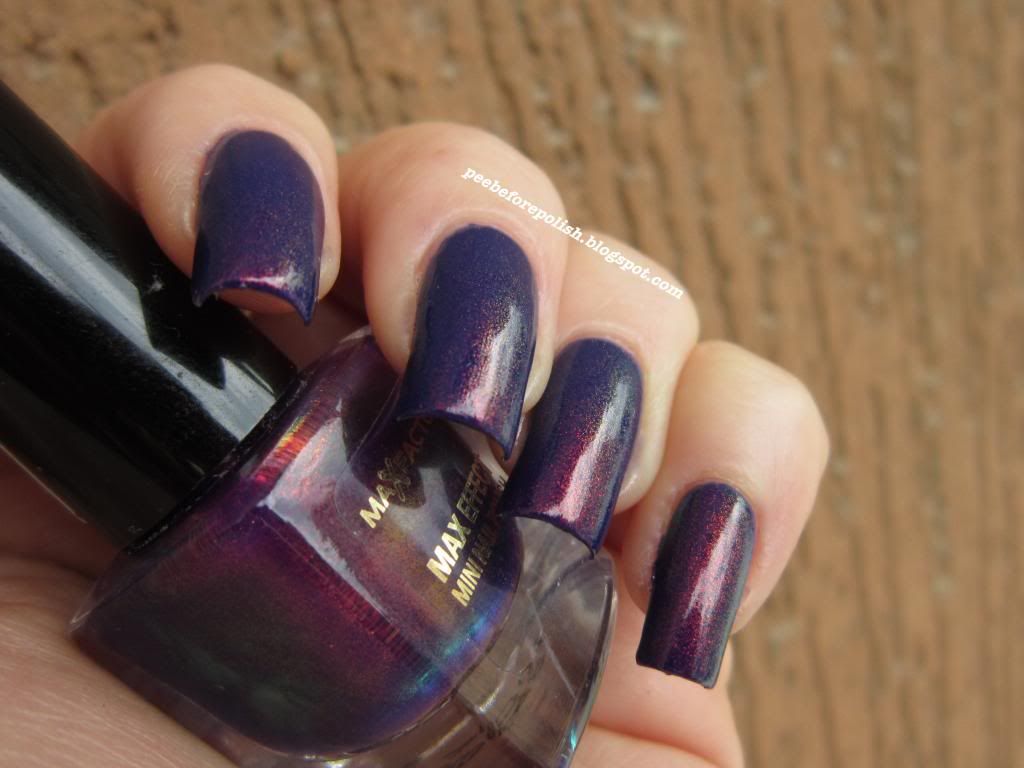
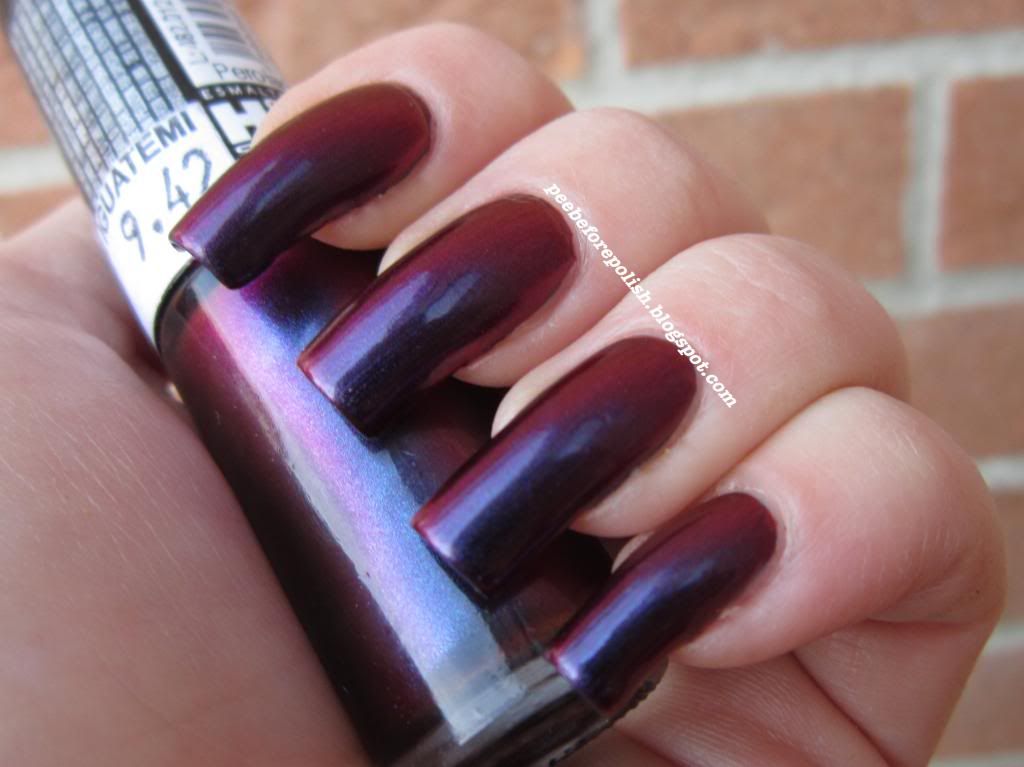
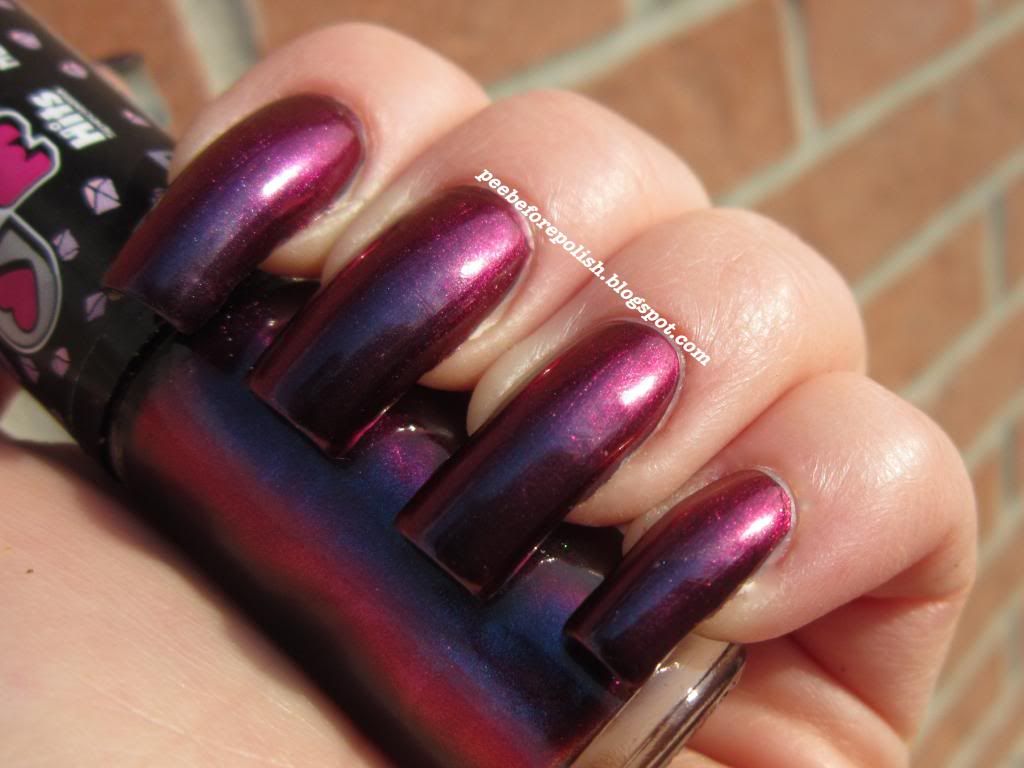
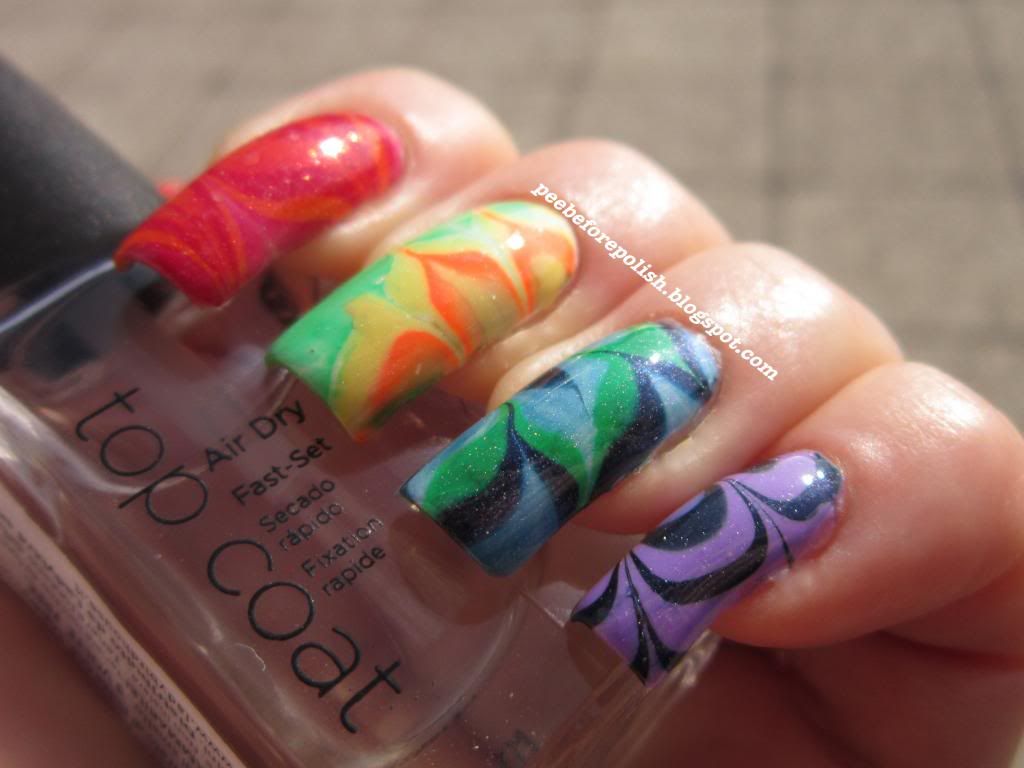
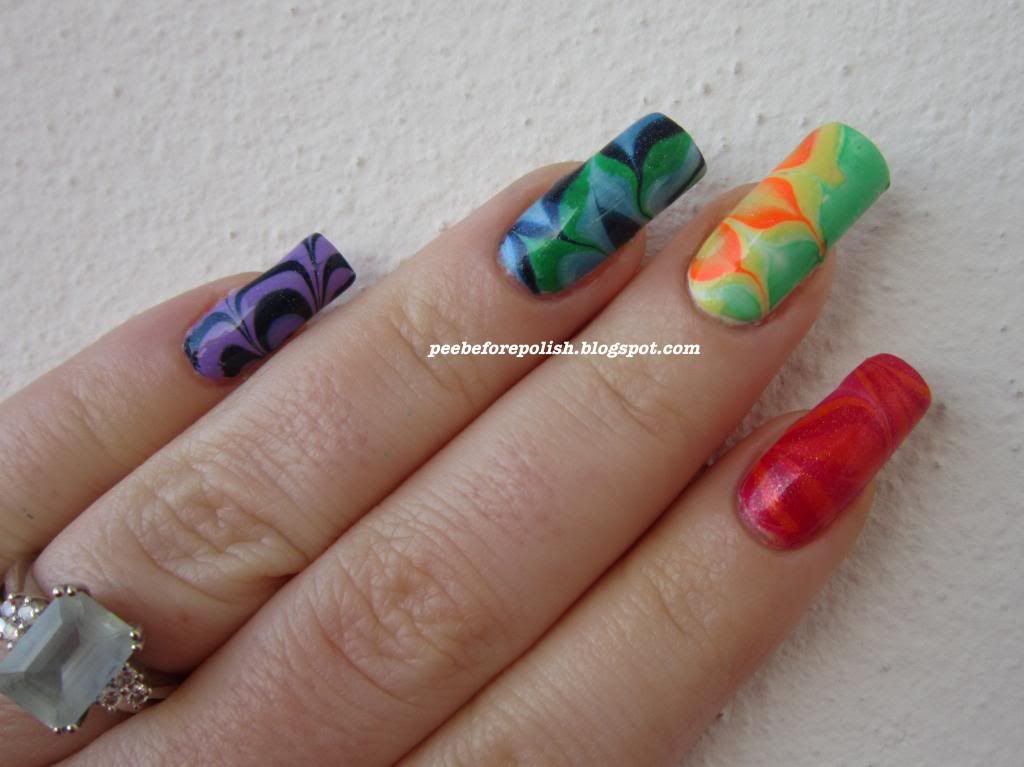
Beh, ora che ho piagnucolato per otto righe, posso passare allo smalto del giorno, lo spettacolare Fantasy Fire di Max Factor, nelle mie foto layerizzato sopra al nuovissimo OPI Eurso Euro.
Quanta beltà in soli 5 ml di prodotto! Un multichrome shimmer dai mille riflessi: blu, viola, verde, rosso... Davvero unico, e credo che possiate ben capire perché le smaltare di mezzo mondo gli hanno dato la caccia con tanta pervicacia (ne approfitto per ringraziare calorosamente Angela, senza di lei dubito che avrei mai potuto averlo).
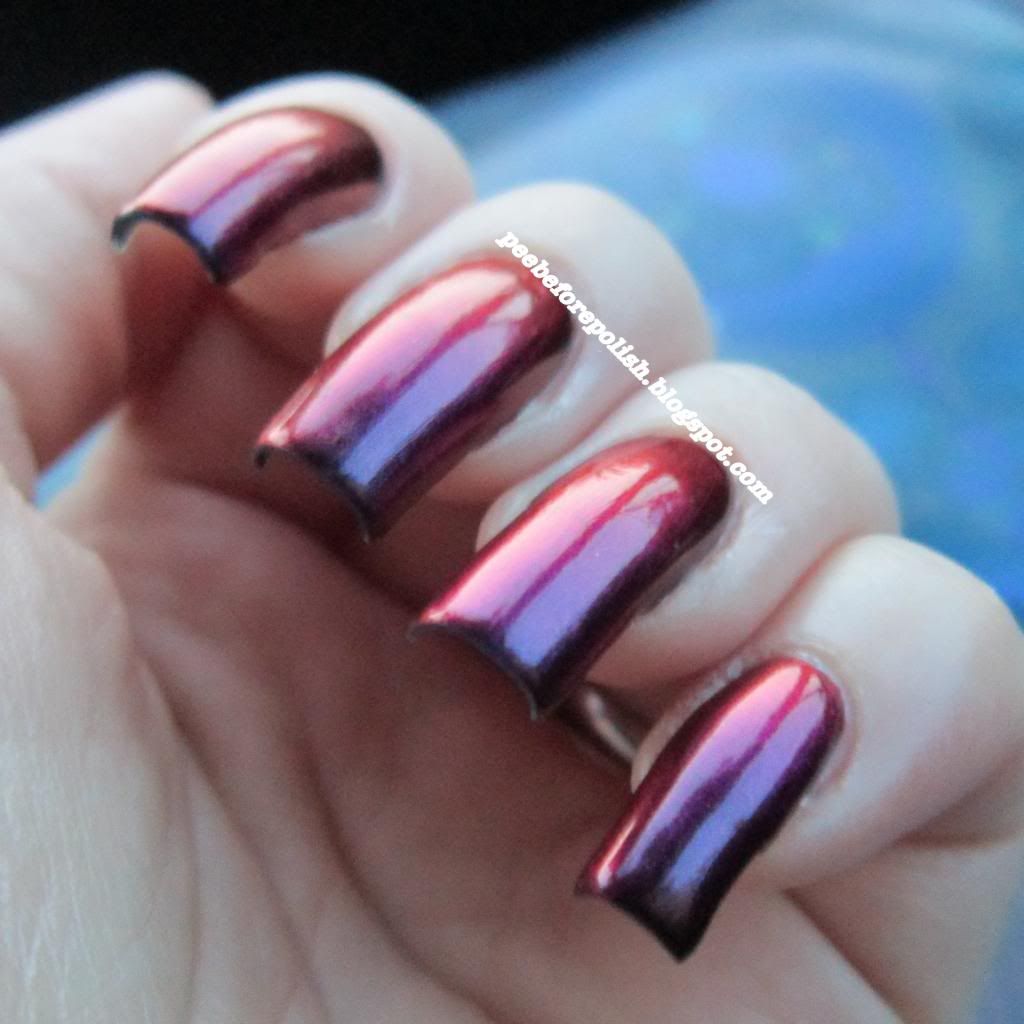
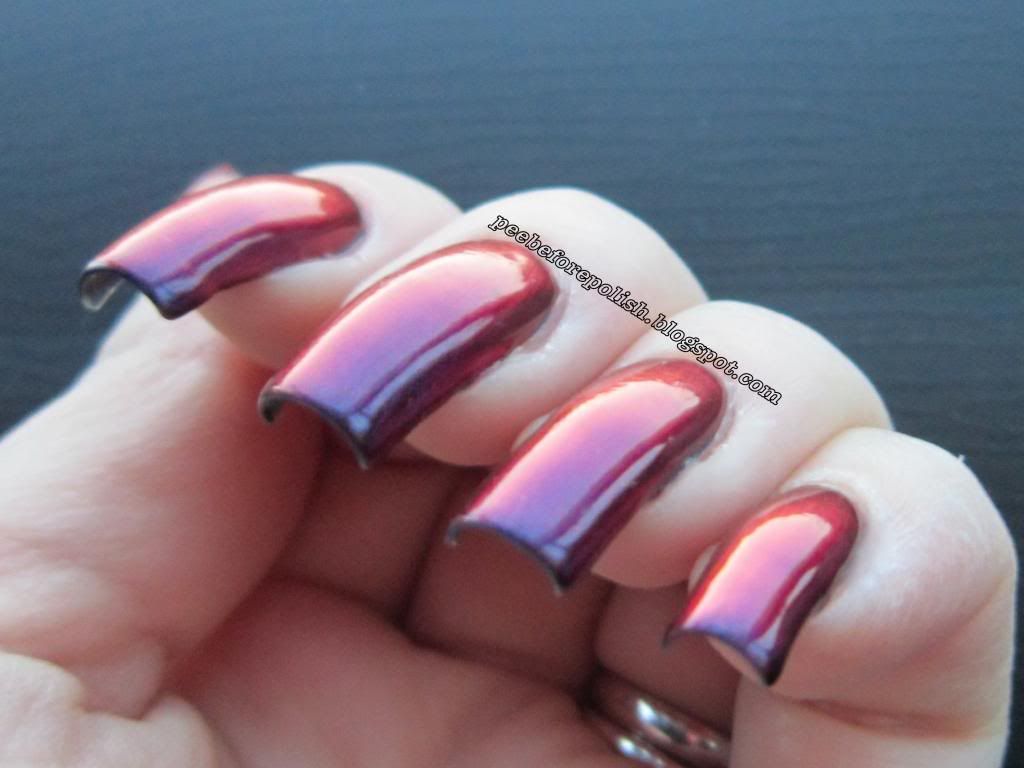
Per me, Fantasy Fire è la versione shimmer dell'Nfu Oh #51: stessi riflessi pazzeschi, stessa complessità di colore, stesso sbavo ogni volta che li guardo!
E voi, avete ceduto al suo fascino assassino?


Last Tuesday I had a very, very bad idea. I decided to file my nails. My index nail started to crack and, even if it wasn't visible, it was quite annoying, so I opted for a drastic solution to the problem. Why, why, why??????????
When I finished filing my nails I realized how much they were short. Of course, short for my standards. 
Now I'm feeling like Samson when Delilah cut his hair. For this post I tried to take pics in "strange" perspectives so they look a little longer than in real life. Well, I suppose they will grow fast. At least, I hope. 
Ok, I won't bore you anymore with my stupid complaints, I promise. Let's talk instead about the polish of the day, Max Factor Fantasy Fire (in my pics, layered over OPI Eurso Euro from the recent Euro Centrale Collection).
Fantasy Fire is a dream in a small 5 ml bottle. It's a wonderful, stunning, beautiful multichrome shimmer polish. Its reflects change from blue to purple, from red to green. It's such an unique shade and I perfectly understand why the entire nail polish community is crazy in love with them. Also, I'd like to thank my friend Angela who kindly bought it for me... Thank you so much sweetie!
IMO, Fantasy Fire is the shimmer version of Nfu Oh #51: same multichrome reflects, same chromatic complexity, same drooling when I look at them!
And what about you? Have you already surrendered to its deadly appeal?


mercoledì 27 marzo 2013

ABC Challenge: L for Layla CE #54 Green Galaxy

Hi ladies!
Today I have another polish from an Italian brand which is known also overseas: Layla CE #54 Green Galaxy.
Green Galaxy has a beautiful dark green base with a jelly finish and very fine green glitters, and two sizes of green hex glitters. It's really a stunning and quite unusual shade!
Formula is really runny, so I recommend very thin coats and/or the use of a rubberized base coat (or a massive clean-up after application!).
Three coats in my pics, it dries quite fast and has a good longevity.
I rarely buy Layla products because they're quite pricey even here in Italy (Ceramic Effects retail for 7.60€), but I think that Green Galaxy deserves its price!
Before leaving, just a couple of notes: I'm a bit uninspired in this period, as I've already wrote I'm having some issues in my real life and I don't think I'll be able to solve them in a next future. I'm really sorry because, during this challenge, I'm simply showing you a series of nail polishes and I haven't created a "real" nail art yet. When I look at the posts of the other lovely partecipating ladies, I feel like an awful blogger. They create stunning nail arts, show unusual polishes and write super nice posts. I simply update a couple of pics, I review the polish of the day and that's all. So: I solemly promise that I will create a nail art for letter M. I already have a nice idea in my mind, I don't know if I'll be able to do a nice job, but I'll try!
Thank you for reading and watching ladies, and see you soon!

Ciao ragazze!
Altro appuntamento con la nostra ABC Challenge, e stavolta mi gioco uno splendido smalto Layla, il CE #54 Green Galaxy. 

Green Galaxy ha una base verde scuro dal finish jelly in cui albergano glitter molto sottili di colore verde, più glitter esagonali di due diverse dimensioni del medesimo verde. Lo trovo davvero splendido!
La formula è davvero liquida, per cui consiglio di stendere una base gommosa, che dà maggior grip, oppure di fare passate molto sottili. Nelle mie foto potete vedere il risultato di 3 mani di Green Galaxy.

I tempi di asciugatura sono piuttosto buoni, così come la durata.
Non sono solita acquistare molti Ceramic Effect, penso che 7.60€ non siano proprio pochi per uno smalto (no, non li trovo MAI in sconto), ma nel caso del Green Galaxy, ne vale proprio la pena! E' uno smalto davvero unico.
Prima di salutarvi, una nota veloce: so di essere stata un po' "sòla" durante questa challenge, non ho postato neppure una nail art vera e propria... Mancanza di ispirazione, ahimé. Spero di recuperare con la M, ho in testa un'idea supercarina, sperando ovviamente di fare un buon lavoro e non un pastrocchio terrificante. 
Per oggi è tutto, vi abbraccio e vi dò appuntamento a presto!


Applicazione / Application
3/5
Asciugatura / Drying time
4/5
Coprenza / Pigmentation
3.5/5
Durata / Longevity
4.5/5
GIUDIZIO FINALE / OVERALL
3.75/5


lunedì 25 marzo 2013

The other side of the rainbow manicure [fan brush gradient]

Buonasera ragazze!
Oggi vi mostro il lato B (!) della mia manicure arcobaleno realizzata per il post finale dei Rainbow Thursdays. Smaniavo dalla voglia di creare sia una water marble che una fan brush gradient, per cui mi sono detta: perché non entrambe?
Ebbene sì, sono rimasta per diversi giorni con due mani decorate in modo completamente diverso tra di loro; ve lo dico nel caso qualcuna di voi nutrisse ancora dubbi sulla mia mancanza completa di sanità mentale. Ne approfitto inoltre per ringraziare tutte coloro che mi hanno fatto i complimenti per la water marble arcobaleno, ahimé non ho avuto tempo di rispondere ai commenti, ma volevo almeno dirvi che li ho letti tutti e che ognuno mi ha mandata in brodo di giuggiole.
Tornando al post del giorno, la fan brush gradient arcobaleno è piuttosto semplice da realizzare, ma di grand'effetto. Dopo aver steso la mia fida base bianca (Orly Dayglow) ed averla lasciata asciugare, ho intinto un fan brush (pennello a ventaglio) nei colori acrilici rosso ed arancio e, dopo aver scaricato e miscelato i colori passando semplicemente il pennello su una superficie piatta e in plastica, ho proceduto all'applicazione su unghia "sventagliando", badando a mantenere sempre lo stesso verso (da sinistra verso destra), e ripetendo l'operazione finché non ho ottenuto sia una copertura perfetta, sia un risultato omogeneo a livello di gradient.
Ho ripetuto la stessa operazione per tutte le dita, cambiando ovviamente i colori, e ho deciso di applicare alla base del mignolo uno strass per ciascun colore dell'arcobaleno.
Dopo aver sigillato tutto con un buon top coat, mi sono lavata accuratamente le mani per pulire ogni traccia di acrilico dalle cuticole. Dal momento che gli acrilici da nail art sono a base acquosa, è sufficiente un po' di comunissimo sapone mani per eliminare ogni residuo in eccesso.
Devo dire che questo è uno dei miei lavori preferiti, ha riscosso un successo incredibile (una ragazza mi ha addirittura fermata per chiedermi se potessi curare la sua manicure per il suo matrimonio!!!), quindi spero vivamente che piaccia anche a voi!


Hi ladies!
Today I'm going to show you the "other side" of my rainbow manicure. When I had to decide the manicure to create for the final post of our Rainbow Thursdays, I didn't know what to do. I wanted to create a water marble but also a fan brush gradient. So, I decided to do both!
Yep, I wore for five days two very different nail arts... But as you already know, I'm completely crazy, so maybe you're not surprised.
Moreover, I want to thank all the amazing ladies who wrote super sweet comments under the final post of Rainbow Thursdays, I didn't have the time to reply but I'd like you to know that I read every single comment and I was really, really happy for your beautiful words and compliments.
Well, back to the nail art of the day: this rainbow fan brush gradient was quite easy to create. I simply apply one coat of my favourite white base (Orly Dayglow) and let it dry. Then, I picked a fan brush and I dipped it into the first two colors I used, red and orange. I blended the two colors together using a flat, plastic surface and then I applied them on my nails. I moved my brush in only one direction (from left to right), this will help to obtain a smoother result.
Then I repeated the application until I obtained a perfect coverage of the nail and a nice gradient effect.
I decorated all the other nails with yellow-green, blue-indigo and purple-white. On the white part of my pimkie I applied seven rhinestones, one for each color of the rainbow.
As a final step, I applied a top coat to protect my work and I washed my hands to remove all the excess of acrylic colors. I used water base acrylic colors so a common soap was all I need to clean my hands.
I have to say that this is one of my fav manicure ever, I'm so proud of it and a lot of people asked me in which salon I went or if I was a professionist. A girl I met in a shop even asked me if I could do her nails for her marriage!
Sooooo... I really hope you like it too! As usual, thank you for reading, watching and commenting, have a nice evening and see you soon!


venerdì 22 marzo 2013

Twinsie Friday: duochromes! [Hits Speciallità Mari Moon Unconventional]

Orbene, questo sarà un post movimentato: sto infatti scrivendo mentre sono in auto, inizia il mio week-end sul cucuzzolo della collina, aaaaaah finalmente si stacca un po'!
Auspicherei di riuscire ad arrivare alla fine con lo stomaco ancora saldo al suo posto originario, quindi è meglio che inizi subito a parlare dello smalto del giorno e a non perdermi in chiacchiere come al mio solito.
Per questo primo appuntamento coi Twinsie Fridays ho scelto uno dei brasiliani gentilmente spediti dal cognatino qualche mese fa, lo Speciallità Hits Mari Moon Unconventional. Credo di non dirvi nulla di particolarmente originale se esprimo tutta la mia ammirazione per i brands brasiliani, capaci di creare smalti stupefacenti, per di più dai finish non comuni come holo e multichrome.
Unconventional (una passata sopra due mani di Orly La Playa, uno splendido blu piuttosto scuro ed intenso) è un multichrome che racchiude in sé tutti i colori del tramonto: rosso scuro, viola, blu, arancio. In più ha un leggerissimo shimmer.
E' uno smalto con formula densa ma piacevole da applicare; inoltre, come tutti gli Speciallità in mio possesso, ha un pennellino largo e piatto, tutto sommato facile da maneggiare.
Lascio parlare le foto per me, e magari ve lo riproporrò più avanti layerizzato sopra ad un colore diverso: caratteristica piuttosto comune dei multichrome è la capacità di cambiare a seconda della base sopra cui li si stende.
Vi abbraccio e vi auguro uno splendido week-end... Lo stomaco è sofferente ma ancora regge per fortuna!


Hi ladies!
Thanks God it's Friday, and I'm on the road, I will be at my parents-in-law home for the entire week-end. Wish me good luck with my mother-in-law!!!
Today my polished friends and I are proud to introduce Twinsie Fridays, we will post beautiful duochrome and multichrome nail polishes every Friday until the arrival of the Summer.
For my first post I picked one of the nail polishes that my brother-in-law (who lives in Brazil) sent me a few months ago, that is Speciallità Hits Mari Moon Unconventional. 
I really love brazilian brands: they make beautiful and unique polishes, and they're true experts of two particular finishes, holographic and duochrome. 
Unconventional (in my pics: one coat over two coats of Orly La Playa, a beautiful dark blue with a creme finish) is a stunning multichrome that shows all the colours of a romantic sunset: deep red, blue, purple and orange. Moreover it has a subtle shimmer.
Formula is a bit thick but easy and pleasant to apply; its brush is quite large and flat.
I'm very curious to try this layered over other colors, maybe it will have a different effect like many other multichromes.
That's all I have for you today, hope you like this beauty too and I wish you a great week-end, see you soon!


mercoledì 20 marzo 2013

ABC Challenge: K for Kiko #644 Blu Mare [Sugar Mat LE]

Hi ladies!
For today's post I picked an Italian brand which is known and appreciated also abroad, that is Kiko.
Kiko has recently launched two new limited edition collections, Mirrors (including 15 shades with a metallic finish) and Sugar Mat, which includes 16 shades with a sand finish.
As I wrote in my introduction post of these two collections, I don't like the plain, mat shades from Sugar Mat. On the contrary, I really like the glittery version.
I'm going to talk and show you #644 Blu Mare (Sea Blue), which is a beautiful cobalt blue with these beautiful, bright and multicolored glitter particles.
Formula is nice, not too thick or too thin, even if I had some issues with the faulty brush (which is also huge!). Pigmentation is really high, this could be a one coater but in my pics you will see the result after two coats (I wanted a more intense look).
It dries super fast and has a good longevity too: it chipped after four days, which is an excellent result for a polish worn without the protection of a top coat.
If you're an "old" reader of my blog, you surely remember that I'm not Kiko's biggest fan. Sometimes I've written very bad reviews about their products, it seems that they don't have a quality standard: they make excellent products or awful ones - at least in my experience!
My honest opinion about the Sugar Mat polishes I bought?!? They're great. I'm really enthusiast about them. Those glittery particles are absolutely the game point.
Hope you like it too! What do you think about sand polishes? Have you bought and try any of them?
Tell me in the comments please!
Thank you for reading and watching, don't forget to check the entries of the other amazing ladies and have a nice evening!

Ciao ragazze!
Oggi vi mostro uno smalto che mi ha davvero entusiasmata, il Kiko #644 Blu Mare.
Come probabilmente saprete, Kiko ha di recente lanciato due nuove LE, puntando sul finish cromato coi Mirrors e col nuovissimo effetto sabbia con gli Sugar Mat.
Come detto nel mio post introduttivo su queste novità, non ho amato la versione "mat e basta" di quest'ultima LE, ma sono stata invece conquistata da quegli smalti con le particelle glitter.
Blu Mare appartiene a quest'ultima categoria ed è uno splendido blu cobalto con microglitter luminosissimi davvero pazzeschi. Può essere tranquillamente un one coater ma nelle mie foto vedete il risultato di due mani, dal momento che volevo un risultato finale più intenso.
La formula mi è piaciuta molto, è densa ma non troppo, quindi l'applicazione è stata piuttosto facile, nonostante il pennello gigantesco (per i miei standard) e soprattutto fallato (le setole tendevano verso l'esterno). Questo cucciolotto inoltre asciuga molto rapidamente e ha un'ottima durata (quattro giorni pieni) se consideriamo che non può contare sulla "protezione" di un top coat.
Concludendo: se leggete il mio blog da un po' saprete sicuramente che io non sono mai stata particolarmente tenera con Kiko. Nella mia opinione ed esperienza, non ha uno standard fisso di qualità: o sforna prodotti pazzeschi o davvero pessimi. Per me, questi Sugar Mat glitterosi sono un epic win.
E voi, che ne pensate? Avete provato questo finish sabbiato? Avevate già messo mano sui parenti d'oltreoceano sfornati da OPI, China Glaze e Zoya? Ditemelo nei commenti, se ne avete voglia!
Nel frattempo grazie per la vostra visita e vi auguro una splendida serata.


Applicazione / Application
4/5
Asciugatura / Drying time
5/5
Coprenza / Pigmentation
4.75/5
Durata / Longevity
3.75/5
GIUDIZIO FINALE / OVERALL
4.25/5


domenica 17 marzo 2013

[Haul] Cosmoprof Worldwide 2013: the edge of reason [second part]

Buonasera ragazze!
Sebbene un po' in ritardo, ecco a voi i miei acquisti al Cosmoprof 2013. Avrei dovuto pubblicare questo post ieri, ma ho procrastinato per un ottimo motivo... La creazione del mio primo brownie! Non indulgerò nella falsa modestia e andrò dritta al punto: è venuto una favola (grazie Eleonora per avermi suggerito un'ottima ricetta).
Chiusa questa parentesi culinaria, torno in topic ed inizio a mostrarvi il mio bottino. Ne approfitto per chiedere scusa in particolare a Piola di questo ritardo, non scordatevi di curiosare anche tra i suoi acquisti!

Hi ladies!
I'm a bit late but I'm ready to show you my purchases at Cosmoprof 2013. I had to publish this post yesterday but I didn't have the time because I decided to prepare and cook my first brownie... It is absolutely delicious, I'm so happy about the result (special thanks to my friend Eleonora who suggested me a fantastic recipe).
Sorry for this off topic but I'm so proud and I wanted to share my satisfaction with you. Well, now I'm ready to show you my new babies! Hope that Piola, my partner in crime, will forgive me for this late post; she already published her haul post, don't forget to check her blog!

My first brownie... I'm so proud!


venerdì 15 marzo 2013

Cosmoprof Worldwide 2013: the edge of reason [first part]


Come vi ho già detto, sono stata una pessima blogger negli ultimi tempi: sono stata poco presente e ho un sacco di commenti splendidi lasciati senza risposta. Scusarmi e basta mi sembrava troppo poco, per cui vorrei farmi perdonare con un post particolarmente succoso: il resoconto fotografico e non solo della mia avventura al Cosmoprof Worldwide 2013!
Ma prima di iniziare la carrellata di immagini vorrei ringraziare Piola per essere stata una formidabile compagna di scarpinate alla scoperta di più stand possibili! Peraltro vi consiglio di controllare il suo blog perché anche lei pubblicherà oggi il post con le nostre avventure. Comunque, è sempre un piacere trascorrere qualche ora insieme ad altre smaltare accanite, insomma qualcuno che possa capire quella voglia irrefrenabile di osservare, toccare e paciugare con queste piccole boccette della felicità (e che non pensa che tu sia folle quando discetti di cose come differenze tra holo scattered e linear o metallici e cromati).
Velo di malinconia: sarebbe davvero bello poter incontrare di persona tutte le mie amicicie smaltare, e poterlo fare con una certa frequenza... Beh, bando ai piagnistei, siete pronte? Ottimo!

Hi ladies!
First-of-all, I want to apologize with all of you. As I wrote in my last post, I have been a bad blogger in the past days, I've posted rarely and I haven't replied to all of your wonderful and sweet comments. I've been very busy and it's not a great period for me. 
Hope you'll forgive me after this post, I have a lot of pics to show you because, as I've announced last week, I visited to Cosmoprof Worldwide Bologna!
Before showing you the pics of my favourite stands (I will write a second post about my purchases), I want to thank Piola, who was a perfect "partner in crime". It's always a pleasure to meet in person other wonderful bloggers, I wish it could happen more often! Don't forget to check her blog because she is going to publish a post about our adventures too.
Well, are you ready for my photo feature? Let's go!

mercoledì 13 marzo 2013

ABC Challenge: J for Essie Jamaica me Crazy

I know, I've been a very bad blogger lately. I'm not in the right mood to post and write.
I'm sooo happy I decided to participate to this polished marathon, so I have the chance to sit down and write... At least once a week!
Today I have for you a nail polish by Essie, Jamaica me Crazy, a nice magenta polish with a subtle shimmer. I don't have a good relationship with Essie products, I've tried several of them and I often hated their formula.
Luckily Jamaica me Crazy has a very good formula, it's easy to apply, even if its brush is really huge!
Two coats for the perfect coverage, it dries fast and has a good longevity too.
Anyway, after application, I noticed some ugly bubbles on the surface of my nails, even if they are not visible in my pics. Phew.
That's all I have for you today, but I'll try to post again as soon as possible. As I wrote in my last post, last Saturday I went to Cosmoprof Worldwide, it was a wonderful experience. You can find a lot of pictures of my adventures on my Facebook page. I'll add a few more in the next days.
Thank you for reading and watching and have a nice evening!


Lo so, sono stata una pessima blogger negli ultimi tempi. Sono sparita per quasi una settimana. Diciamo che non sono dell'umore adatto per scrivere. Sono felice di avere questo impegno settimanale con la challenge, almeno sono "obbligata" a postare!
Per oggi ho scelto Jamaica me Crazy di Essie, un bellissimo fuchsia violaceo con shimmer finissimo. Non ho un rapporto idilliaco coi prodotti Essie, ne ho provati parecchi e troppi, davvero troppi, hanno una formula orribile. Con quello che costano poi...
Per fortuna Jamaica me Crazy ha un'ottima formula, facile da stendere. Due passate per la coprenza perfetta, asciugatura rapida e durata buona.
Purtroppo, dopo aver finito di stenderlo, ho notato delle antiestetiche bollicine, ma per fortuna nulla che si veda in foto, e quindi neppure di persona, a meno che non vi avviciniate davvero parecchio.
Bene, per oggi è tutto, spero che lo smalto vi sia piaciuto! Scriverò nuovamente prestissimo, ho da raccontarvi della mia splendida esperienza al Cosmoprof, e nel frattempo, se volete, trovate un gustoso album fotografico sulla mia pagina Facebook.
Vi abbraccio e vi auguro una buona serata! 


Applicazione / Application
4/5
Asciugatura / Drying time
4.5/5
Coprenza / Pigmentation
4.5/5
Durata / Longevity
4/5
GIUDIZIO FINALE / OVERALL
4.25/5


giovedì 7 marzo 2013

The Rainbow Ladies #8: RAINBOW! [Water Marble]

Keep calm and paint your nails.
E se fosse proprio il processo di pittaggio unghie a farci strippare? Per questo post finale è andata esattamente così.
In un impeto di "modestia portami via", vi confesso che a me le water marbles sono sempre uscite con facilità e naturalezza. Sì, magari dovevo provare tre-quattro smalti prima di trovare quello adatto, ma niente di drammatico.
Con questa water marble ho invece pagato pegno, una sorta di contrappasso (godete molto, eh?).
Diciamo che il problema è stato trovare degli smalti arancio e gialli che non solo si aprissero in acqua, ma che andassero anche d'accordo tra loro e che rimanessero ben distinti, non mescolandosi.
C'è voluta una vita e, non so, quei settordicimila tentativi e quei diciassei rosari di improperi.
Per fortuna, il risultato finale mi ha soddisfatta a tal punto da ripagare ogni mia pena.
Quindi ecco a voi la mia water marble arcobalenosa!
Per realizzarla ho usato:
- Base: Orly Dayglow (bianco);
- Indice: Orly Ignite (rosso) + Basic Beauty #49 (arancio);
- Medio: Orly Melt Your Popsicle (arancio) + H&M Going Bananas (giallo) + Kiko #296 (verde);
- Anulare: Kiko #296 (verde) + Kiko #267 (azzurro) + OPI Russian Navy (indaco);
- Mignolo: OPI Russian Navy (indaco) + Illamasqua Jo'mina (viola).
Per finire, ho passato una mano leggera di China Glaze Wireless Holographic Top Coat, tanto per dare quel lieve "sbrilluccichio" visibile solo al sole.
In linea generale, posso dirvi che Orly Ignite, i due Kiko, l'OPI Russian Navy e l'Illamasqua Jo'mina funzionano divinamente. Gli altri, pur funzionando, mi hanno dato qualche difficoltà. In ogni caso, ribadisco che a volte non è lo smalto X in sé a non funzionare, ma la sua combo con un altro smalto Y a rendervi impossibile il lavoro.
Al di là di queste note tecniche, spero che la mia nail art vi sia piaciuta (in caso contrario potrei uccidervi), vi ringrazio per averci seguito anche in quest'avventura e vi dò appuntamento a presto (dico solo che sabato sarò al Cosmoprof!).


Keep calm and paint your nails.
And it really works for me. Painting my nails is therapeutic, it relaxes me a lot. But it can also happen that the creation of a nail art is the principal cause of stress.
And that's what happen with this water marble, which is also my final post for Rainbow Thursdays.
I must admit that creating a water marble has always been easy for me. Of course, sometimes I had to try three or four nail polishes before finding the one which works, but nothing tragic.
Unfortunately, I had many difficulties with this water marble.
Let's say that I almost became mad before finding a yellow and an orange polish which worked and which got on well together.
Anyway, the final result is sooo nice (IMO, of course) and I'm really happy with it!
So, here is the list of the products I used:
- Base: Orly Dayglow (white);
- Index: Orly Ignite (red) + Basic Beauty #49 (orange);
- Middle: Orly Melt Your Popsicle (orange) + H&M Going Bananas (yellow) + Kiko #296 (green);
- Ring: Kiko #296 (green) + Kiko #267 (blue) + OPI Russian Navy (indigo);
- Pimkie: OPI Russian Navy (indigo) + Illamasqua Jo'mina (purple). As a final touch, I applied one light coat of China Glaze Wireless Holographic Top Coat, just to give to my water marble that bright touch (which is visible only in direct sunlight).
As a general note, I can say that Orly Ignite, the two Kikos, OPI Russian Navy and Illamasqua Jo'mina works perfectly for this technique. I had some issues with the other nail polishes.
Anyway, I'd like to say again that sometimes the polish itself works, but it doesn't work anymore if used in combo with another polish. I think it's a matter of different formulations.
Well, this was the last post of our Rainbow Thursdays, hope you enjoyed our creations. See you soon with other projects and with the chronicles of my adventures at Cosmoprof Worldwide Bologna (I will be there on Saturday, yay!). Have a nice day ladies!


*** Orly Dayglow, Melt Your Popsicle e Ignite e Illamasqua Jo'mina mi sono stati inviati per essere recensiti. Tutti gli altri prodotti sono stati acquistati da me ***
*** Orly Dayglow, Melt Your Popsicle and Ignite and Illamasqua Jo'mina were sent me for review. All the other products were bought by me ***

mercoledì 6 marzo 2013

ABC Challenge: I for Illamasqua Rampage

Hi ladies
and welcome back to our ABC Challenge! For today's post I picked a nail polish I used a few weeks ago for a glitter gradient: Illamasqua Rampage. I'm really sorry for this, but during last week-end I was very busy - I created two different and time consuming nail arts for the final post of Rainbow Thursdays - and I didn't have the time to paint my nails with a new nail polish, test its quality and take good pics. 
Anyway I think that Rampage is soooo beautiful that it deserves an entire and dedicated post.
Rampage is a dark forest green with a jelly finish. It is an excellent dupe for NARS Zulu, which is more expensive and needs four coats for the perfect coverage. If you decide to wear Rampage, two thin coats and you're ready to go!
Formula is just perfect, it dries fast and has an excellent longevity.
In conclusion: I love this polish, it's a stunning color and has an amazing quality too!
That's all I have for you today, don't forget to take a look at the entries of the other ladies and have a nice evening!


Salve ragazze, e ben ritrovate col consueto appuntamento settimanale con la ABC Challenge.
Per il post del giorno sono andata un po' al riciclo, ho pescato le foto dell'Illamasqua Rampage che avete già visto in azione qualche settimana fa per questa glitter gradient. Nel week-end sono stata super impegnata nel creare due impegnative nail arts per il post conclusivo della Rainbow (ma sono spilorcia e domani ve ne mostrerò solo una) e non ho proprio avuto il tempo di indossare, testare e fotografare un altro smalto.
Comunque Rampage è così bello che si merita davvero un post tutto suo! Si tratta di uno splendido verde foresta dal finish jelly. E' un ottimo dupe del blasonato NARS Zulu che, però, oltre ad essere persino più costoso, necessità di quattro mani per la coprenza perfetta. Col Rampage, 2 mani sottili e via! La formula è perfetta, si applica divinamente, asciuga in fretta e dura davvero a lungo.
Devo specificare che lo adoro?!
Per oggi è tutto, a domani per il "post col botto", e nel frattempo vi auguro una splendida serata!


Applicazione / Application
5/5
Asciugatura / Drying time
5/5
Coprenza / Pigmentation
4.5/5
Durata / Longevity
5/5
GIUDIZIO FINALE / OVERALL
4.75/5

*** Illamasqua Rampage mi è stato inviato a scopo valutativo ***
*** Illamasqua Rampage was sent me for review ***


lunedì 4 marzo 2013

Nails Inc Jubilee 3D Glitter

Nails Inc è una di quelle marche che rincorrevo da tempo, ma avevo sempre rimandato l'acquisto degli smalti presenti nella mia wishlist per via del costo piuttosto elevato.
In particolare, le mie mire si concentravano sul Jubilee 3D Glitter, smalto uscito lo scorso anno in edizione limitata (ma si trova ancora tranquillamente on line) in occasione del Giubileo della Regina Elisabetta. Dopo aver monitorato diversi siti, mi sono decisa ad acquistarlo grazie ai saldi dello scorso gennaio.
Il Jubilee 3D Glitter mi ha colpita innanzitutto per via del packaging ricercato e decisamente kitsch: il tappo è completamente e generosamente decorato con degli strass argentati. Assolutamente accecante!
Lo smalto in sé consiste in una base trasparente con abbondantissimi glitter rossi, argento e blu. Io l'ho usato per una glitter gradient (il colore di base è l'H&M Something Blue), anche se non è stato proprio semplice perché asciuga davvero velocemente. Sull'anulare ho invece dato una sola mano piena di Jubilee 3D Glitter, il che vi fa capire quanto siano fitti e coprenti i glitter.
Inutile dirvi che io amo alla follia questo smalto, è di certo nella mia top three dei glitter in mio possesso, lo trovo spettacolare, scenografico ed anche un po' folle.
Per oggi è tutto, ci vediamo presto per la ABC Challenge e buona serata a tutte!


Jubilee 3D Glitter is my first Nails Inc product. I've always been interested in this brand, but since it's quite expensive, I've have waited a lot before purchasing one of their nail polishes.
Last January I discovered a sale on Nails Inc products on Beauty Bay and I finally placed a small order... Ta daaaan! After a few weeks Jubilee 3D Glitter was in my hands, and it immediately became one of my favourite polish ever.
As its name suggests, it has been launched to celebrate the Jubilee of Queen Elizabeth II; it's a limited edition polish, but you can still easily find it on line.
First-of-all, I love the packaging: it's so well-finished, refined and... A bit kitsch! Its cap is completely decorated and covered with clear rhinestones... It's so bright and crazy!
Talking about the polish itself, Jubilee 3D Glitter has a clear base and lots of blue, silver and red glitters. I used it for a simple glitter gradient (it wasn't that easy because it dries super fast) over H&M Something Blue; on the ring finger I applied one coat of Jubilee 3D Glitter.
I really love this product, it's one of the best glitter polishes I have ever seen.
Hope you like it too!
That's all I have for you today, thank you for reading and watching and see you with letter I of our ABC Challenge.
Have a nice evening!