Ads 468x60px

sabato 15 dicembre 2012

Orly Naughty or Nice Collection: swatches and review (II part)

Buon sabato a tutte!
E' mia ferma intenzione travolgervi con un mare di glitter... C'è forse scelta migliore della seconda parte della Naughty or Nice Collection di Orly?!? Qui trovate i primi tre smalti, e qui la presentazione iniziale.
Bando alle ciance e via con le foto!

Hi ladies! Hope you're having a nice week-end! Today I show you the second part of Orly Naughty Or Nice Collection [here it is the first part of the collection and here it is the introduction]. 
Ready for a crazy amount of glitters? Let's go!


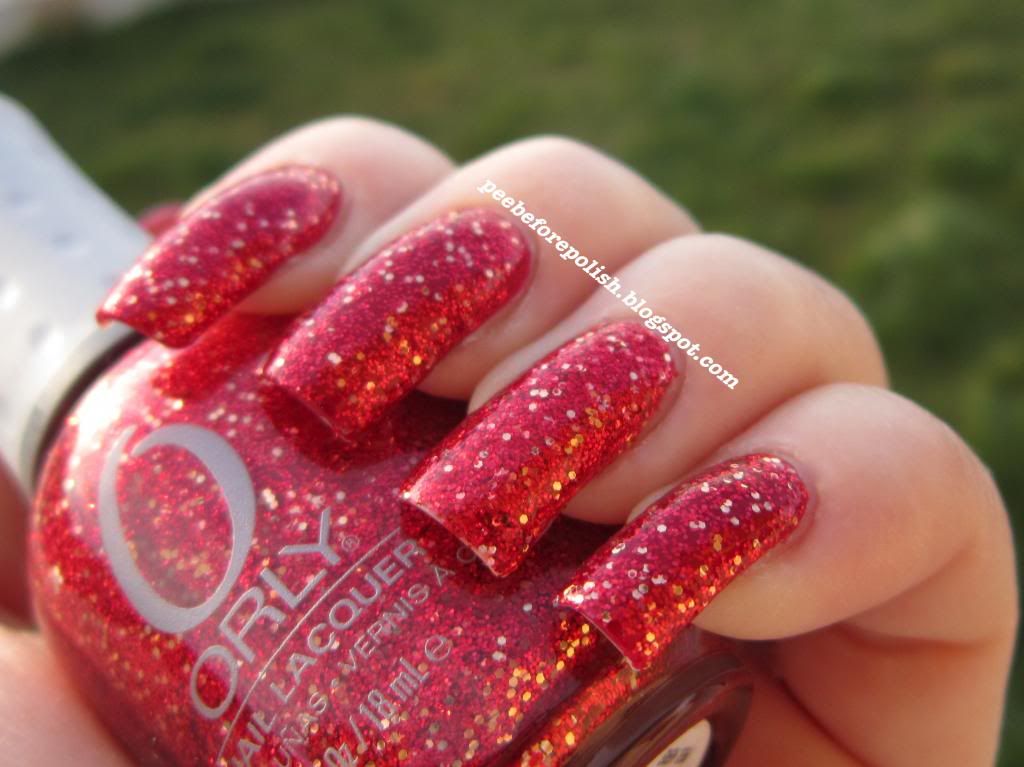
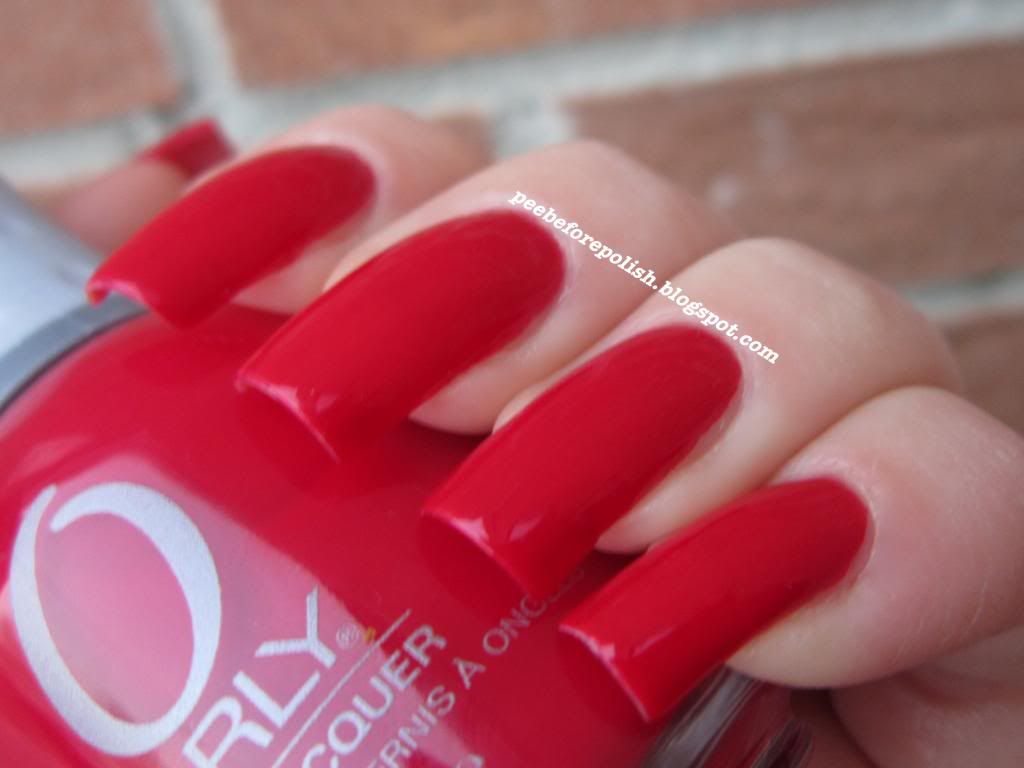
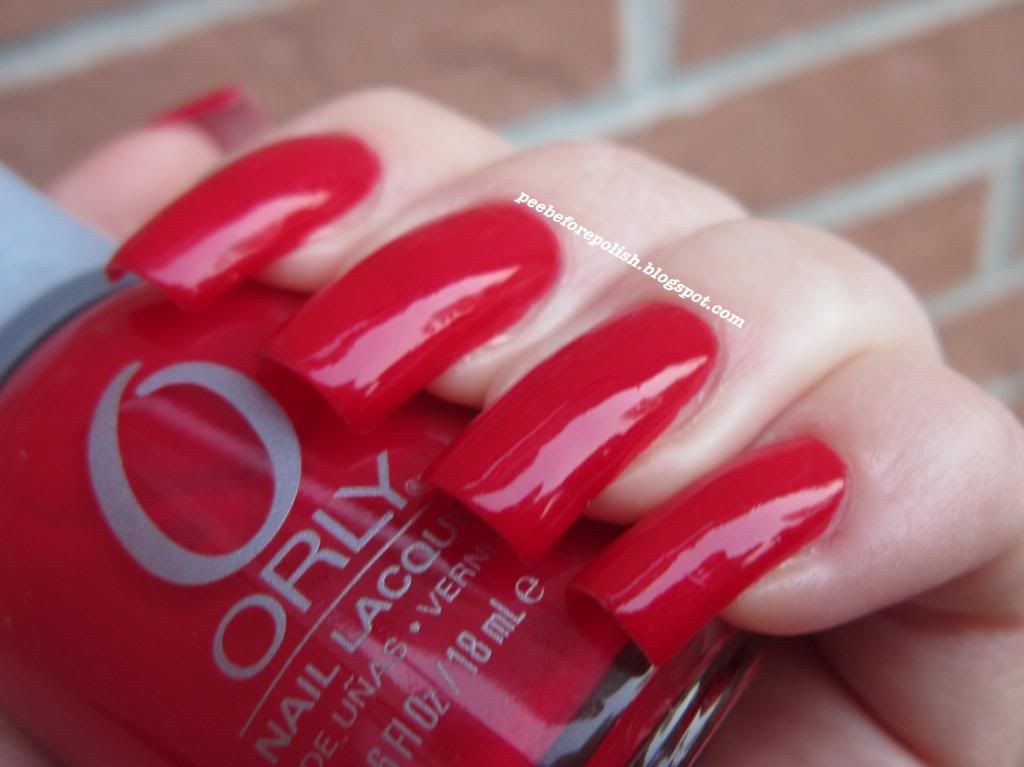
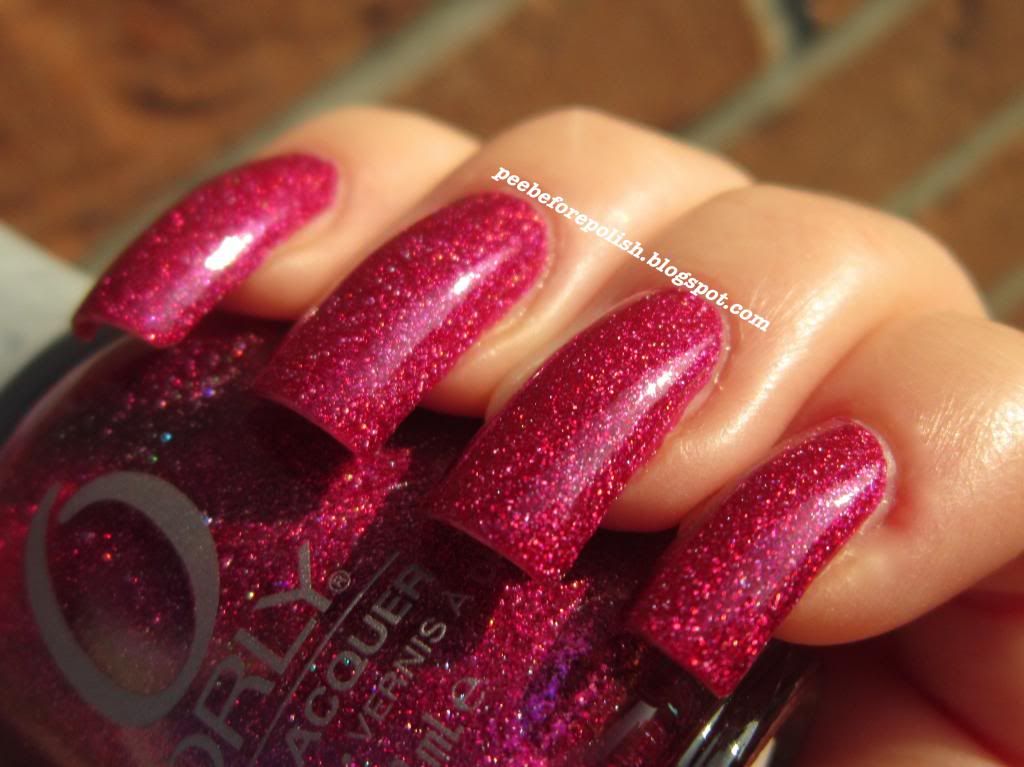
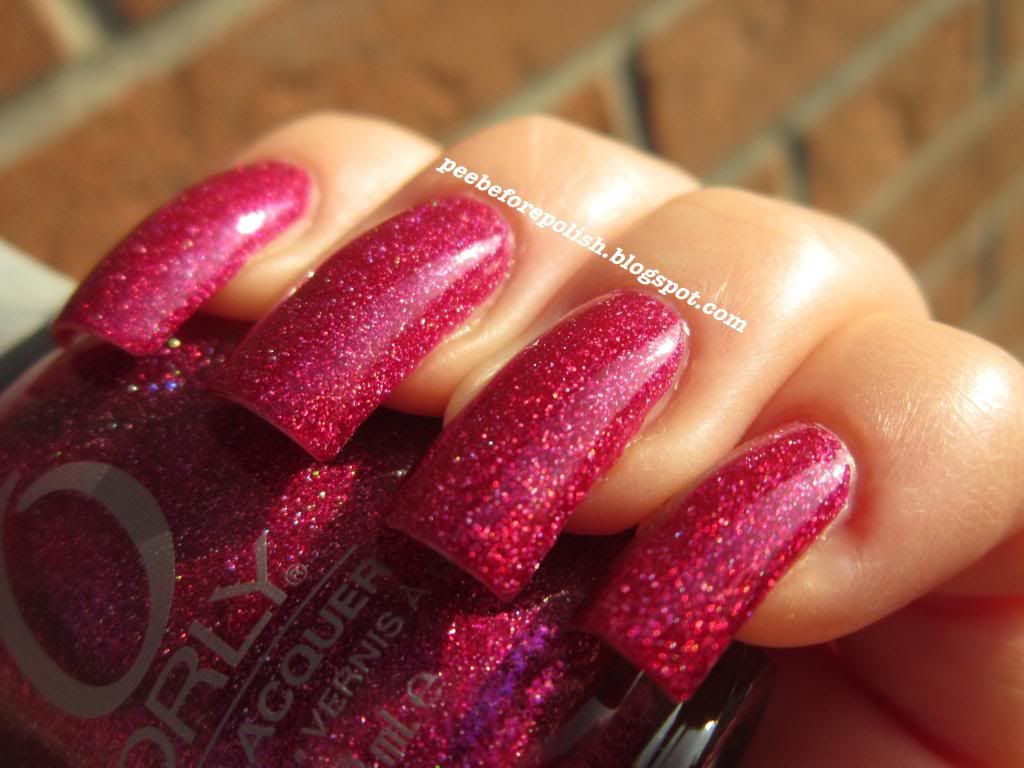
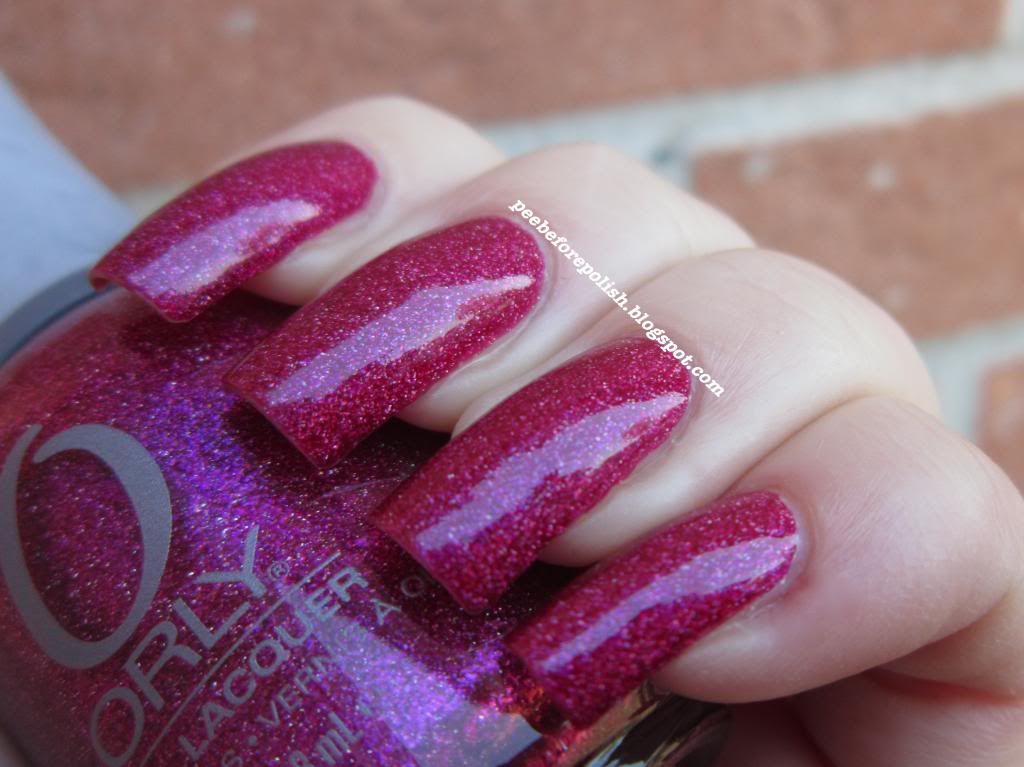
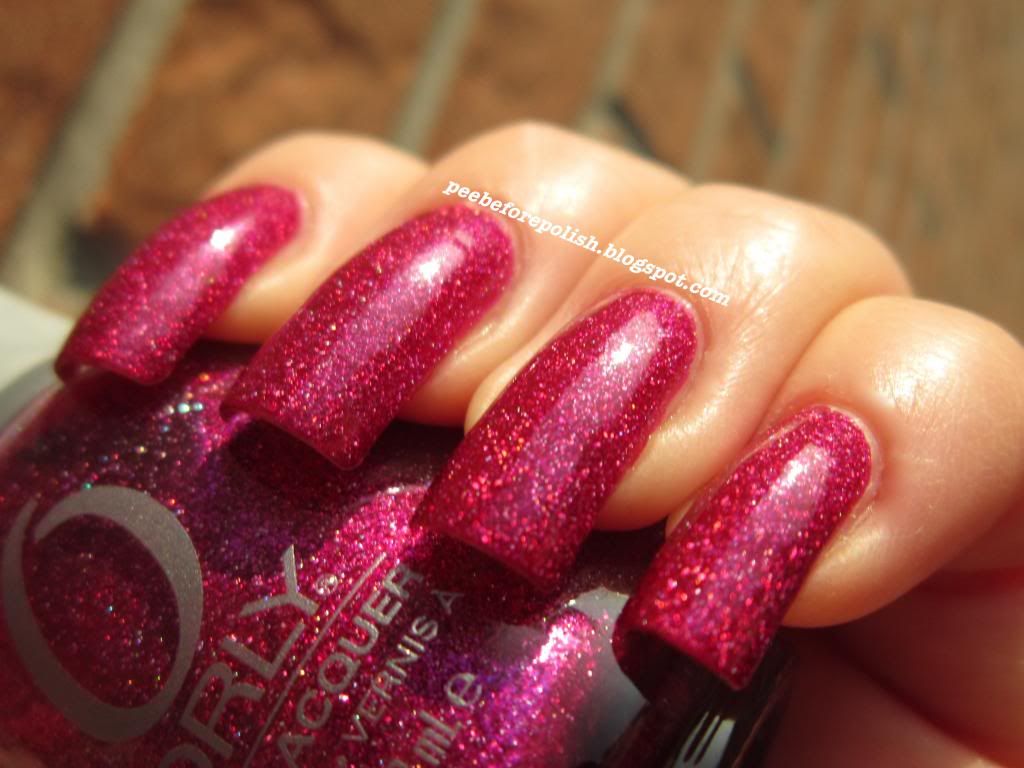
Devil May Care: tripudio di piccoli glitter rossi e glitter dorati più grandi ed esagonali in base trasparente. Contiene così tanti particelle glitterose che può tranquillamente essere usata da solo, e non solo per il layering.
Su indice, medio e mignolo potete vedere come appare una passata di Devil May Care su due mani di Orly Torrid. Sull'anulare, invece, trovate due mani di Devil May Care da solo.
A me piace in entrambi i modi, anche se forse il Torrid riesce persino a dargli quel tocco ulteriore di luminosità.

Devil May Care has a clear base and lots of small red glitters and bigger hex gold glitters. 
It can be used alone of over another polish. 
On my ring finger you can see two generous coats of Devil May Care; on the rest of my nails, one coat of Devil May Care over two coats of Torrid. 
I like it in both ways, maybe a bit more over Torrid because I think it gives an extra touch of sparkle to the glitters. 


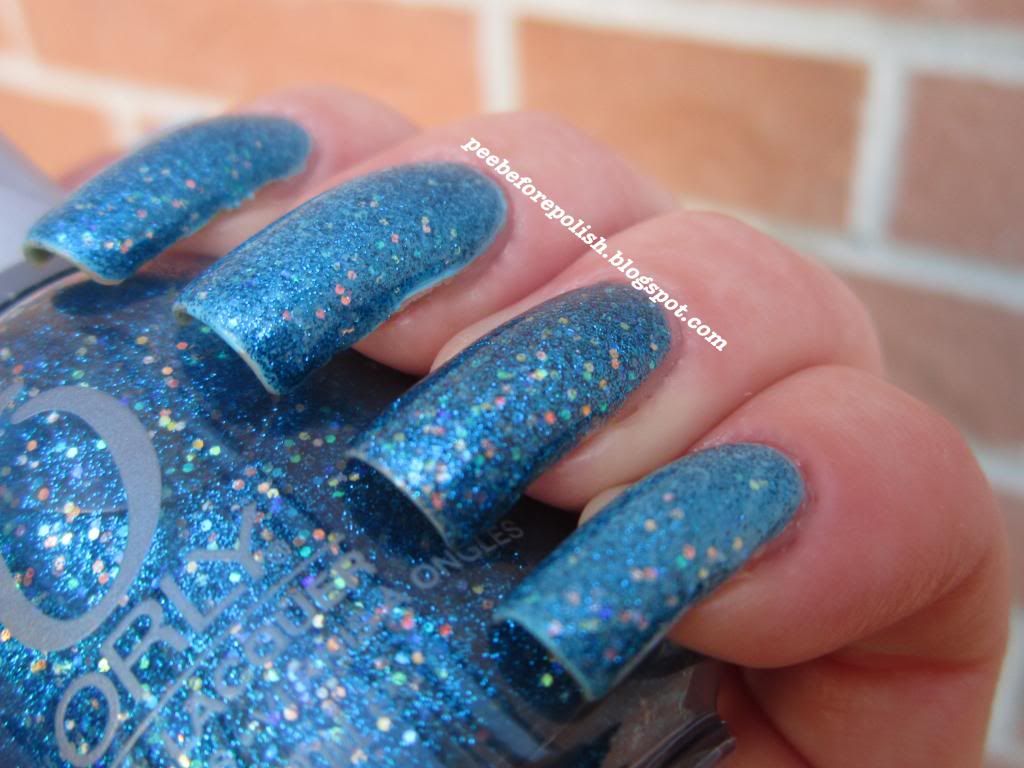
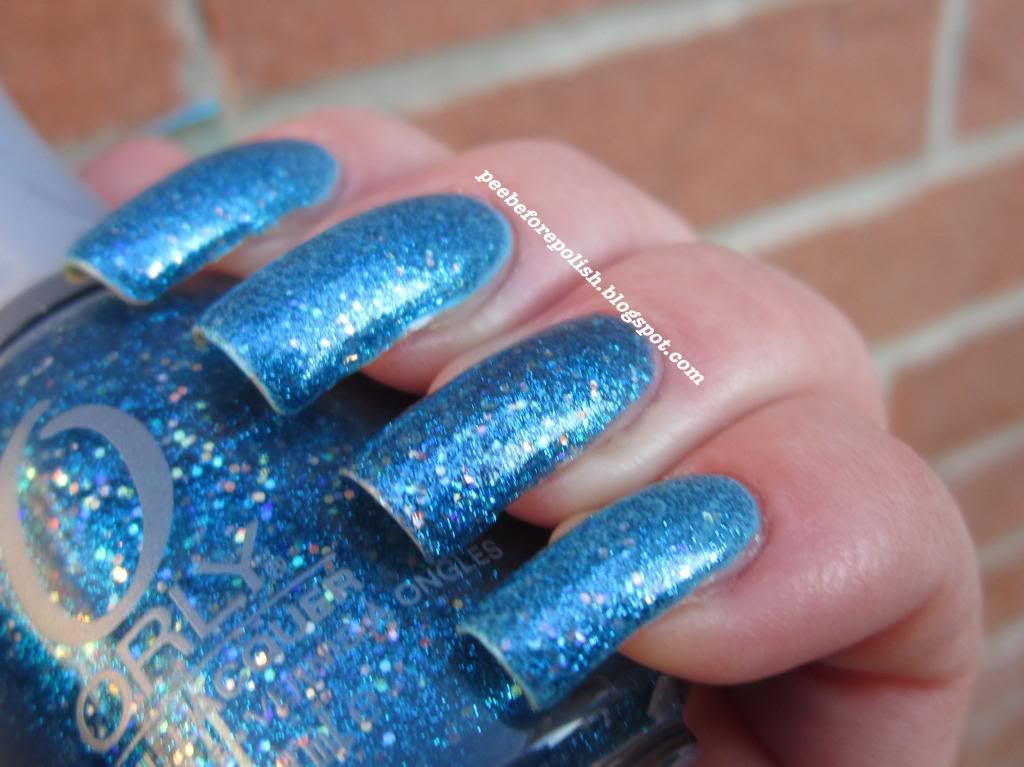
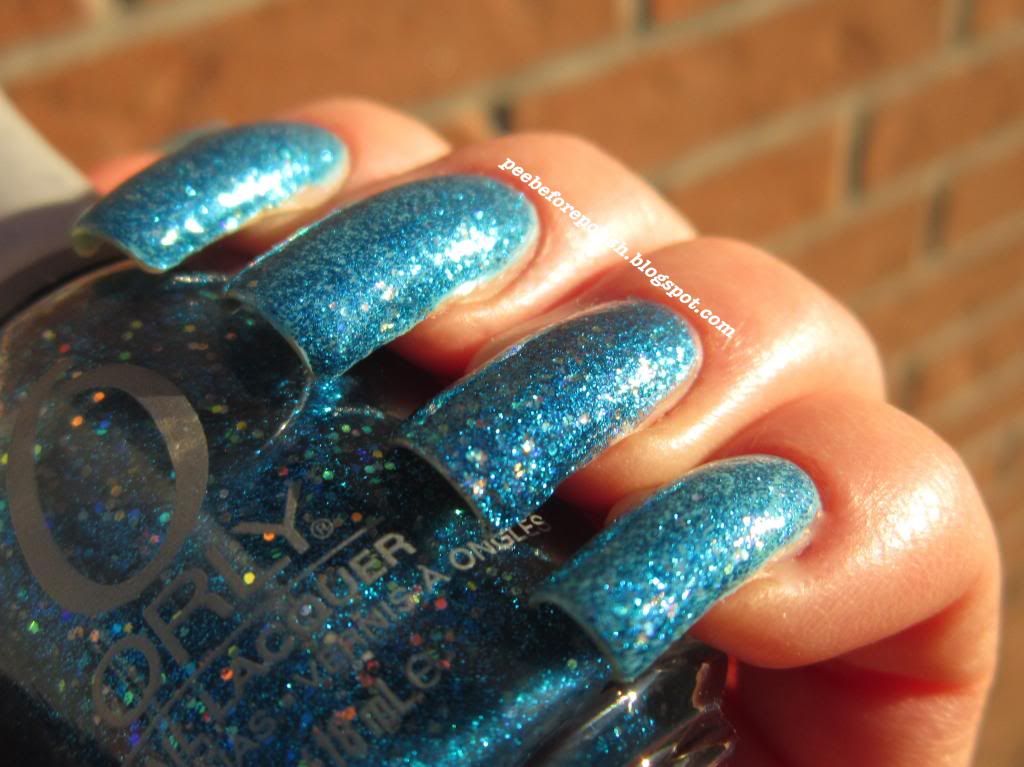
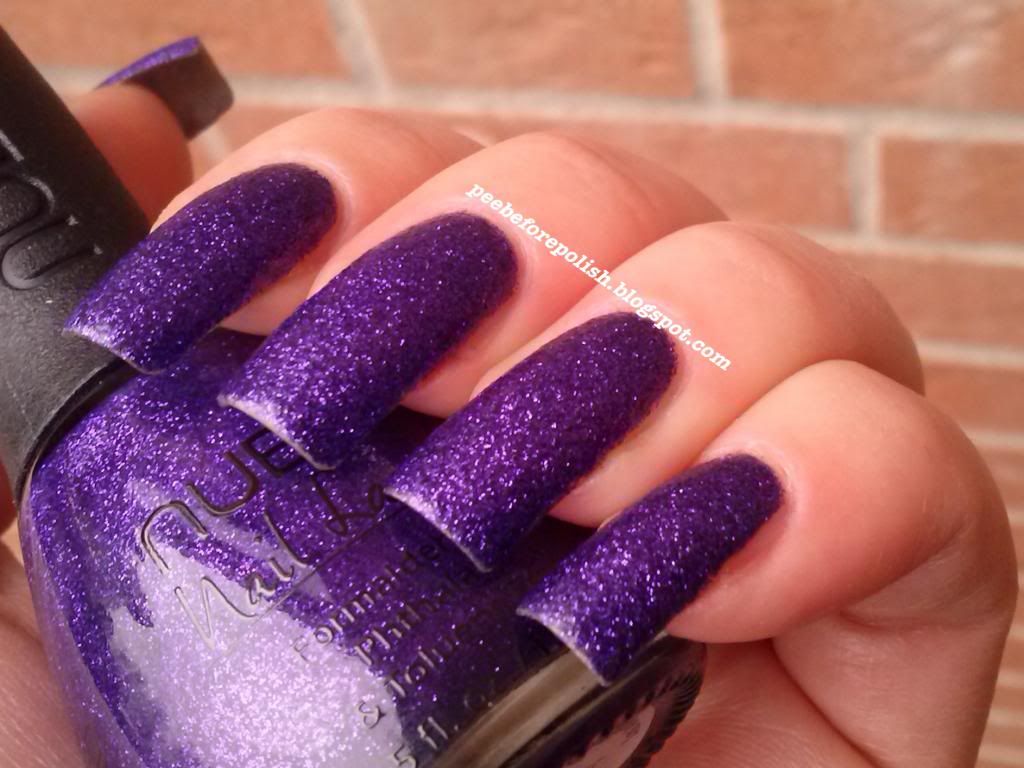
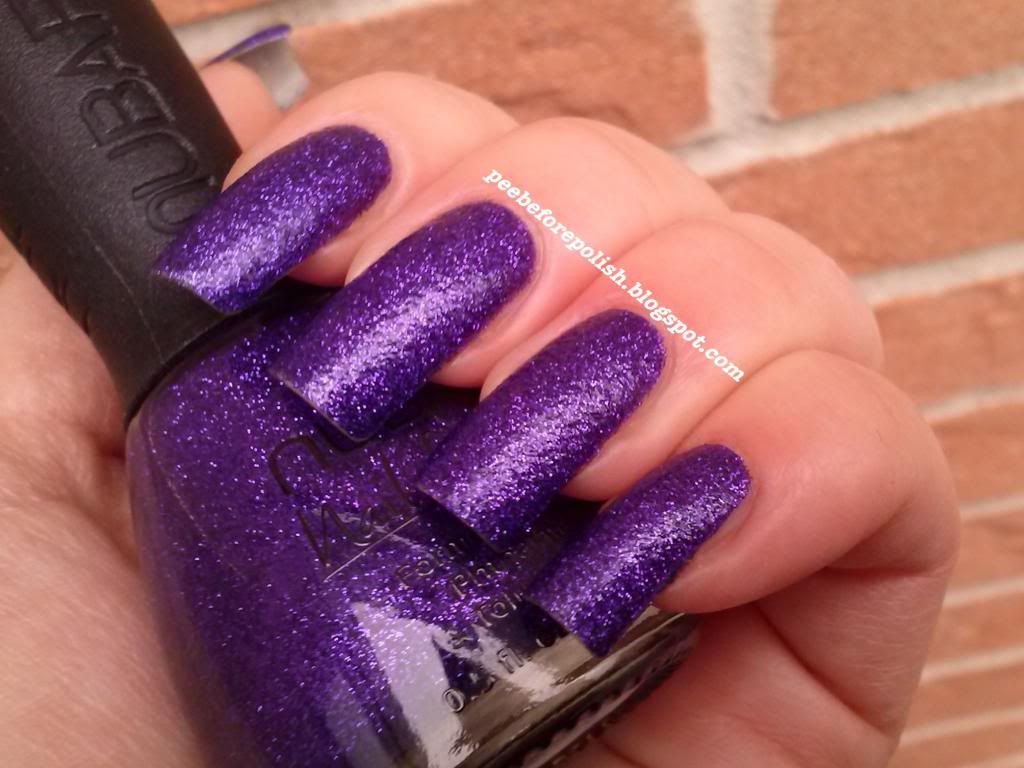
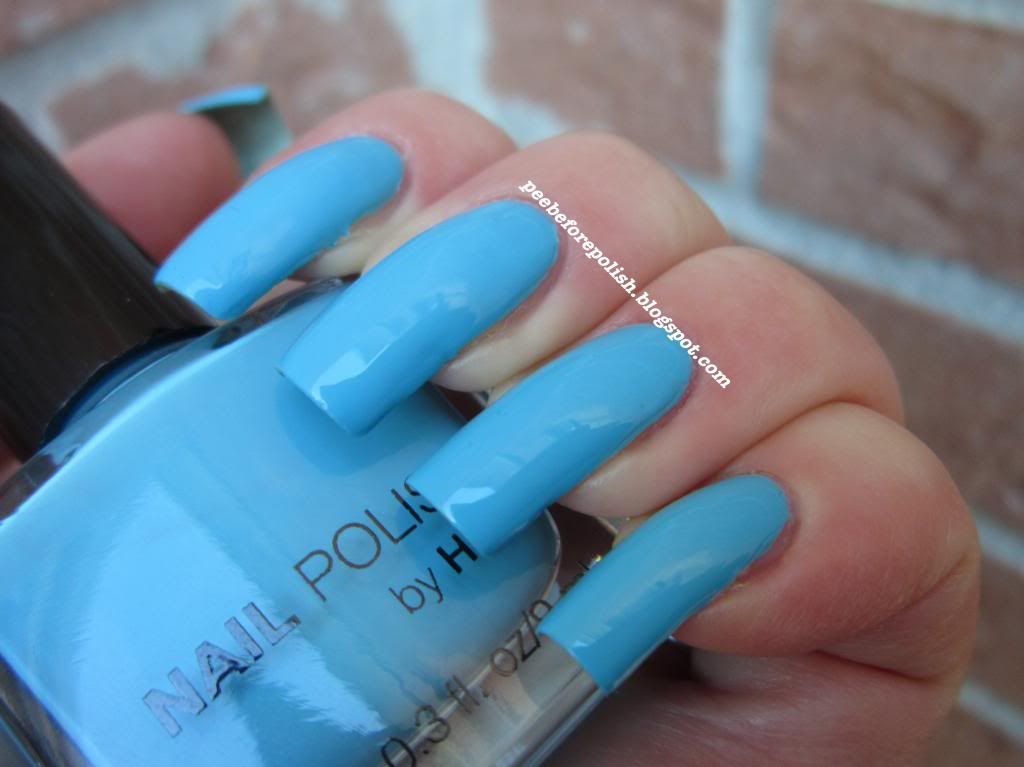
Angel Eyes: aaaaaah, il mio preferito del terzetto. Base azzurra molto sheer con glitter piccoli anch'essi azzurri e glitter esagonali olografici. Anche in questo caso, vi mostro come appare sia layerizzato che da solo. Su indice, medio e mignolo una mano di Angel Eyes sopra una di H&M U Must Have This. Sull'anulare, tre mani di Angel Eyes. In questo caso preferisco di gran lunga come appare l'Angel Eyes da solo, raggiunge un'intensità ed una luminosità pazzesche!

Angel Eyes is my fav one of this second part. It is a mix of small blue glitters and holographic hex glitters in a sheer blue base. 
This one too can be used alone or for layerings. On my ring finger you can see three coats of Angel Eyes; on the rest of my nails I applied one coat of Angel Eyes over one coat of H&M U Must Have This.
In this case I prefer Angel Eyes used alone, I love the intesity it has!


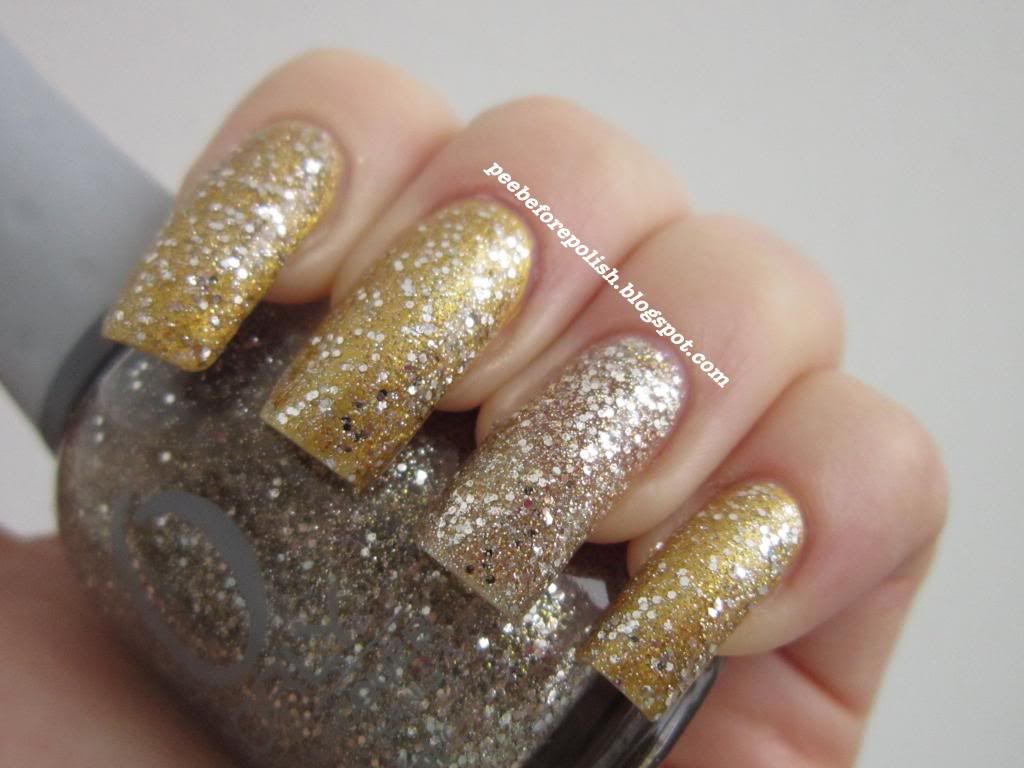
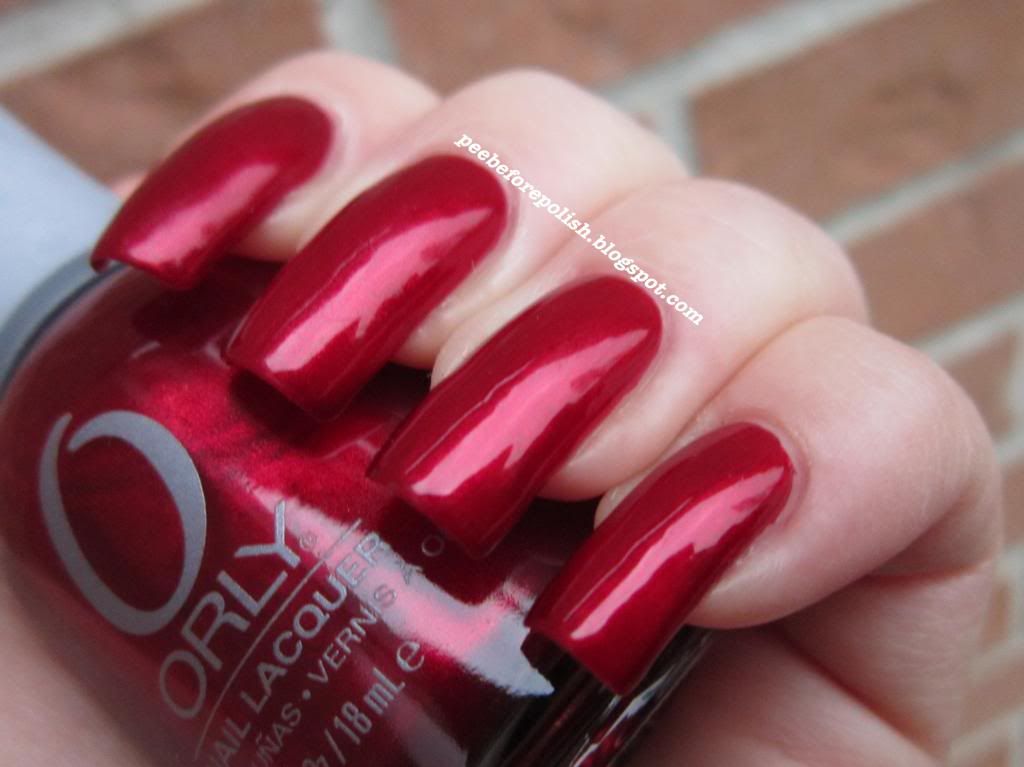
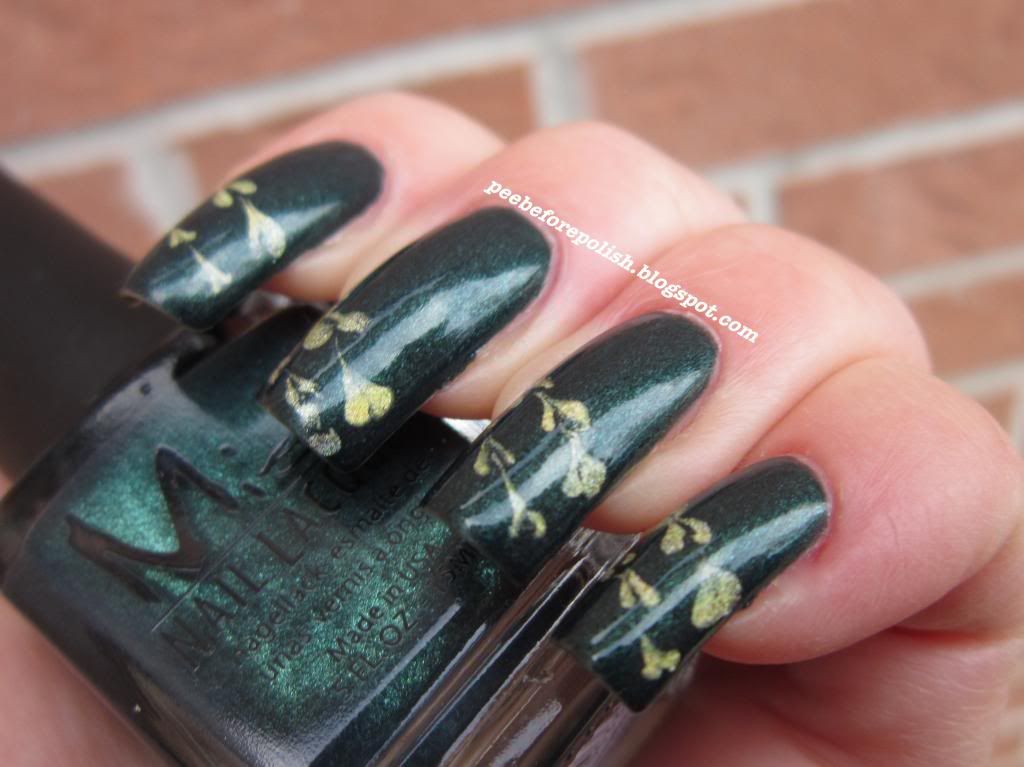
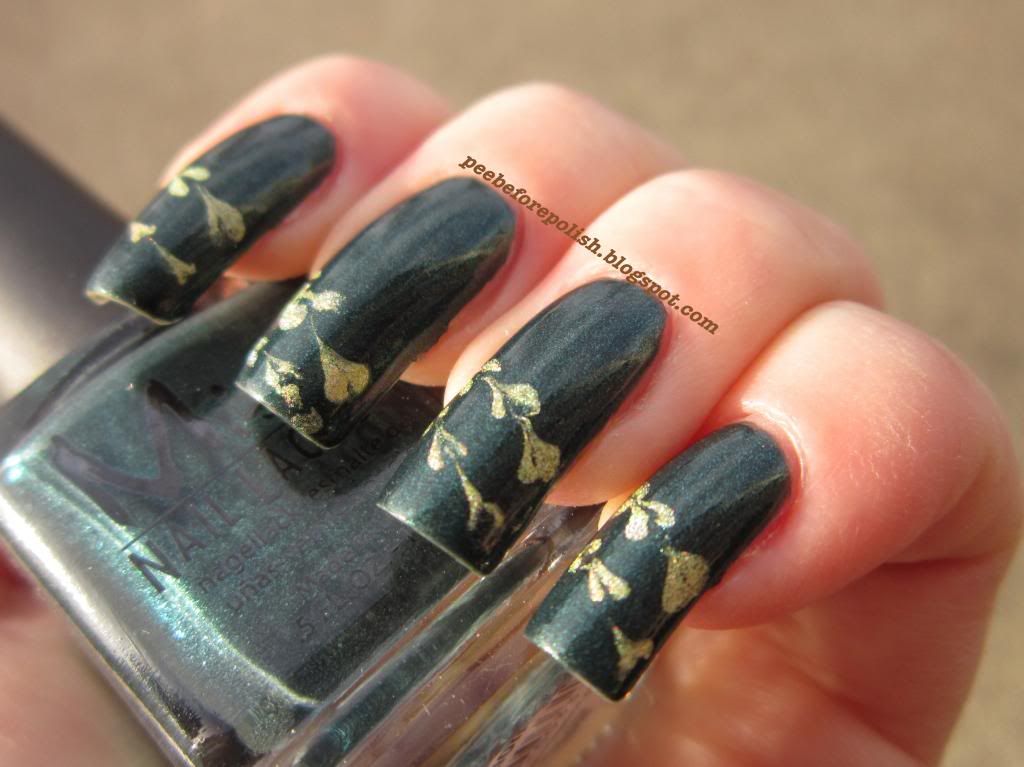
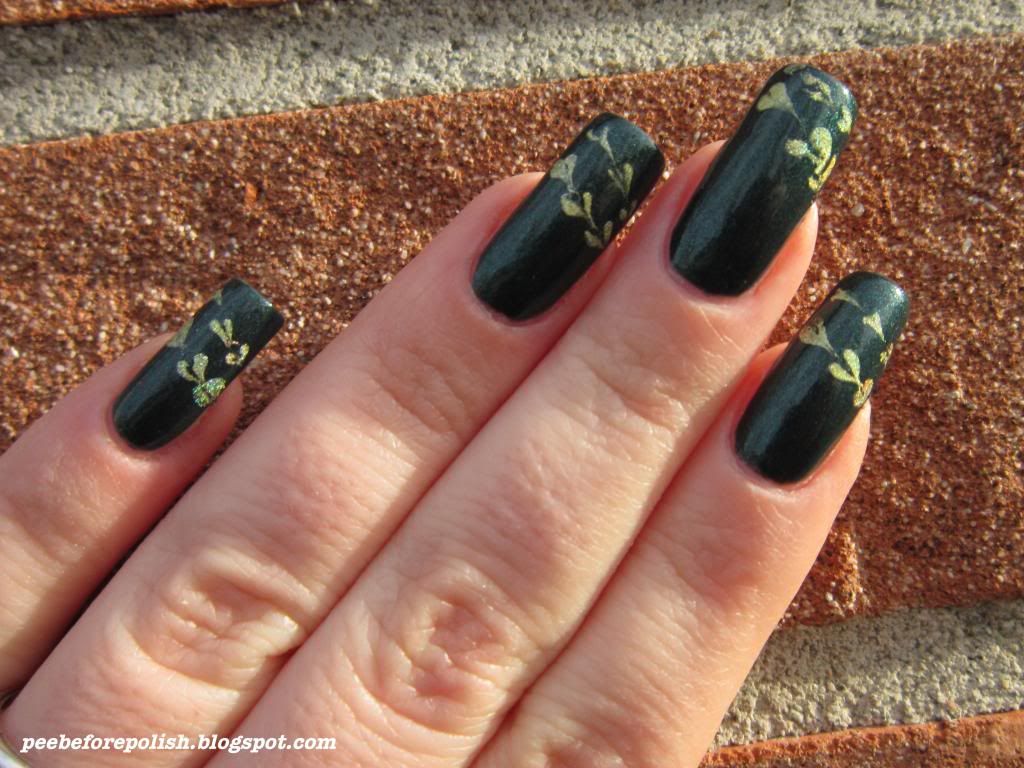
Infine, Halo: un incontro di glitter dorati ed argento sempre in base trasparente. Nelle mie foto potete vedere Halo da solo sull'anulare (due passate generose) oppure come appare una passata sopra lo Stargazer 237 su indice, medio e mignolo. Anche in questo caso, lo preferisco da solo, anche se tornando indietro penso che lo sovrapporrei ad un oro foil, e non ad un oro perlato come lo Stargazer.

In the end, Halo: a mix of silver and gold glitters in a clear base. On my ring finger I applied two generous coats of Halo, on the rest of my nails there's one coat of Halo over two coats of Stargazer 237. Also here, I prefer Halo alone. But I have to say that I have to try it over another kind of gold (maybe a foil gold would be better than a pearl one like the Stargazer).


La formula è grandiosa per tutti e tre e l'applicazione è fantastica. Nel caso indossiate Halo e Angel Eyes da soli consiglio di aspettare qualche minuto tra una mano e l'altra per agevolare l'asciugatura degli strati ed evitare paciughi.
In conclusione, questa collezione mi è piaciuta tantissimo: risponde perfettamente al mio bisogno compulsivo di glitter e con Miss Conduct mi ha regalato un tocco olografico a dir poco abbagliante. Completano il tutto un rosso che più natalizio non si può come Torrid e un rosso più classico ma dal finish inusuale come Unlawful. Voi cosa ne pensate? Ma soprattutto, vi sentite più Naughty o più Nice?! Buon week-end a tutte!

Formula is great on all these polishes and application is super easy. If you want to wear Halo and Angel Eyes alone I'd suggest to wait a few minutes between each coat.
In conclusion, I really love this collection: it has a lot of fabulous glitter polishes and a stunning scattered holo like Miss Conduct. 
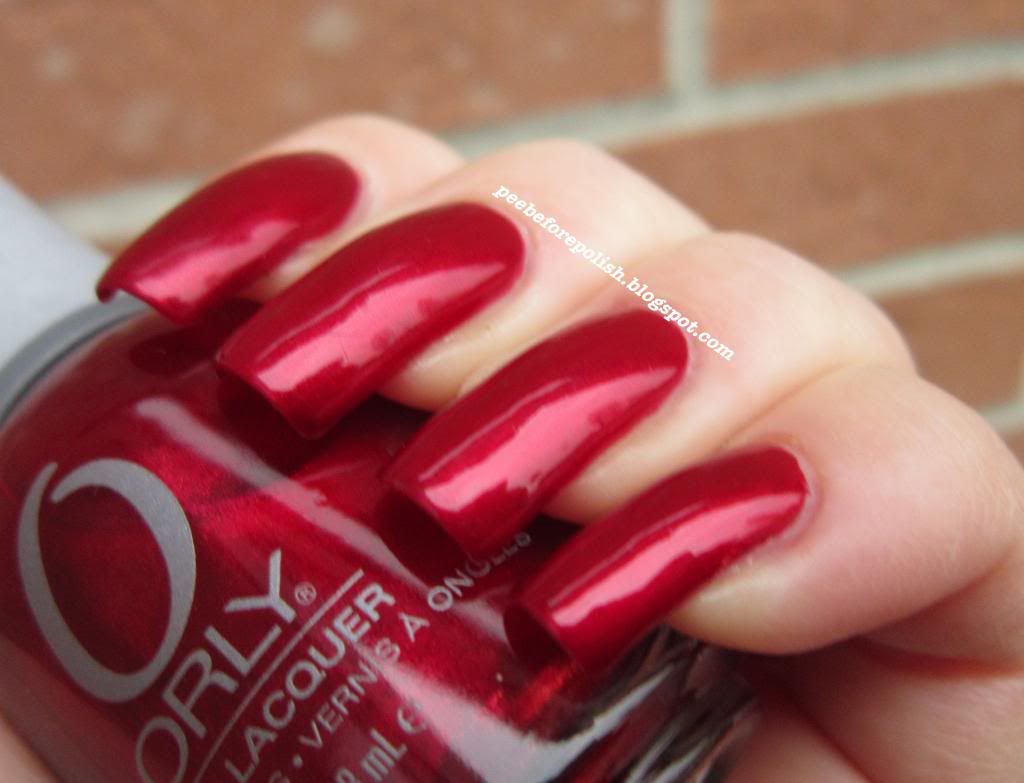
I also love Torrid, the perfect red for Christmas, and Unlawful, a super nice and classic red with a particular finish. 
What about you? What do you think about this collection? Do you feel naughty or nice?
Have a nice week-end!


DEVIL MAY CARE
Applicazione / Application
5/5
Asciugatura / Drying time
4.5/5
Coprenza / Pigmentation
3.75/5
Durata / Longevity
4.5/5
GIUDIZIO FINALE / OVERALL
4.5/5

ANGEL EYES
Applicazione / Application
5/5
Asciugatura / Drying time
4/5
Coprenza / Pigmentation
3.5/5
Durata / Longevity
4.5/5
GIUDIZIO FINALE / OVERALL
4.25/5

HALO
Applicazione / Application
5/5
Asciugatura / Drying time
4/5
Coprenza / Pigmentation
3.75/5
Durata / Longevity
4.5/5
GIUDIZIO FINALE / OVERALL
4.25/5

Sito web di Ladybird House
Pagina Facebook

*** I prodotti del post mi sono stati inviati a scopo valutativo ***
*** Products in this post were sent me for review ***

giovedì 13 dicembre 2012

ABC Challenge: V for Nubar Violet Sparkle

Simona, nel suo post relativo alla V, ha scritto che le viene spontaneo dire "V for Vendetta". Io sono più del club del "V for Viennetta", ma solo perché sono ingorda.
Comunque, non ho nessuno smalto che si chiama Viennetta, semmai ho un Vendetta ma non sarà lui lo smalto per la mia V!
Ora che vi ho confuse abbastanza, direi che posso essere un tantino meno delirante: V sta per Nubar Violet Sparkle.
Direttamente dalla collezione Sparkles della primavera 2010, Violet Sparkle ha una base trasparente in cui sono contenuti migliaia di glitterini di un fantastico viola intenso e vibrante, ma anche di un viola più chiaro e tendente al fuchsia. Potrei dirvi che nelle mie foto vedete il risultato di due mani pesanti, ma non sarebbe preciso: ne ho date due badilate. Meglio tre passate più umane, forse.
Ciononostante, si è asciugato alla velocità della luce.
Un consiglio che posso darvi è di passare due volte il top coat o di usarne uno molto corposo: Violet Sparkle rimane davvero molto ruvido, e la prima passata di top coat quasi "se la beve". Per cui, se amate unghie lissssie lissssie e lucide, abbondate!
Ah, se la mia pelle vi sembra di un colore strano, è solo perché ho dovuto cambiare il bilanciamento del bianco per farvi vedere lo smalto nel suo colore reale!
Questa era la mia VVVVVVV, non scordate di guardare le altre entries e... A presto con la W, che sarà una nail art che volevo fare da tanto, troppo tempo!


Simona, in her post about letter V, wrote: "Did you think of the word “Vendetta” straight after reading the title? I keep thinking that, too!".
I have to say that when I hear "V is for", I think: "V is for Viennetta!". Maybe am I too greedy???
Anyway, I don't own any nail polish which is called Viennetta. I have a Vendetta, but it's not my choice for letter V.
I know, this sounds confusing. I stop here. The polish I picked for letter V is Violet Sparkle by Nubar from Sparkles Collection for Spring 2010.
Violet Sparkle has a clear base with millions of small purple and fuchsia glitters. In my photos you can see the result of two super heavy coats. Maybe three standard coats are better.
This polish dries super fast and needs a very dense top coat (or maybe two coats of TC) because it is rough. 
Ops, I forgot: I had to play with white balance to capture its true color, so my skin seems a bit odd in these pictures!
Well, this was my pick for V, don't forget to check the other entries and... Have a nice evening and see you soon with letter W, can't wait to show the nail art I realized for this letter!!!! 


Applicazione / Application
5/5
Asciugatura / Drying time
4.75/5
Coprenza / Pigmentation
3.5/5
Durata / Longevity
4/5
GIUDIZIO FINALE / OVERALL
4.25/5


mercoledì 12 dicembre 2012

Astra Soul Colour Waterproof Eyeshadows: swatches and review

Salve a tutte!
Post makeupposo in attesa della lettera V della ABC Challenge. Oggi vi propongo i celeberrimi Astra Soul Colour Waterproof Eyeshadows, che davvero hanno bisogno di pochissime presentazioni visto il grande successo che hanno avuto.
Disponibili in 12 colorazioni, sono ombretti cremosi scriventissimi e davvero durevoli. Io ho acquistato il #02, un rosa delicato con riflessi dorati; il #04, un bel verde acqua intenso; il #05, un azzurro cielo brillante, e il #06, un viola altrettanto vibrante.
Come accennavo, la pigmentazione è davvero eccezionale. Se è vero che il prodotto presente nei barottolini è poco, è altrettanto vero che ne basta un'inezia per avere una resa eccellente - e che il prezzo è davvero piccolissimo, €3 cadauno.
Il verde e l'azzurro si stendono molto bene, con una facilità estrema. Il viola, invece, è un po' duretto e necessita di essere lavorato con più attenzione. Anche per il rosa bisogna fare un po' di lavoro extra perché il colore tende a non essere omogeneo.
Nonostante io li abbia applicati sempre senza base, la durata è sempre stata incredibile. Li applicate e lì rimangono per ore ed ore. Ovviamente il rovescio della medaglia è che non è agevolissimo sfumarli, dovete davvero essere velocissime: io puccio direttamente il blending brush nel colore e poi procedo all'applicazione e alla sfumatura nella piega dell'occhio.
Questi ombretti possono essere anche usati come eyeliners, sono splendidi anche così, ma attenzione: buona la prima! Se doveste sbagliare, sarà impossibile correggere l'errore e dovrete struccarvi tout court.
E voi vi siete lasciate contagiare dalla mania per questi waterproof eyeshadows? Se sì, quali colori avete scelto?
Vi dò appuntamento a domani e vi auguro una splendida serata!


Hi ladies!
Today's post is about a product which is having a huge success here in Italy. Last summer Astra, an Italian cheap brand, has launched a line of waterproof eyeshadows (available in 12 colours) which are cheap but have an excellent quality.
These cream eyeshadows have an amazing, excellent, exceptional pigmentation and bright and vibrant shades. I picked #02, a delicate pink with golden reflects; #04, an intense aqua green; #05, a bright sky blue, and #06, a vibrant purple.
The quantity contained in the little pot is not huge, but you need a very small quantity for every look; moreover, they're really cheap (3€ each).
Application is easy for #04 and #05; #06 is more difficult to work with because it is more solid.
I have always applied these beauties without a primer or a base, and they last for hours, hours and hours. They dry super fast and fix on your lid so you have to be very fast if you want to blend them. I usually use a very small quantity of product on my blending brush and I immediately blend it in my crease. 
Also, they are gorgeous if used as eyeliners: of course, since they fix almost immediately, you have to correct any kind of mistake with a make up remover. 
I know that Astra is sold only in Italy, but I wanted to share this review with my international readers anyway... Maybe you will visit Italy one day and will make some shopping!
That's all I have for you today, thank you for reading and see you tomorrow with another post of our ABC Challenge!


#06 and #02 in the shade
#06 and #02 in direct sunlight
#05 and #04 in the shade
#05 and #04 in direct sunlight

lunedì 10 dicembre 2012

ABC Challenge: U for H&M U Must Have This

Buon inizio di settimana a tutte e ben ritrovate con la nostra ABC Challenge.
Analogamente a quanto successo col Rouge Noir di Chanel, mi voglio giocare uno dei primi smalti comprati quando ho smesso di mangiarmi le unghie: l'H&M U Must Have This.
Questo gioiellino, oltretutto, arriva dritto dritto dal mio haul newyorkese dell'estate del 2009, per cui porta con sé anche tantissimi, meravigliosi ricordi.
Comunque: U Must Have This, vecchio packaging, è un bell'azzurro cielo molto inteso dal finish cremoso. La coprenza è eccellente, praticamente un one coater; la formula è densa ma comunque piacevolissima da applicare.
L'asciugatura è rapida e la durata decisamente molto buona.
Posso dunque dire che... Nomen omen! E' uno smalto davvero da avere.
Un saluto a tutte quante e non scordatevi di curiosare tra le entries delle altre pulzelle!


Hi ladies!
Hope this new week has started well for all of you and welcome back to another post of ABC Challenge.
A few posts ago I showed you one of the first polishes I bought when I stopped biting my nails, Chanel Rouge Noir. But also the polish of the day, H&M U Must Have This, was one of my first purchases. I bought it in New York three years and a half ago, so it takes with it a lot of beautiful memories.
Anyway: U Must Have This by H&M (old packaging version) is a gorgeous bright sky blue with a creme finish. Pigmentation is high, it's nearly a one coater. Formula is a bit thick, but application is easy. Drying time is fast and longevity is really high.
What can I say? The name of this polish is a guarantee. I can only recommend it!
That's all I have for you today, don't forget to check the other ladies' entries and see you soon!


Applicazione / Application
4.5/5
Asciugatura / Drying time
4.5/5
Coprenza / Pigmentation
4.75/5
Durata / Longevity
5/5
GIUDIZIO FINALE / OVERALL
4.75/5


venerdì 7 dicembre 2012

Orly Naughty or Nice Collection: swatches and review (I part)

Salve a tutte!
Oggi vi presento la prima parte della collezione Naughty or Nice di Orly.
Visto che oltre ad essere autolesionista, sono anche un po' sadica, riservo i glitters al prossimo post, ma posso garantirvi che anche oggi metterò in pista dei pezzi da novanta!
Partiamo subito allora!

Hi ladies!
Today I'm going to show you the swatches of the first part of Orly Naughty or Nice Collection.
I will post the glitters in the second part, so for today I have a creme-jelly red, a shimmer red and a holo scattered pink! Let's go!


Unlawful è un rosso con inflessioni rosa dal finish "ibrido": è senz'altro un creme, ma con quel tocco di jelly. Non so voi, ma io adoro questo genere di "resa", così lucida e luminosa che il top coat è più uno sfizio che una necessità.
Pigmentazione medio-buona (due passate generose nelle foto), asciugatura rapida e durata eccellente.

Unlawful is a bright red with a hint of pink. This has a "hybrid" finish: it is certainly a creme but it's so glossy that it also seems a jelly. I love this kind of finish. 
Pigmentation of Unlawful is medium-good (two heavy coats in my pics), drying time is fast and longevity is excellent.


Torrid... Vi viene in mente un colore più natalizio di un bel rosso borgogna con shimmer quasi impercettibile, tanto da renderlo metallico? A me no.
La coprenza è molto buona (due passate sottili nelle foto), l'asciugatura è molto rapida ed anche qui, durata eccellente. Perfetto per una water marble di Natale (ops, spoiler!!!).

Torrid... The perfect shade for Christmas. It is a beautiful red with a super fine shimmer, in the end it almost looks metallic. 
Pigmentation is high (two thin coats in my pics), drying time is fast and longevity is excellent. 
The perfect shade for a Xmas water marble! (ops, spoiler!)


Infine. Miss Conduct. Aaaaaaaah, questo smalto lascia senza fiato. In foto è già bellissimo, ma nella vita reale è persino meglio. Un ciclamino carico con finish holo scattered generosissimo. E' come se l'unghia fosse coperta di minuscole luci multicolori. Fantastico, non mi viene in mente altro aggettivo. Due mani nelle foto, asciugatura rapidissima e durata molto buona.
Orly, visto che è Natale e bisogna accontentare i desideri delle bambine buone come me (eeeeeeh?), mi fate degli holo scattered di questo tipo in altri cinque o sei colori???? Grazieeeee!

In the end... Miss Conduct. Wow, I'm speechless... This polish is absolutely gorgeous! It is bright pink with a very generous holo scattered effect. In my pics it looks super nice, but IRL it is much better: it seems that your nails are covered of micro and multicolored lights!
Pigmentation is good (two coats in my pics), it dries fast and it has a good longevity too.
Orly, please: make other colors with this same finish. Please please please! I have been a very good girl during this year, I deserve it!


E con questa preghiera un po' delirante vi saluto, buon week end a tutte!

And after this delirious prayer I wish you a nice week end and see you soon!


UNLAWFUL
Applicazione / Application
4.5/5
Asciugatura / Drying time
4.5/5
Coprenza / Pigmentation
3.5/5
Durata / Longevity
5/5
GIUDIZIO FINALE / OVERALL
4.25/5

TORRID
Applicazione / Application
5/5
Asciugatura / Drying time
5/5
Coprenza / Pigmentation
4.5/5
Durata / Longevity
5/5
GIUDIZIO FINALE / OVERALL
4.75/5

MISS CONDUCT
Applicazione / Application
5/5
Asciugatura / Drying time
5/5
Coprenza / Pigmentation
4.5/5
Durata / Longevity
4.5/5
GIUDIZIO FINALE / OVERALL
4.75/5

Sito web di Ladybird House
Pagina Facebook


*** I prodotti del post mi sono stati inviati a scopo valutativo ***
*** Products in this post were sent me for review ***

giovedì 6 dicembre 2012

ABC Challenge: T for Toxic Seduction and Toothpick

Buongiorno a tutte!
Siamo già arrivate alla T e la nostra maratona sta giungendo al termine, cosa di cui mi dolgo. Sarà che sono un po' autolesionista, ma fosse per me ricomincerei da capo non appena messo il punto sull'ultimo post! *e fu così che venne seppellita dagli insulti delle altre compagne di challenge*
Tornando a noi: T sta per Misa Toxic Seduction e Toothpick (stuzzicadenti).
Ma andiamo per gradi. Toxic Seduction, appartenente alla Poisoned Passion del 2008 (gulp), è un verde scuro arricchito da shimmer di un verde leggermente più chiaro. Pigmentazione eccellente, due passate sottili nelle foto, ed asciugatura rapidissima. Nulla da eccepire neppure sulla durata, che è decisamente buona.
Per aggiungere un po' di pepe avevo deciso di fare una marble rapidissima col Layla Gold Idol. Quando lo smalto di base è ancora fresco, si creano dei pallini col colore da contrastro, tre o quattro a seconda della dimensione dell'unghia, e poi si passa in mezzo uno stuzzicadenti o un ago. In questo modo si dovrebbero creare dei decori di tipo cuoricioso.
Classica nail art a prova di impedita, no? NO. Perché qui è chiaro che qualcosa è andato storto. Lo vedete anche voi, no?
La ragione del semi fail è che non dovete usare degli smalti holo linear con formula poco corposa (come i Layla, gli Nfu Oh o gli Shaka), perché la goccina di smalto (bastarda) non si "aprirà" al passaggio dello stuzzicadenti, ma se ne andrà a spasso per l'unghia prendendovi in giro.
Ovviamente non mi sono rassegnata all'evidenza empirica, ma ho continuato a provarci finché non ho ottenuto un risultato pseudo decente. Non fatelo a casa!!!!!!
Per oggi è tutto, vi dò appuntamento a sabato con altri golosi swatches extra challenge!


Hi ladies!
The post of the day is about letter T of ABC Challenge. That means that our marathon is going to end soon. I'm a bit sorry about this, I'd immediately start another challenge! Maybe am I a masochist?!
Back to us: T for Toxic Seduction and Toothpick.
Let's start with this gorgeous polish: Toxic Seduction is quite old (it belongs to Poisoned Passion, which was launched for Fall 2008) but I think it is a great shade for fall or winter. It is a dark green with green shimmer. Two thin coats in my pics. Drying time is really fast and I'm happy with its high longevity too.
I wanted to add something sparkly to this polish so I decided to make a fast marble design. While the base color (here, Toxic Seduction) is still wet, you have to make three or four dots with another polish of your choice (here, Layla Gold Idol). Then you have to trace a line with a toothpick (or a needle) in the middle of these dots, and you will obtain a nice design similar to heart. 
Unfortunately, I picked the wrong polish. If you use a holo polish with a very thin formula (like Laylas, Shakas or Nfu Ohs), you won't be able to "break" the dots and create the design. The dots will move and walk around the surface of your nails, but they won't break. But as I wrote above, I am masochist, I didn't change the polish and I didn't obtain the result I imagined. Mpppppf. Nice try?! Anyway: don't do this at home. Try with another finish!
That's all I have for you today, see you Saturday with swatches extra challenge and have a nice day!


Applicazione / Application
4.5/5
Asciugatura / Drying time
4.5/5
Coprenza / Pigmentation
4.5/5
Durata / Longevity
4.5/5
GIUDIZIO FINALE / OVERALL
4.5/5


mercoledì 5 dicembre 2012

How to: Striped Nails [tutorial]

Ciao a tutte!
Come annunciato, ecco il tutorial per fare delle striped nails. Il procedimento è davvero semplicissimo, basta solo un po' di pazienza.
Cosa vi serve:


Hi ladies!
As promised, here it is my tutorial for striped nails. This is really a super simple nail art, you only need a bit of patience!
Products you need:


Il procedimento:
1) Stendete base, smalto colorato a piacimento e top coat.
2) Quando tutto è ben asciutto, tagliate dei piccoli pezzi di striping tape, abbastanza lunghi da "sbordare" oltre l'unghia in modo che rimuoverli risulti semplice, ed iniziate a posizionarli. Fateli aderire molto bene all'unghia, in modo che lo smalto non si "insinui" sotto.
3) Completate la sistemazione delle strisce adesive sull'unghia; io ho preferito un intervallo "serrato" e regolare, con andamento diagonale, ma ovviamente voi potete procedere come preferite.
4) Una volta terminato di disporre i pezzetti di nastro, stendete una generosa mano del secondo smalto da contrastro.
5) Rimuovete, preferibilmente con l'ausilio di una pinzetta da sopracciglia, le striscioline. Questo step va fatto a smalto ancora fresco, altrimenti rovinerete le righe per via del progressivo addensamento dello smalto stesso.
6) Opzionale: stendete il top coat in modo da omogeneizzare la superficie dell'unghia. In questo caso io non l'ho fatto per non rovinare l'effetto holo. FINITO!

Come vedete, è davvero superfacile! La difficoltà sta, semmai, nell'avere la pazienza e la precisione di stendere tante strisce se volete ottenere intervalli regolari e stretti come i miei.
Se usate uno smalto olografico, poi, dovrete anche essere molto veloci a togliere tutto prima che lo stesso si asciughi - e sappiamo che gli holo si asciugano alla velocità della luce!
Arrivata all'anulare ho capito che era meglio togliere due strisce alla volta... Consiglio anche a voi di fare così!
Spero che questo tutorial vi sia utile e a presto!


Here it is the method I used:
1) Apply your base coat, two coats of nail polish (I chose China Glaze Light as Air) and top coat.
2) When it's completely dry, cut several stripes of striping tape. They have to be long enought to allow easy removal. Place the stripes and make sure there is no space between your nails and striping tapes.
3) Complete the placement of the stripes. Here I did a diagonal design with a few space between the stripes, but you can do what you prefer.
4) When you finished placing the stripes, apply a generous coat of the second polish (here, China Glaze IDK) on the nail. 
5) Remove the stripes, using a tweezers if this can help. You have to remove the stripes while the second polish is still wet, or you will ruin the final design. 
6) Apply a top coat, it will help to obtain a smooth nail surface. I didn't apply a top coat here because I didn't want to ruin the holo effect. DONE!

It is really super easy, you only need a bit of patience expecially if you do a design with a very small gap between stripes. 
If you're using a holo polish, you have to be fast to remove the stripes - as we know, holo polishes dry incredibly quickly. You can even remove two stripes at a time.
Hope this tutorial can be useful, thank you for reading and watching and have a nice evening!